License Plate Tutorial
This tutorial will show you how to create proper license plates for BeamNG.drive.
Requirements
For this tutorial you just require an image editing tool and a text editor. We’ll use GIMP and Notepad++ for this tutorial.
You can either use this template file or make everything from scratch to create your mod. The template contains a working license plate mod which you can modify as much as you like.
If you’re using it, just drop it in the mods folder and unpack it via the mod manager within the game. Don’t forget to rename the files as shown the preparing the folder structure section of this tutorial.
Introduction
For a proper license plate mod, it’s necessary to have at least three files - a jbeam file, a json file and a texture file.
The jbeam file will define your new license plate as an additional part that the player will be able to select in the parts selector.It also contains all relevant information about your license plate mod and indicates the file path of the corresponding json file.
The json file indicates the paths for all textures files you’re going to use in your personal license plate mod.
The texture file will serve as the background to your license plate.
Creating a license plate mod
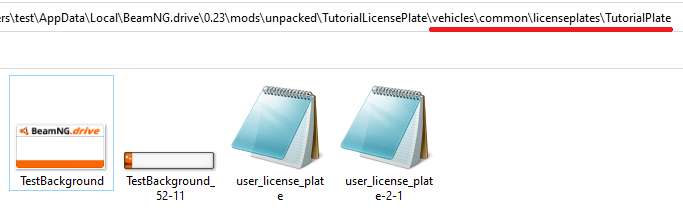
Preparing the folder structure
Navigate to the Userfolder
then to /mods/unpacked and create several folders to match up the corresponding file path for license plates.
In the end you should have a file path like this:
/mods/unpacked/username_mod/vehicles/common/licenseplates/username_license_plate/
You should change the parts marked in bold to whatever you would like to use. It’s best to avoid using spaces or other special characters in file and path names, you can substitute these for - or _.
Please make sure that you’re using unique names to avoid conflicts with other users’ or base content. You should also avoid using spaces or special characters, as those can sometimes cause problems.
Including your username in the folder’s name is an easy way to make sure your mod’s name will be unique.
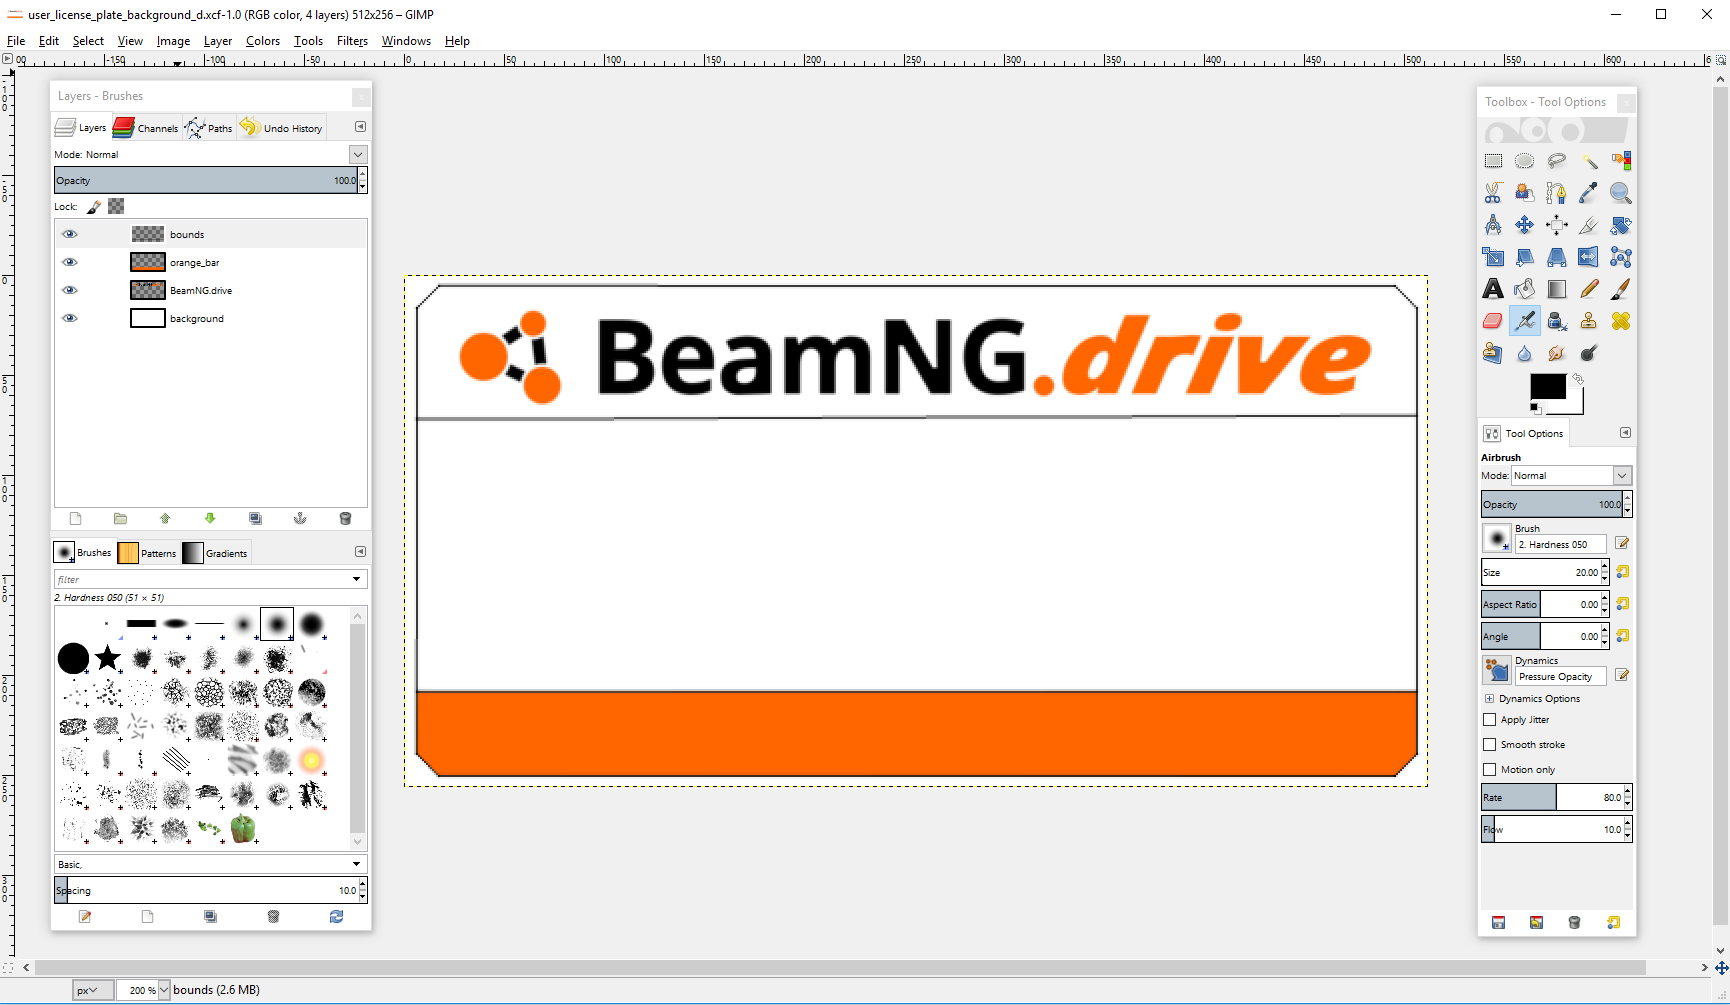
Creating the texture
Open up GIMP or any other image editing application.
We are going to create the background for the license plate now. The texture for the background should stay identical to the templates, 512x256px for the standard plate, and 1024x196px for the 52-11 license plate.
Use this template file to create your own personal background for the license plate. Do not write the plate number on the texture, as it will be generated by the game and blended in the background texture.
Once it’s done, export your file as a .png in the folder you created before and give it a unique name as well.
Create the json file
After finishing the texture, we’ll create the json file to create the connection between the license plate and the texture.
{
  "name" : "username_license_plate",
  "version": 2,
  "data": {
    "gen":{
      "pattern" : "BNG*%nb%nb",
      "patternData":{ "nb":["A","B","C","1","2","3"]}
    },
    "format": {
      "30-15": { //US
        "size" : {
          "x" : 512,
          "y": 256
        },
        "text" : {
          "x" : 0.5,
          "y" : 0.65,
          "scale" : 1,
          "color" : "rgb(187, 61, 0)",
          "limit" : 8
        },
        "generator": "vehicles/common/licenseplates/user_license_plate/licenseplate.html", //Optional
        "characterLayout": "vehicles/common/licenseplates/user_license_plate/platefont.json", //Optional
        "diffuse" : {
          "spriteImg" : "vehicles/common/licenseplates/default/platefont_d.png",
          "backgroundImg" : "vehicles/common/licenseplates/user_license_plate/user_license_plate_background_d.png", //Change this to your path
          "fillStyle" : "black"
        },
        "bump" : {
          "spriteImg" : "vehicles/common/licenseplates/default/platefont_n.png",
          "backgroundImg" : "vehicles/common/licenseplates/default/licenseplate-default_n.png",
          "fillStyle" : "rgb(0,0,255)"
        },
        "specular" : {
          "spriteImg" : "vehicles/common/licenseplates/default/platefont_s.png",
          "fillStyle" : "rgb(233,233,233)"
        }
      },
      "52-11": { //EU
        "size": {
          "x": 1024,
          "y": 196
        },
        "text": {
          "x": 0.54,
          "y": 0.45,
          "scale": 1.7,
          "color": "black",
          "limit": 9
        },
        "generator": "vehicles/common/licenseplates/user_license_plate/licenseplate.html", //Optional
        "characterLayout": "vehicles/common/licenseplates/user_license_plate/platefont.json", //Optional
        "backgroundImg": {
          "spriteImg": "vehicles/common/licenseplates/default/platefont_d.png",
          "backgroundImg" : "vehicles/common/licenseplates/user_license_plate/user_license_plate_background_52-11_d.png",//Change this to your path
          "fillStyle": "white"
        },
        "bump": {
          "spriteImg": "vehicles/common/licenseplates/default/platefont_n.png",
          "backgroundImg": "vehicles/common/licenseplates/driver_training/license_plate_german_new_wide_n.png",
          "fillStyle": "rgb(0,0,255)"
        },
        "specular": {
          "spriteImg": "vehicles/common/licenseplates/default/platefont_s.png",
          "fillStyle": "rgb(233,233,233)"
        }
      }
    }
  }
}
Required changes
These changes are required for your mod to work.
- name: Can be whatever you want.
- gen: Defines the pattern of characters that will be generated if the user does not use fixed text. For more information see this section .
- data section:
- spriteImg / backgroundImg: Determines which texture will be used for the text (spriteImg) and the background (backgroundImg). You should change this to the path of your own background image.
For the path, the important part is the path within your mod’s root folder. For example, in the case below, the path would be “/vehicles/common/licenseplates/TutorialPlate/TestBackground.png” and “/vehicles/common/licenseplates/TutorialPlate/TestBackground_52-11.png”
Optional properties
While you do not need to modify the other properties, you can use them to add other things to your mod.
- data section:
- formats: The game supports 2 default formats for license plates. 30-15 is a standard US license plate, while 52-11 is a standard EU license plates. It’s recommended that you use the default license plates for most applications where the sizes are close enough. If you only need one of those sizes, just delete the unneeded section.
- text: Defines the appearance of the text. Change the values for x and y to position the text. Modify the scale factor to scale it and alter the RGB value of color to change the color of the text. limit defines the maximum characters that will appear on your license plate.
- generator: You can define the appearance of your license plate by creating your own html for it and link it here. If you do not include this line, the default html will be used.
- characterLayout: Refers to the json file that defines the font used for this license plate. For more information see this section . If you do not include this line, the default html will be used.
- diffuse / bump / specular: Hereafter you must define where the different texture files are stored. You can use up to three different map types: diffuse-, bump- and/or specular-maps.
- fillStyle: This defines which color will be used if no spriteImg / backgroundImg file is defined. This can be either a predefined HTML color (e.g.: black, white, ..) or a RGB value.
- version: This property is for internal use only and shouldn’t be modified.
Create the jbeam file
{
    "USERNAME_license_plate_2_1": {
    "information":{
        "authors":"BeamNG",
        "name":"License Plate Mod",
        "value":50
    },
    "slotType" : "licenseplate_design_2_1",
    "licenseplate_path" : "vehicles/common/licenseplates/user_license_plate/user_license_plate.json"
    }
}
- Change the part name: First of all change the part name in line 2 to something unique.
- Modify the information section:
- authors: Type in the author’s name
- name: Type in the name of your license plate. This name will appear within the part selector menu within the game.
- slotType: The slot type should always be “licenseplate_design_2_1”
- licenseplate_path: Shows the path of the corresponding json file. Enter the path of your json file here.
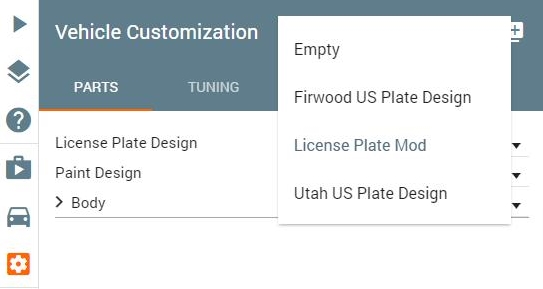
Once you’ve completed all the steps above, test your mod in-game.
Open up the part selector menu and check if your mod appears.
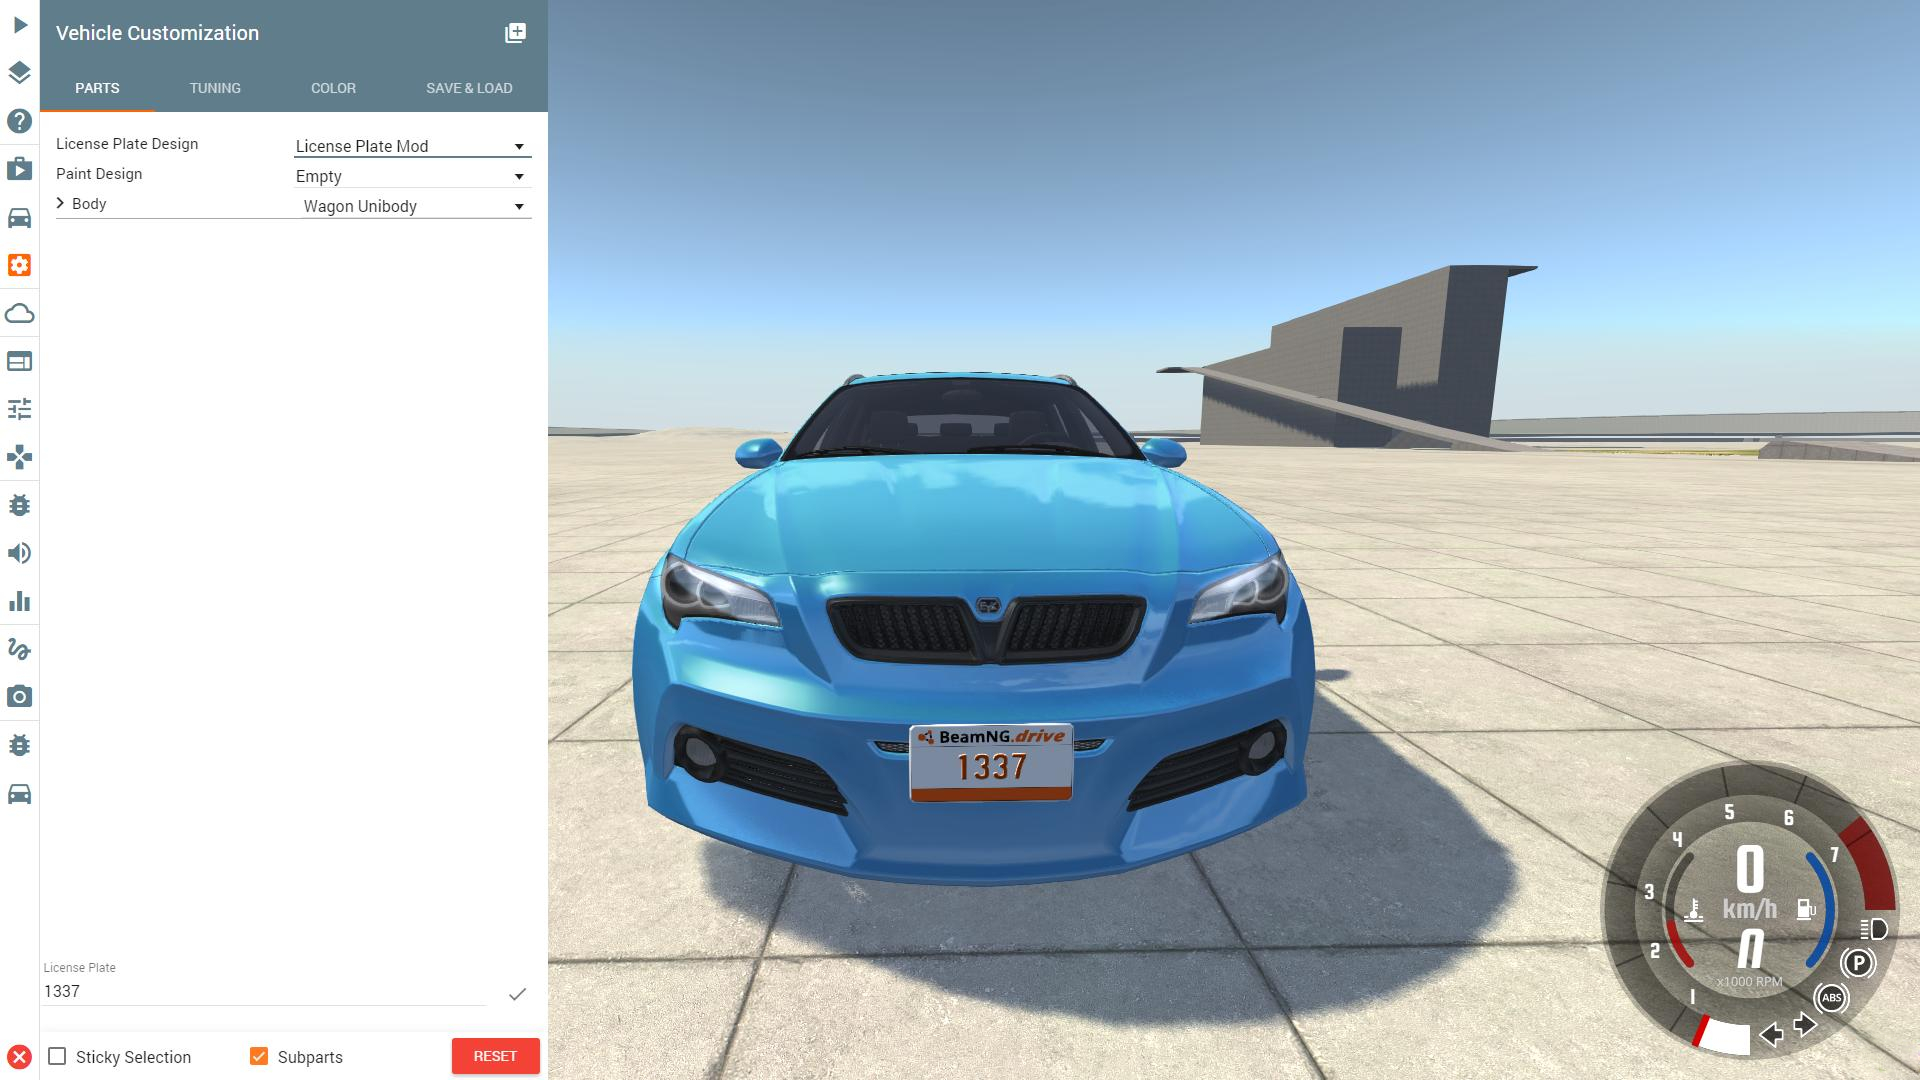
DONE! If everything works properly you can zip your mod using the mod manager of the game and upload your mod to the repo -> Uploading Mods
Additional options
Modified font style
You can create your platefont.json file if you want to use a custom font. Just copy & paste this template
, rename, and modify it.
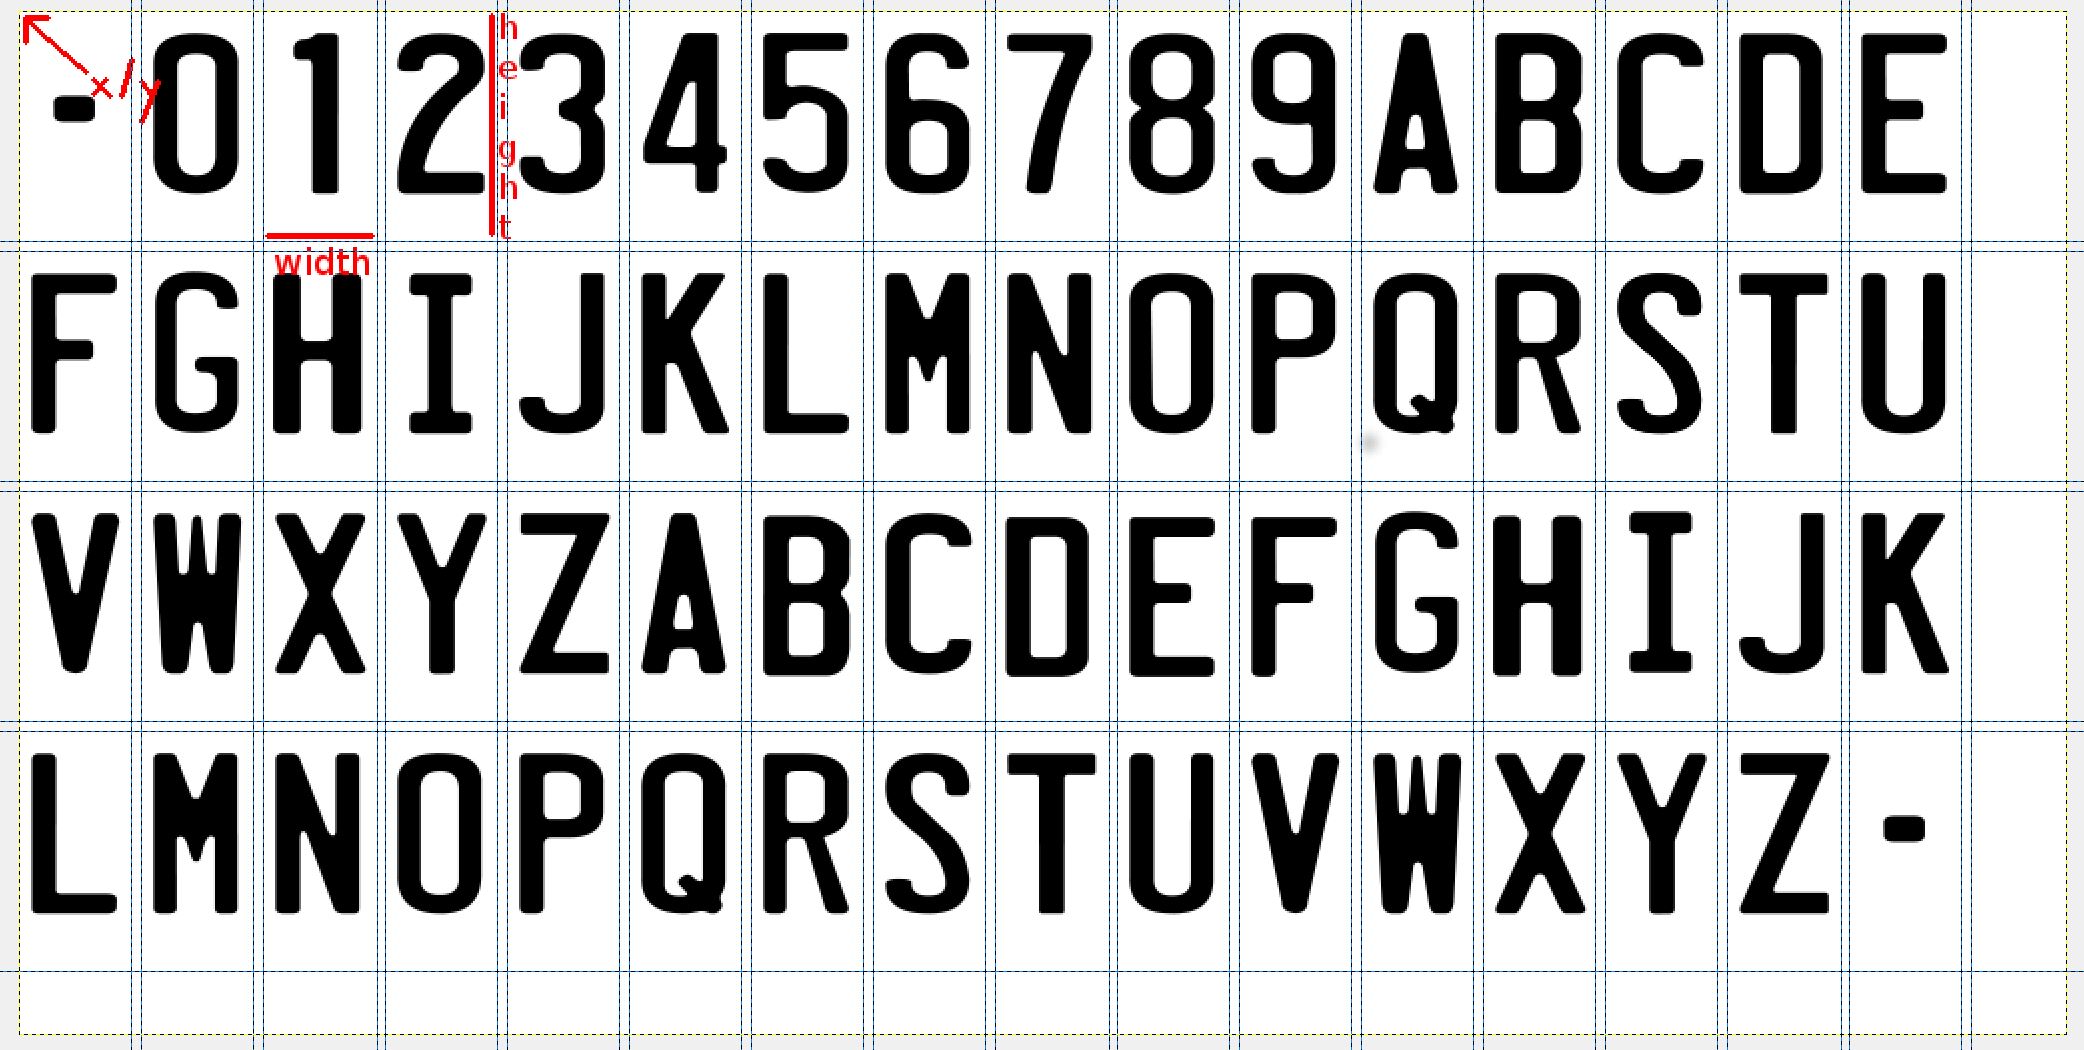
The most important part of the file is the chars list. Here you can define the different characters of your font and where they’re located on your texture.
{ to }, line for each character in your plate, just place on a new line after },"chars": {
"count": "64",
"char":
{
"id": "45",
"x": "0",
"y": "0",
"width": "56",
"height": "115",
"xoffset": "0",
"yoffset": "0",
"xadvance": "56",
"page": "0",
"chnl": "15"
},
}
- count: States how many characters your custom font is containing.
- id: Stands for the decimal value of the character in the ASCII table. To find out which character has which value check this link .
- x / y: Defines the entry point for the character.
- width / height: Defines how many pixels the character embraces.
Pattern text generation
{
  "name": "Default",
  "version": 2,
  "data": {
    "gen":{
      "pattern" : "BNG*%nb%nb",
      //"pattern" : ["BNG*%c%c%D%d%d","BNG*%c%D%d%d%d","BNG*%c%c%D%d"],
      "patternData":{ "nb":["t1","t2","t3"]}
    },
In the file above the text generated would be something like BNG*t3t1
One of the string in nb will be chosen randomly each time it’s used. There is no guarantee it will be the same each time.
On line 7, an array of strings is used instead of a single string. This way you can generate one of the random formats that your licence plate is trying to mimic. For instance this is the format used in german plates.
Default generators
Adding your own plate format
You need to add a new mesh, material, and license plate files.
Put them in a folder like so:
/vehicles/common/licenseplates/%NEW_FORMAT%/ or /vehicles/common/licenseplates/%NEW_MAP%/
The material name need to respect the convention: licenseplate- width in centimetres, dash, height in centimetres, optional country code (one or two letters). The country code should only be used in rare event where a similar format exists but needs a different material.
You also need to create a default styling so that maps or styles that do not define your new format will still display something instead of a no texture error.
You need to create the fallback file here /vehicles/common/licenseplates/default/licensePlate-default-%NEW_FORMAT%.json
Was this article helpful?
