Flowgraph Mission Example
The “ScenarioLike” flowgraph mission template is the most complete of the available templates, and represents a gameplay loop similar to the previously existing scenarios, with an intro, gameplay phase, and an outro, along with a reset loop allowing the player to restart the mission at any point.
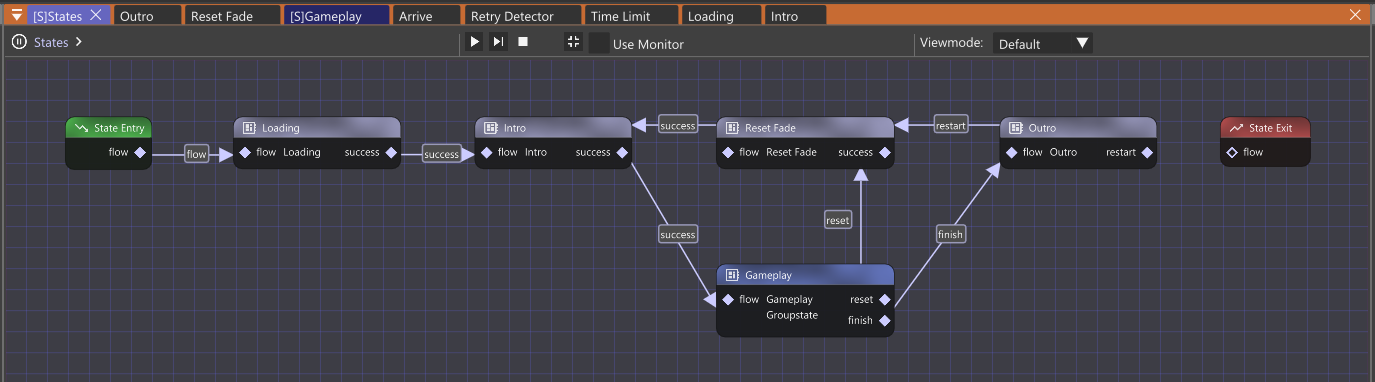
We won’t be going into the detail of every single element, but at least give you a decent explanation of what each section does and why it does it so you can apply those principles to your own missions.
Loading
The first state is the loading state, where things are set-up on the first time the mission is loaded.
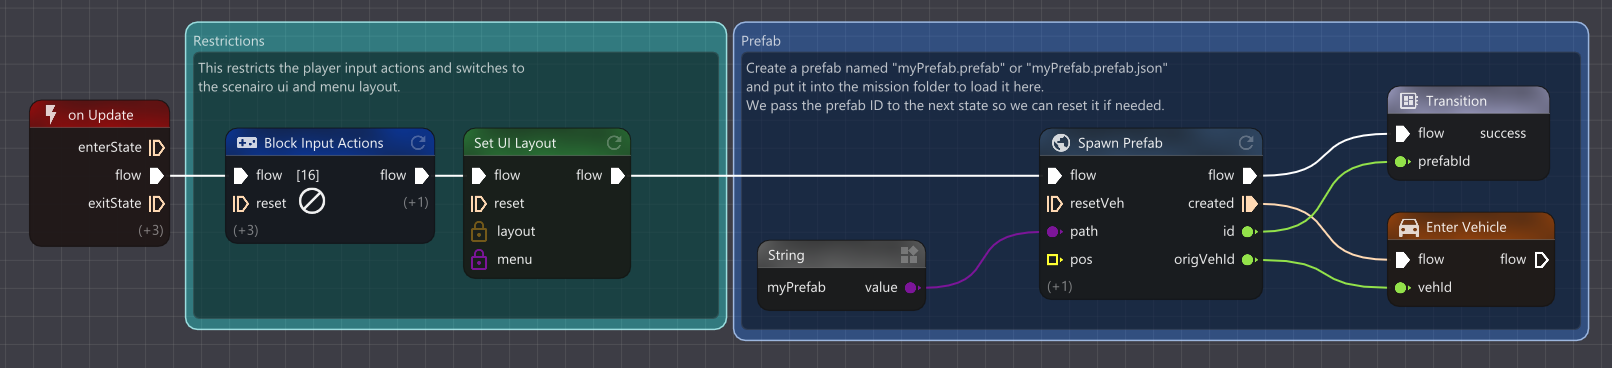
The two section blocks multiple input actions like slowmotion and vehicle recovery, and switches to the scenario UI layout, blocking access to some menus like the part selector.
The second section loads the prefab whose name matches the string node “myPrefab”. To add a prefab, you need to add a prefab file with the already defined file name inside the mission’s folder.
Once this is done, the mission transitions to the next state.
Intro
The intro state gets loaded up both on first load, and every time the player resets the vehicle.
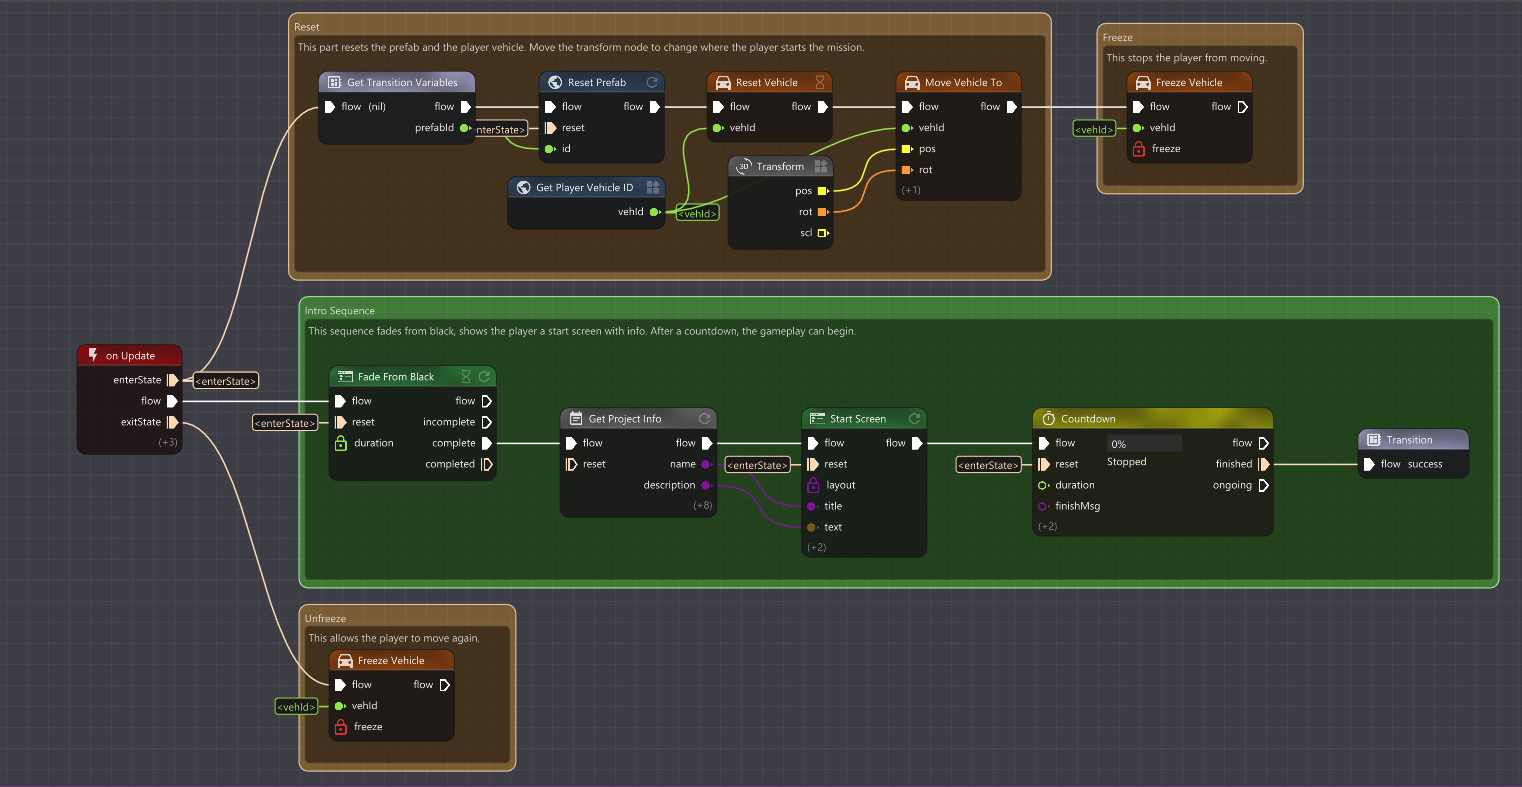
On the first frame when entering the state, all the actions in the upper block happen, namely reseting the prefab, the player vehicle, and freezing the player vehicle. All of the single use nodes in the state also get reset at the same time.
While that is happening, the intro sequence also starts, fading from black, displaying the start screen and then the countdown.
Once the countdown is complete, we transition out of this state, and as that happens the player vehicle gets unfrozen by the bottom node.
Gameplay
The gameplay is defined as a group state made out of 3 states that run in parallel.
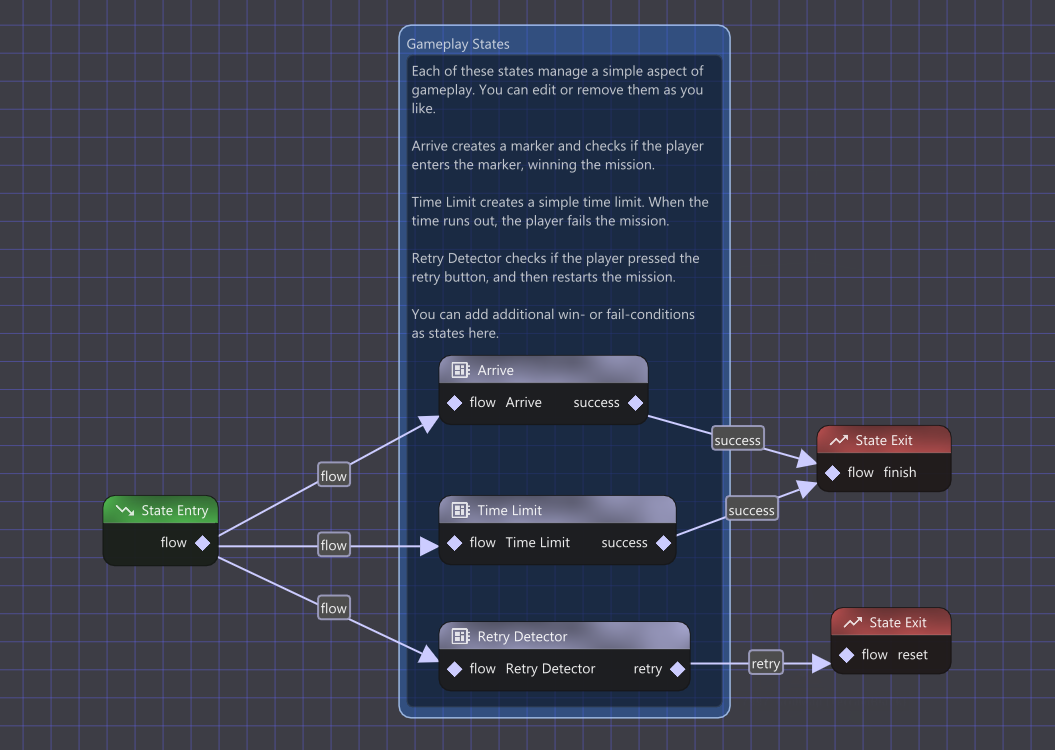
The transition to the next state will happen whenever one of the 3 states fills out it’s transition parameter, locking out the other 2. This means for example that you won’t be able to complete the “arrive” state if the time limit has been reached.
Arrive
The Arrive state represents the main objective of this mission, which by default is set-up as a “drive to” mission.
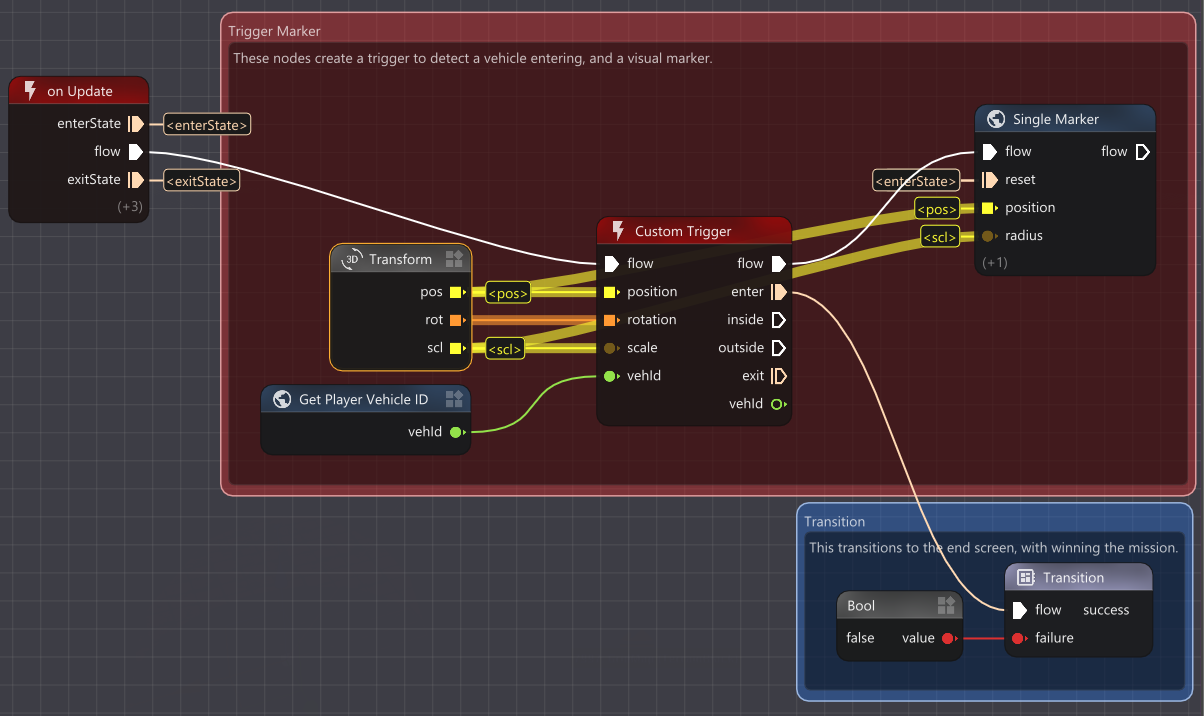
It consists of a custom trigger alogn with it’s parameters, and a transition to the next state once the trigger is “entered” by the player’s vehicle.
You can move the target area by clicking on the transform node and then moving it in the world editor.
You can see a boolean node next to the transition, which sets the “failure” variable to “false”. The same principle can also be used to add conditions which fail the player, in which case the “failure” variable would be set to “true”
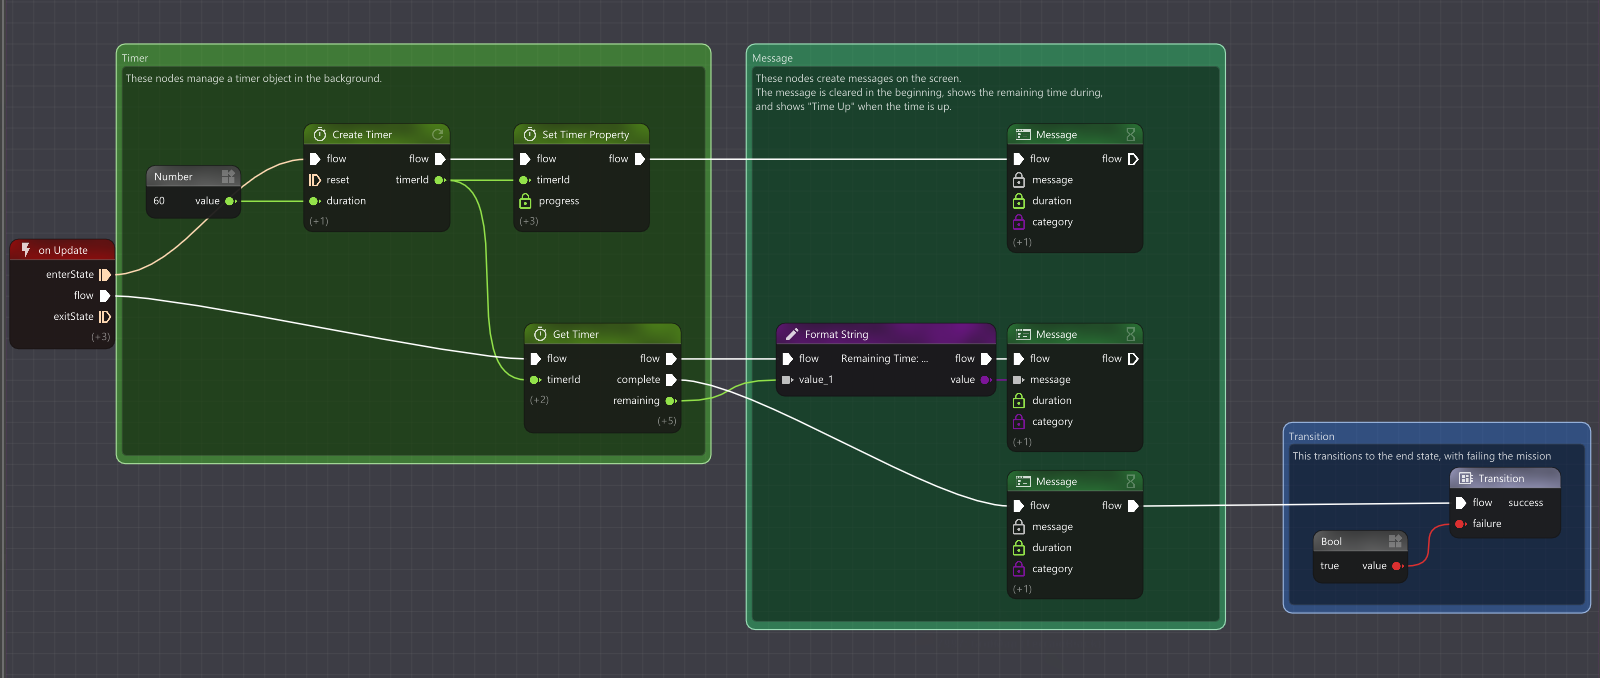
Time Limit
Retry Detector
The retry detector waits for the player to use the input to reset their car (R by default), and transitions to the “retry” state when that happens.
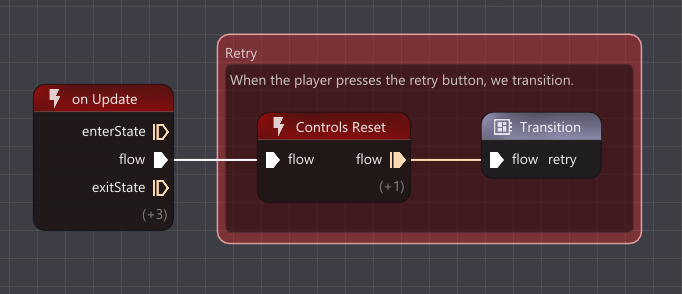
It is used as the trigger to reset the mission when the player resets the car, as happens with scenarios.
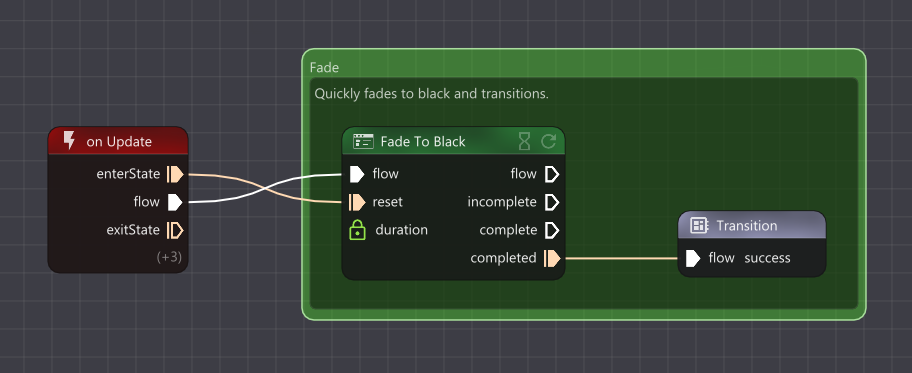
Reset fade
The reset fade state fades back to black when the player resets, before heading back to the intro state, which will reset the prefab and the player’s car, and then fade from black.
Outro
The outro state displays the end screen and then allows the player to continue or reset.
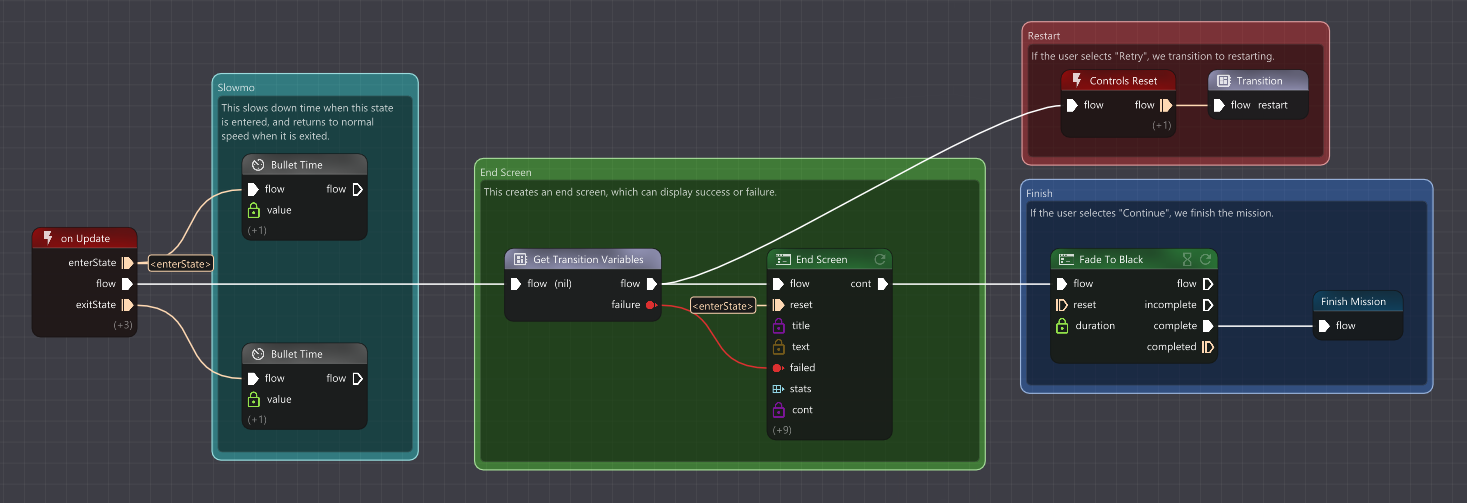
The first section enables bullet time, slowing down the game.
Then the end screen is displayed, showing the failure or success message.
If the player continues, we fade to black and finish the mission, at which point the prefabs are automatically unloaded. If the player resets, the flowgraph transitions to the reset Fade state.
In both cases, as we transition out of this state, bullet time is deactivated as we exit the state.
Was this article helpful?
