This tutorial gives an overview of the basic steps involved in creating a simple scenario with the BeamNG.Drive. I will try to make each step easily comprehensible for you with some pictorial illustrations.
Aim:
This tutorial is aimed at creating a scenario under the game level "east_coast_usa".
What do you stand to learn?
You will get to learn about:
- what a scenario is
- what a prefab is
- how to customize prefabs and set up a scenario
Requirements
You might be wondering about the requisite skills you would need to fully grasp this topic. The requirements are:
- basic understanding of how to use an editor
- creative mind
- problem-solving orientation
- a good reading comprehension
- focus and a lot of patience
It is pertinent that you pay attention to the "Note" usage in each section to avoid errors.
What is a scenario?
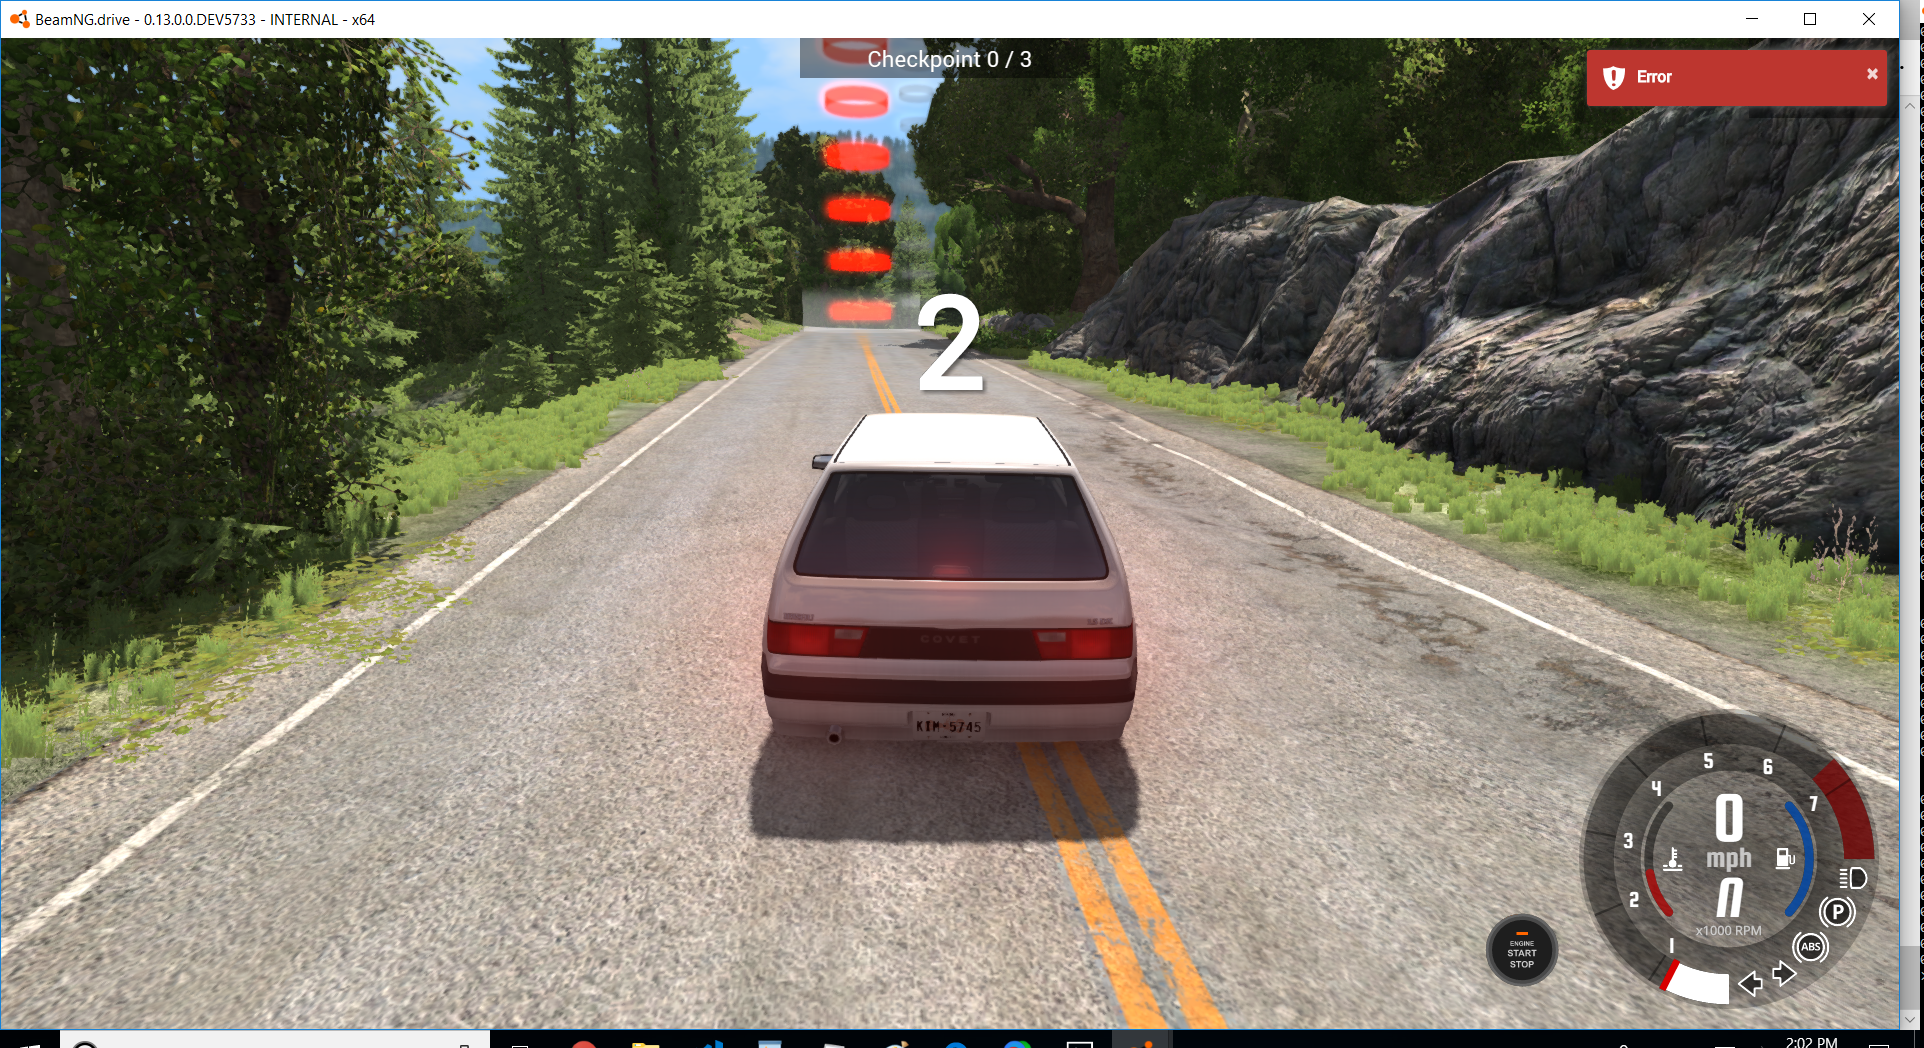
A scenario is a designed environment which is loaded with predefined activity (some set goals) that a player must accomplish. A scenario could be a car race where a player must navigate through some obstacles on the road to reach a predefined destination within a specific time. A typical example of a scenario is shown below.
 Top view of a simple scenario
{width=“6.66667in”}
Top view of a simple scenario
{width=“6.66667in”}
What is a prefab?
Prefabs are collections of different predesigned game objects that are loaded into the scene. The properties of the game objects can be adjusted to your desired specification. Therefore, users are able to customize the route and place different objects in the scene. This gives you the opportunity to choose your desired player and adjust its position to your desired position.
 A Prefab
{width=“6.66667in”}
A Prefab
{width=“6.66667in”}
Waypoints: Waypoints are sets of points which define the route or direction a player must take in a scenario.To specify the direction the player must take, you need to position the waypoints. The waypoints can be freely placed at any desired position to define the route. Below is a pictorial example of a waypoint placed in a scene.
 A Waypoint
{width=“6.66667in”}
A Waypoint
{width=“6.66667in”}
Setting up scenario starting kit
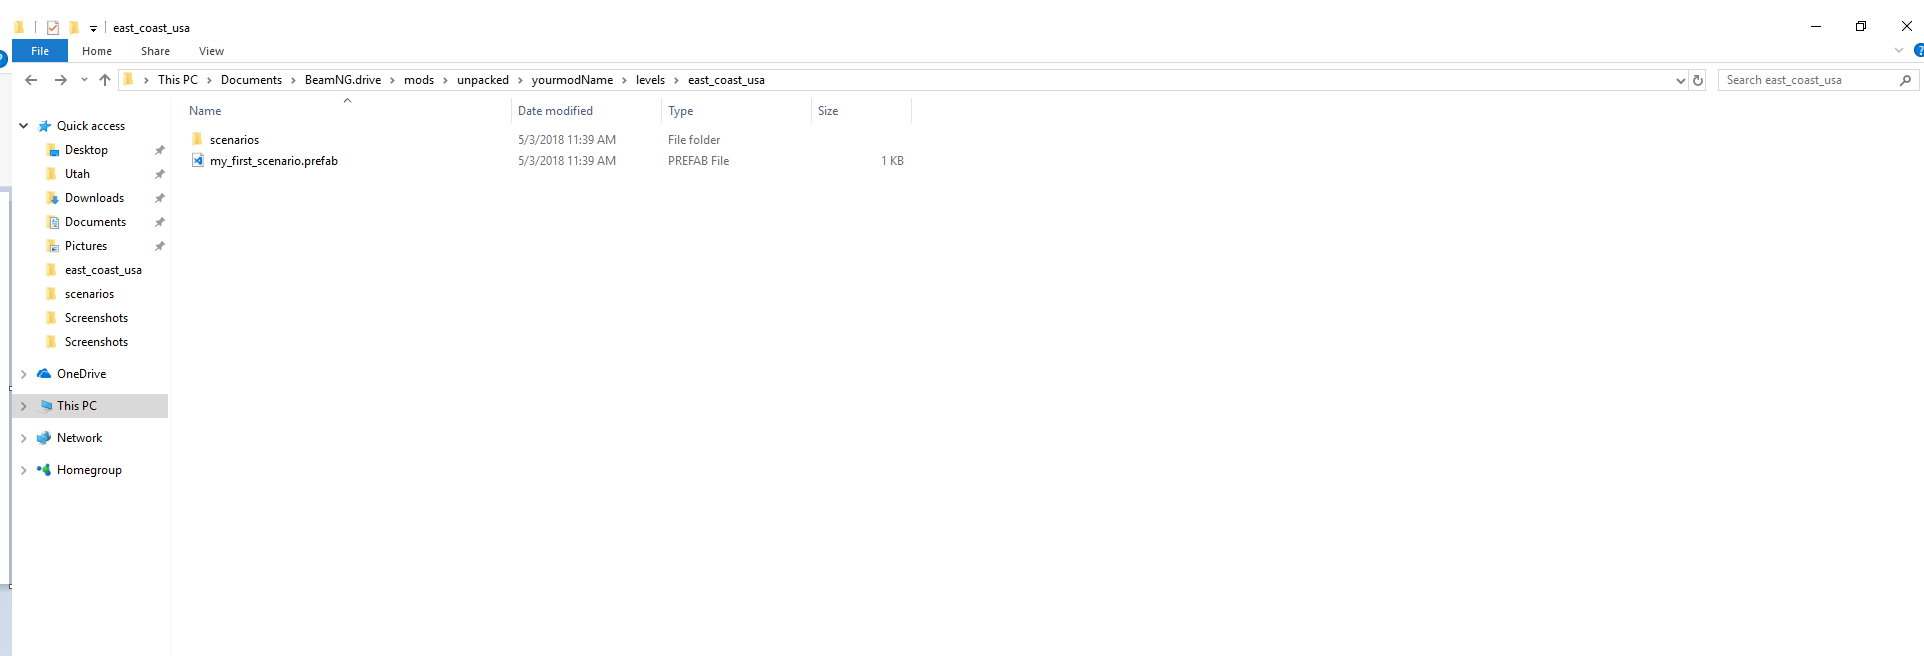
The scenario starting kit can be downloaded here. The downloaded zip file should be as shown in the picture.
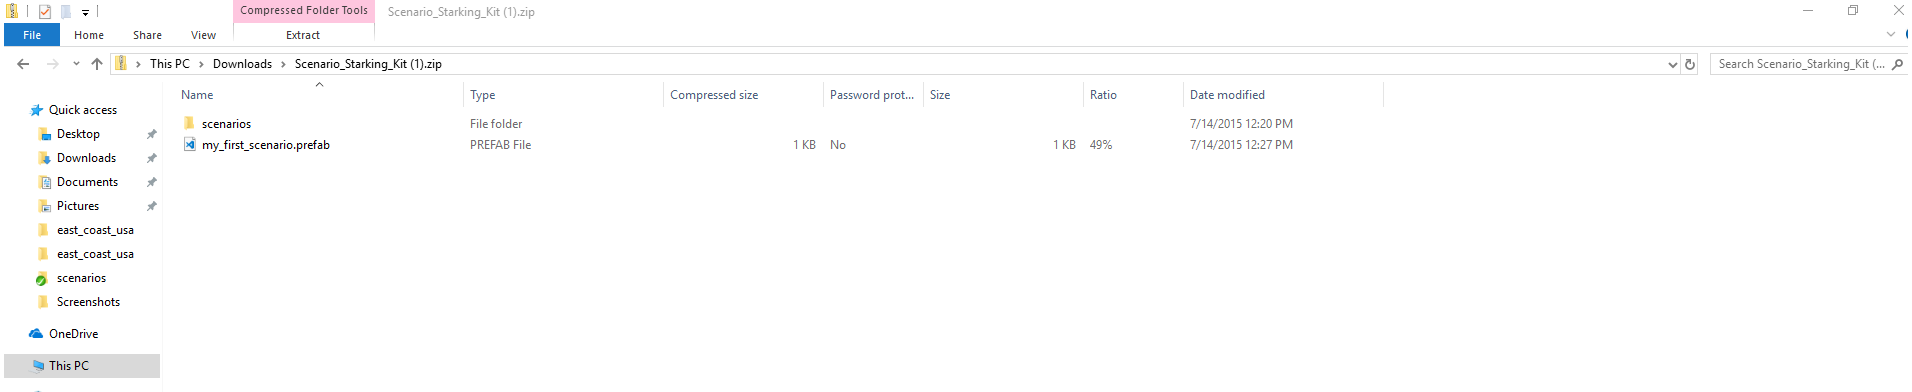 Scenario Starting Kit
{width=“6.66667in”}
Scenario Starting Kit
{width=“6.66667in”}
The my_first_prefab file is the default prefab on which you customize by adding additional game objects to the scene. Inside the 'scenarios' folder is the default scenario preview image (my_first_scenario.jpg) and the scenario json file (my_frst_scenario.json).
Creating a folder
You need to create a folder in the same order as shown in the picture below:
 Created Folder
{width=“6.66667in”}
Created Folder
{width=“6.66667in”}
Unzip the downloaded scenario starting kit and copy its contents(files) into the east_coast_usa folder. You may change the file names to whatsoever you want but I will keep mine as it is in this tutorial.
::: {.note} ::: {.title} Note :::
While changing the file names, ensure that you use exactly the same file name for each file. The default name ('my_first_scenario') is retained in this tutorial. :::
In-game
::: {.note} ::: {.title} Note :::
It is highly recommended that you don't save the level during the entire scenario creation. :::
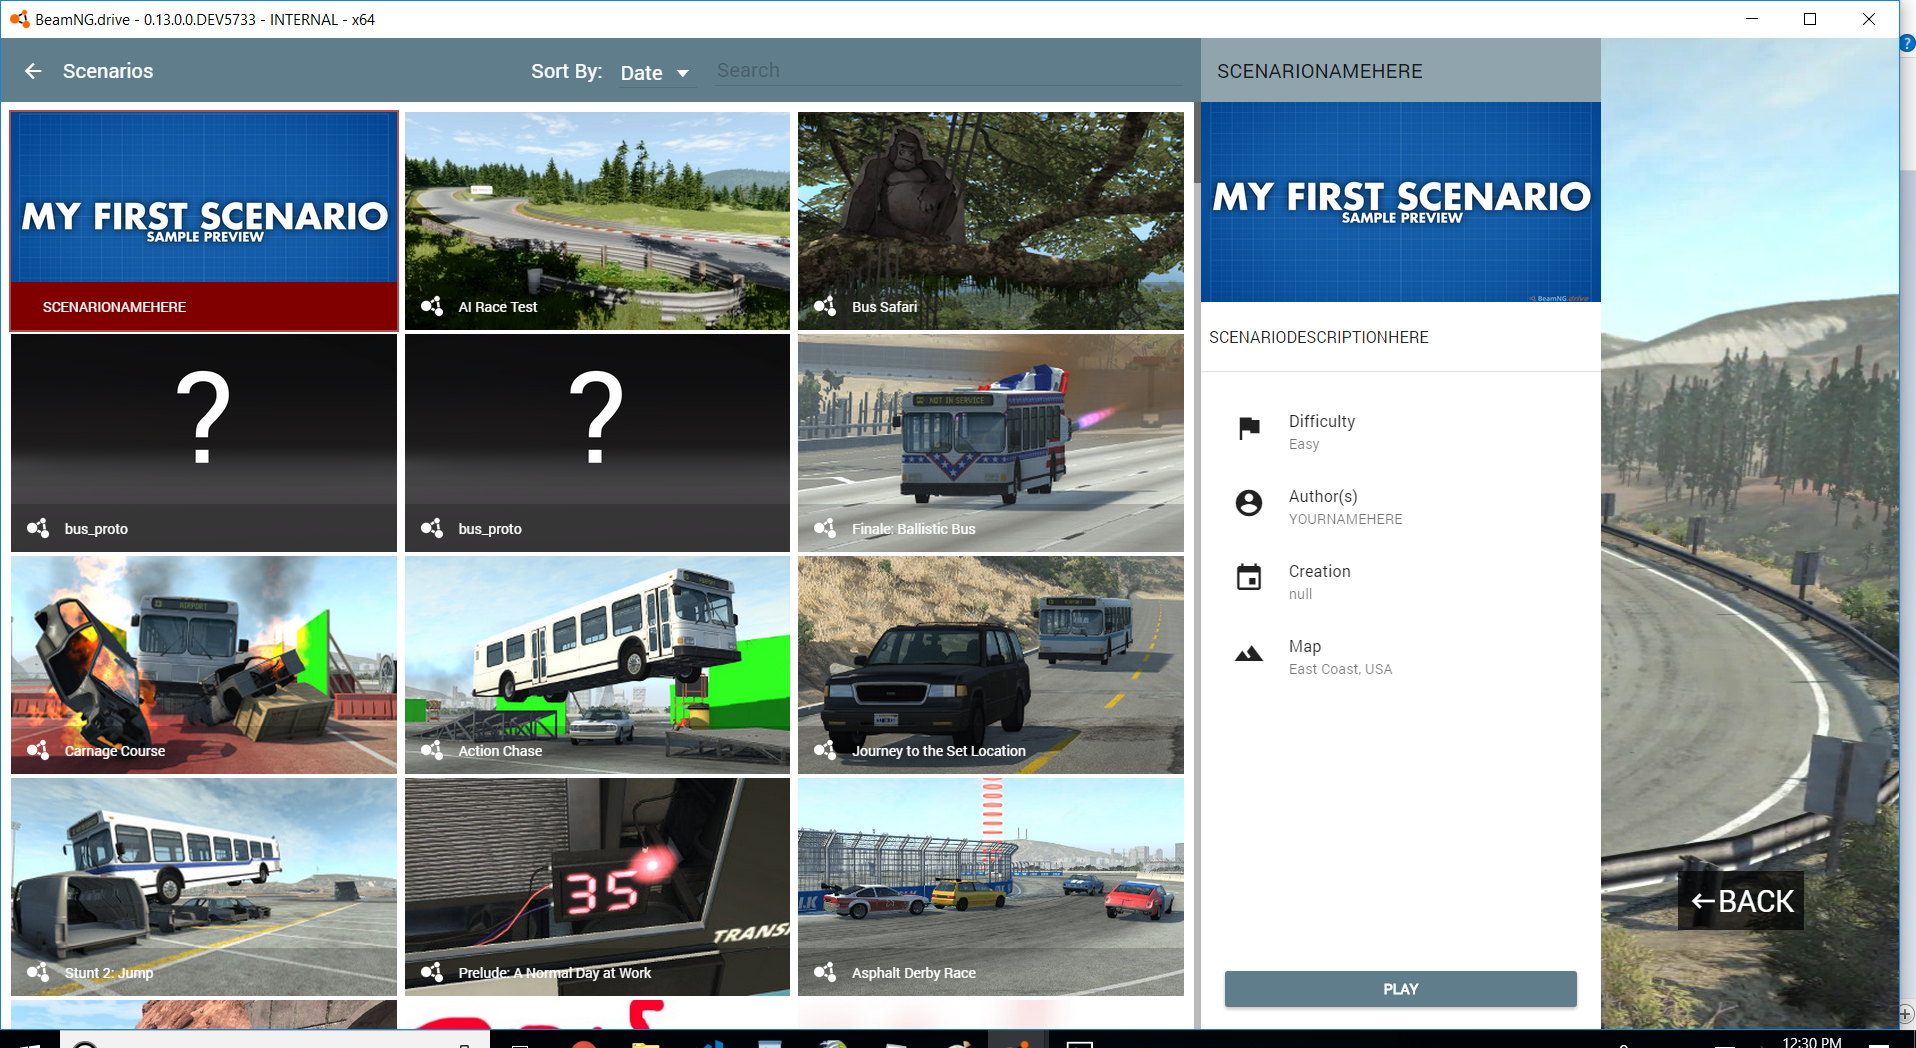
Now, open the game by selecting game>BeamNG.drive.exe>play>scenarios. The pictures below show what you are expected to see at each step.
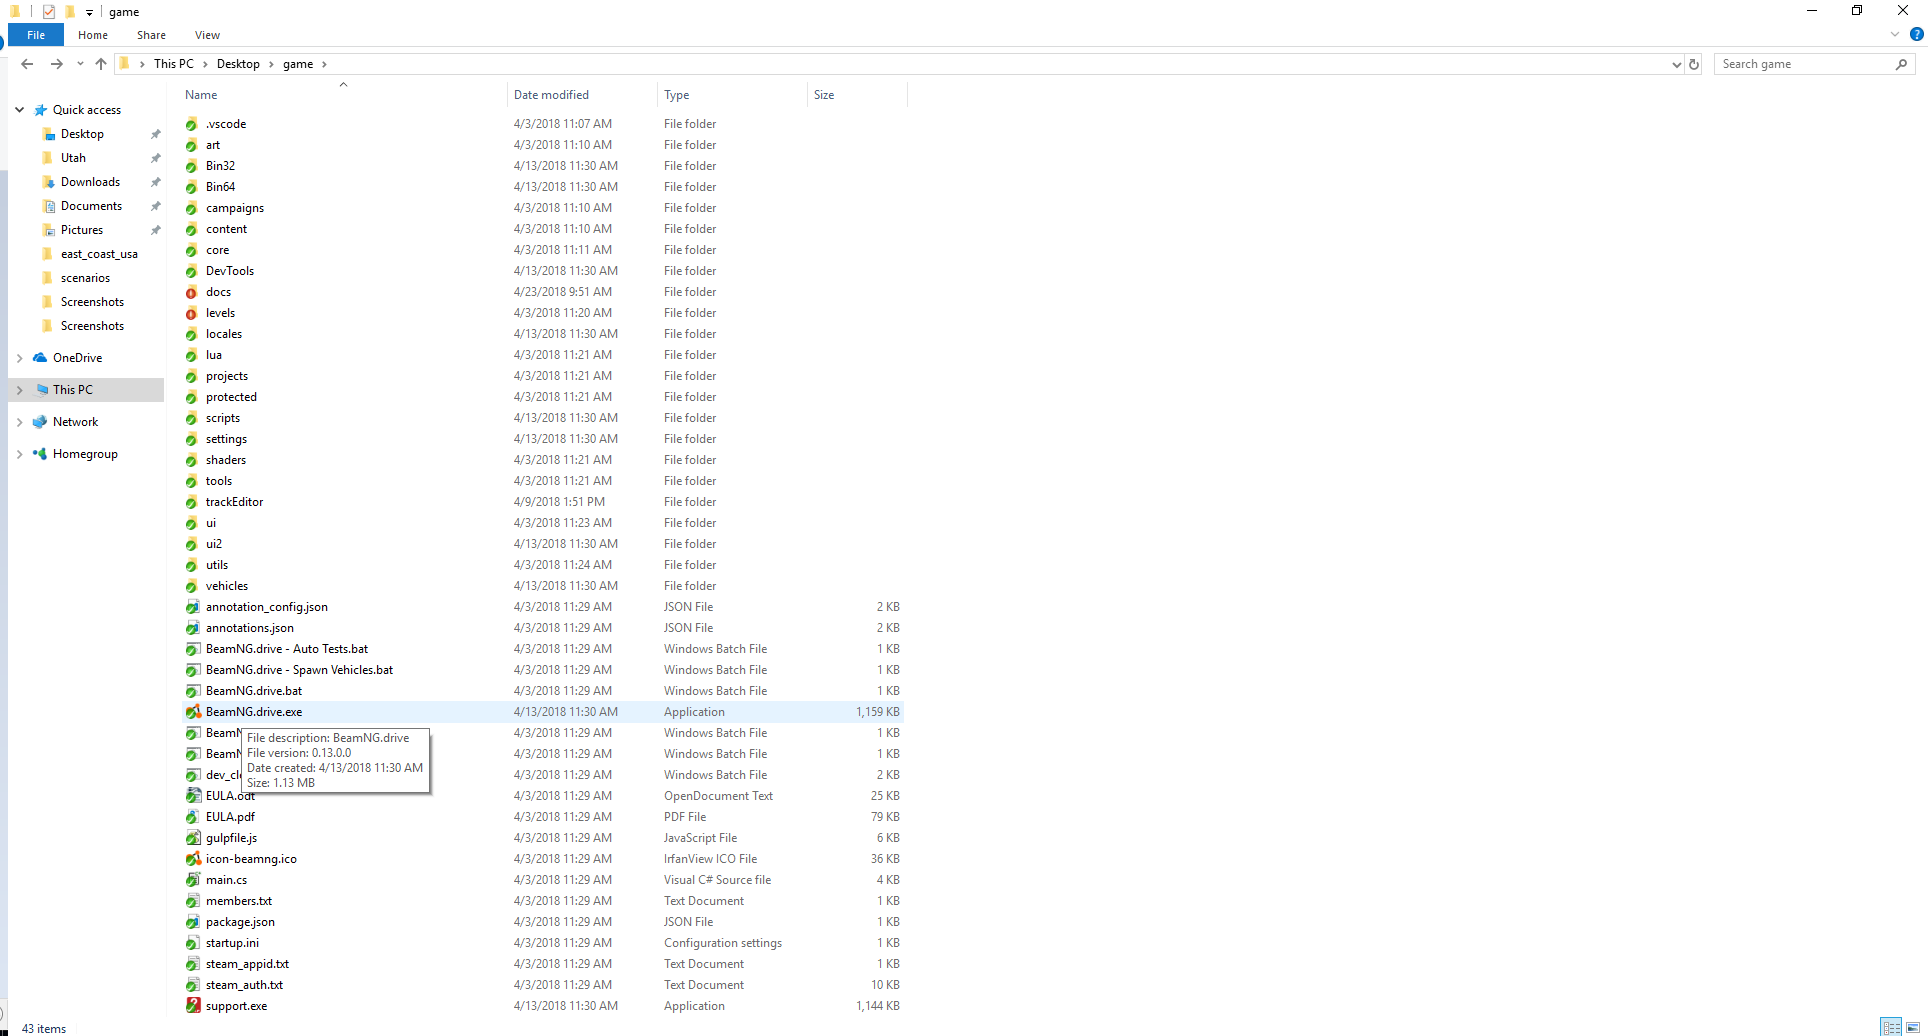 Opening the game-step1
{width=“5.83333in”}
Opening the game-step1
{width=“5.83333in”}
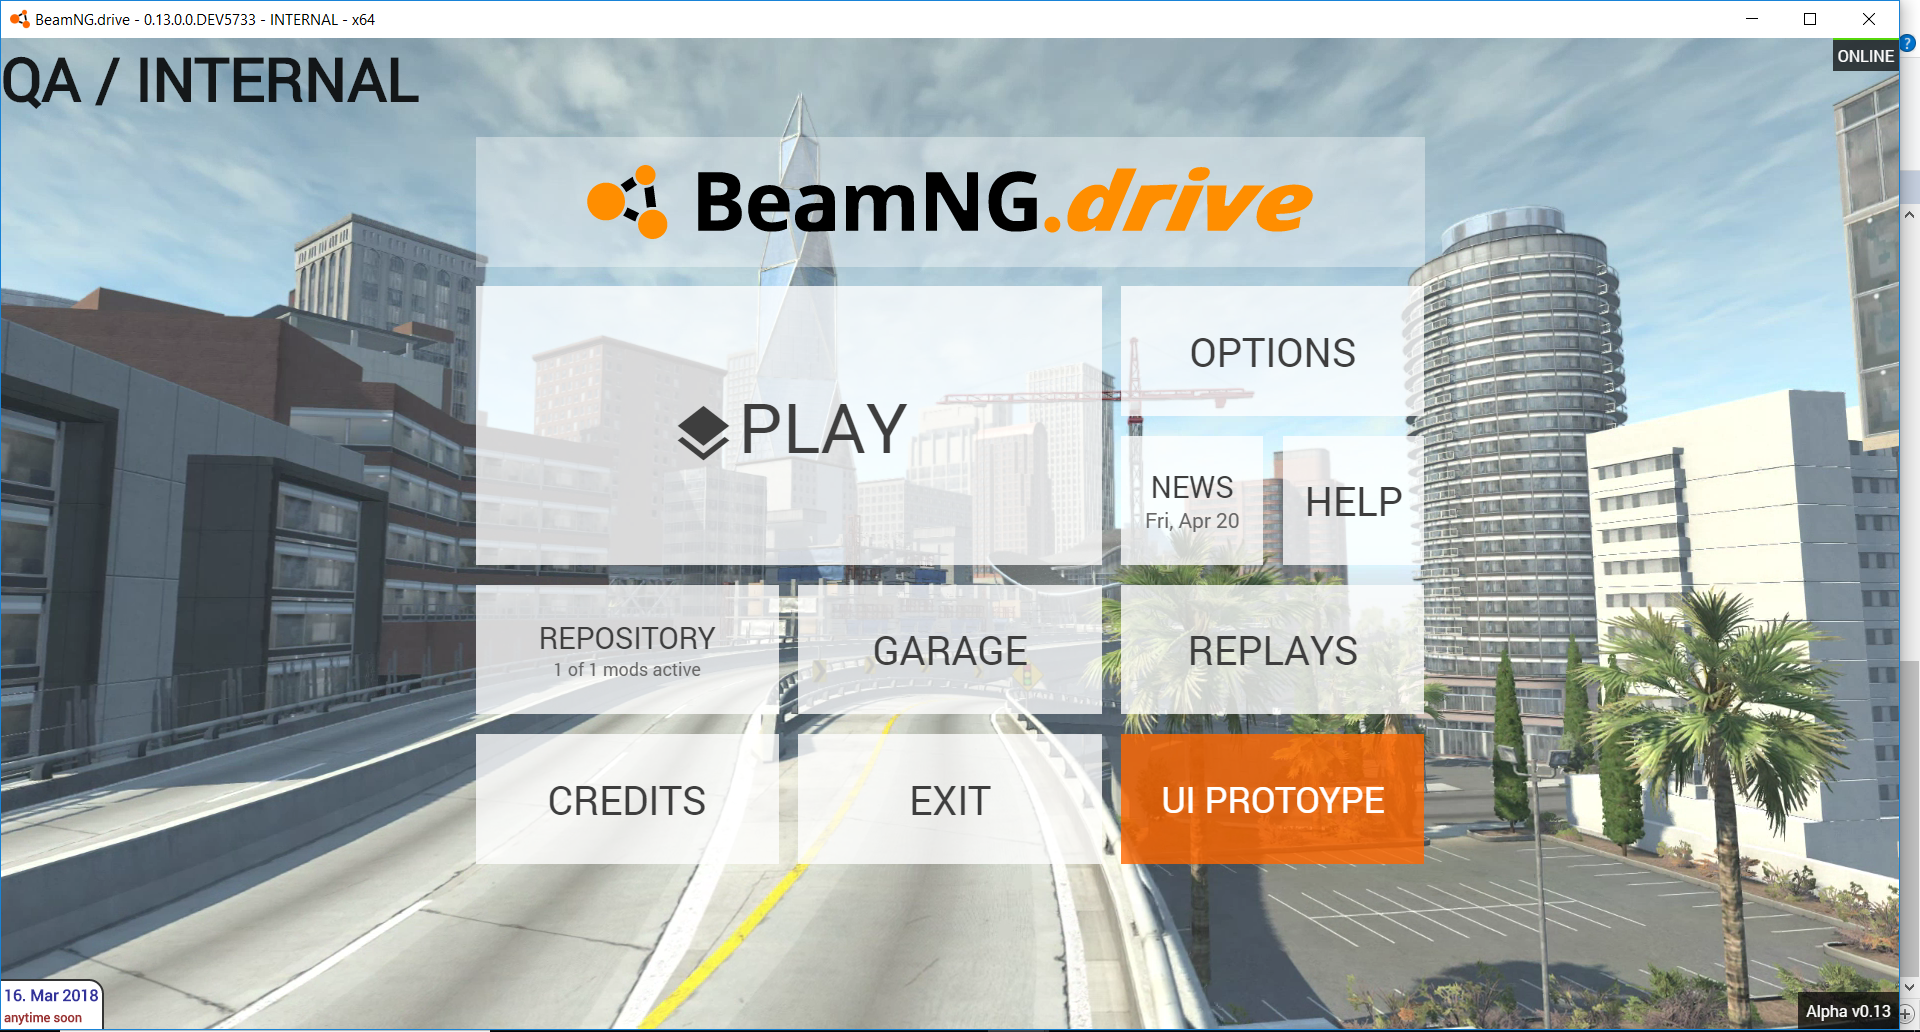 Opening the game-step2
{width=“5.83333in”}
Opening the game-step2
{width=“5.83333in”}
 Opening the game-step3
{width=“6.66667in”}
Opening the game-step3
{width=“6.66667in”}
Select your scenario by double clicking on "My_First_Scenario". At each step, you should have the pictures below:
 Opening the game-step4
{width=“6.66667in”}
Opening the game-step4
{width=“6.66667in”}
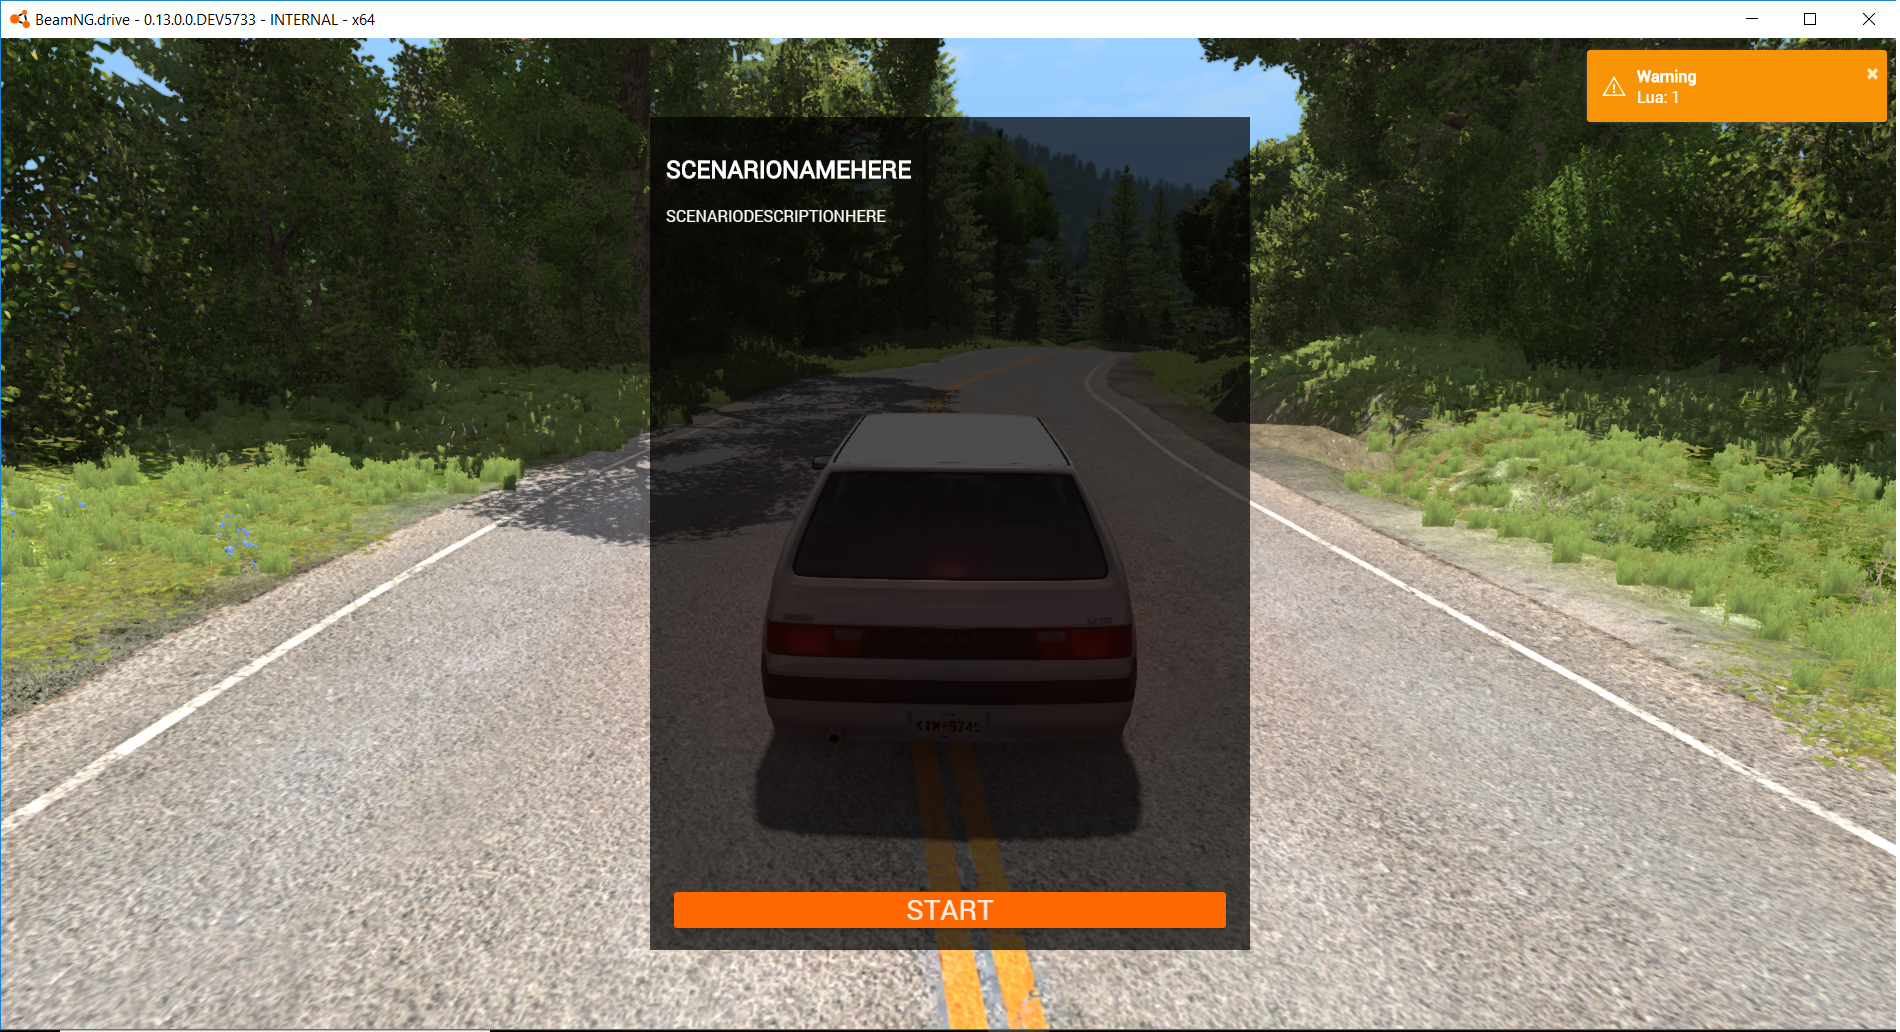 scenario_start_screen
{width=“6.66667in”}
scenario_start_screen
{width=“6.66667in”}
Editor Mode
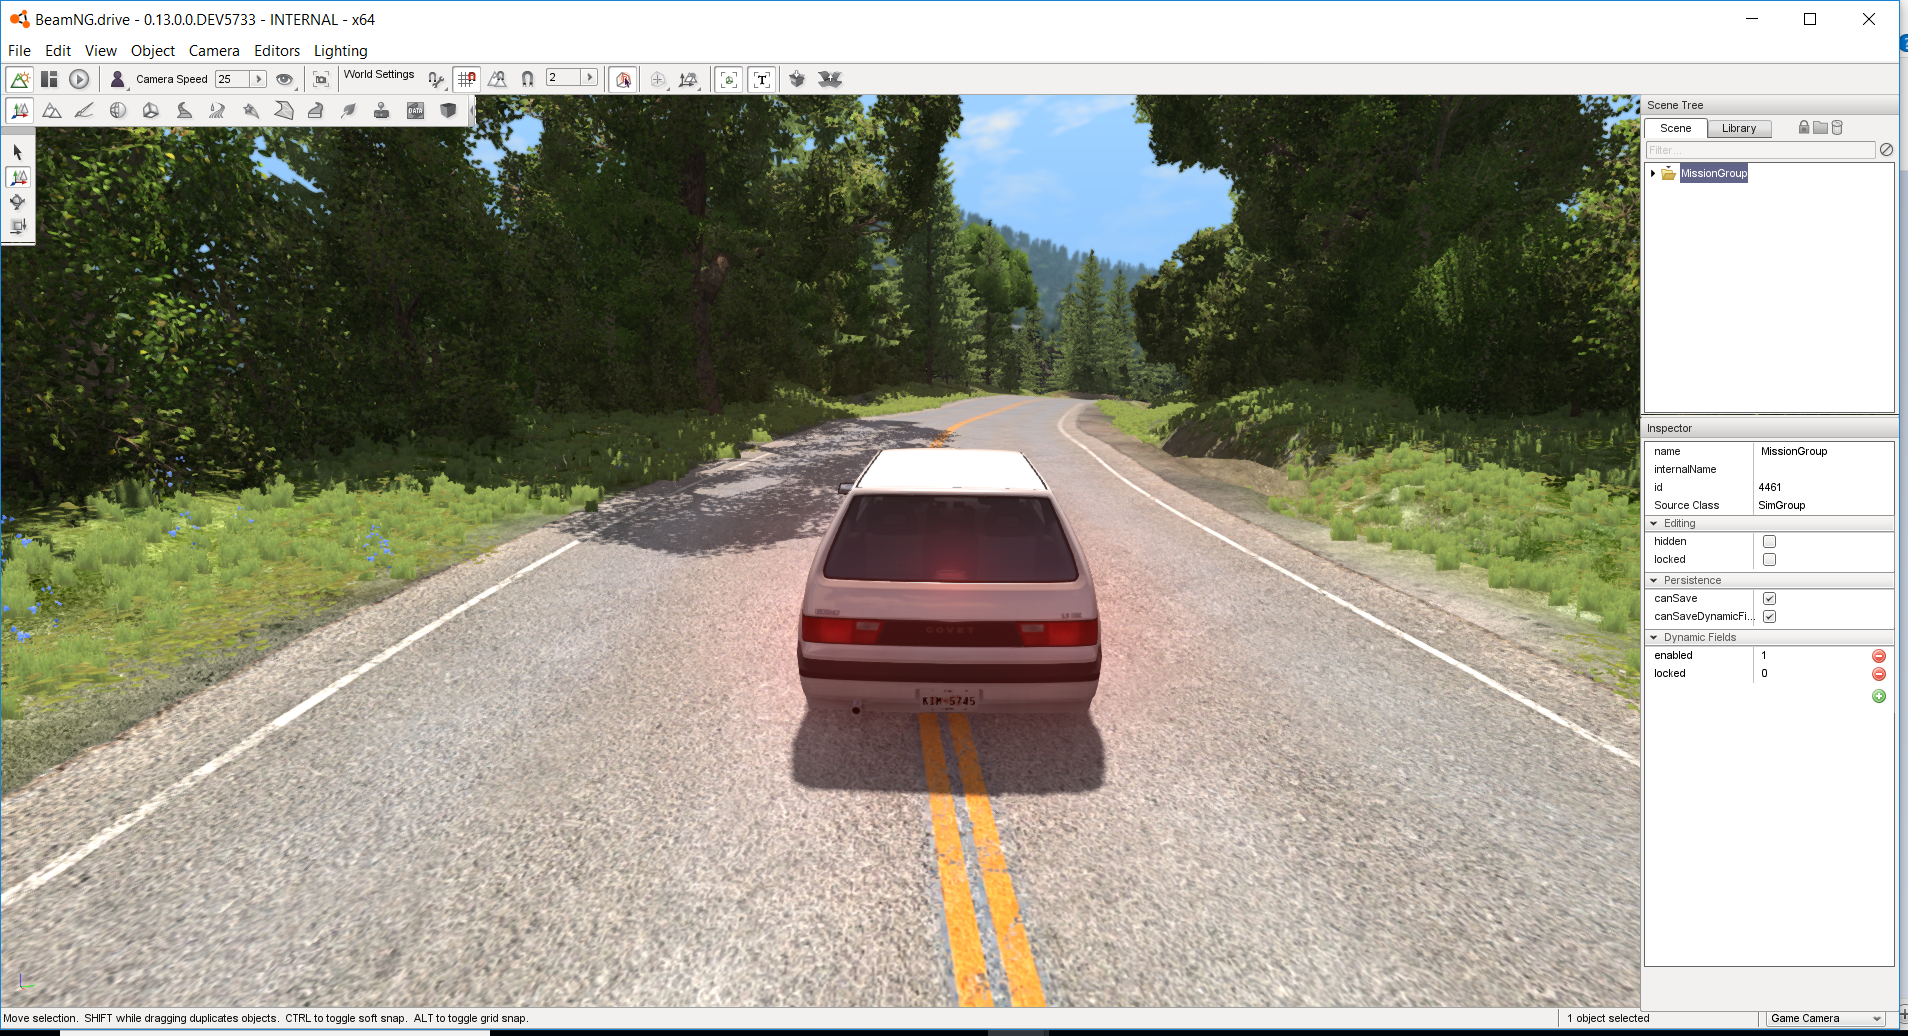
Simply click on the play button, then pause the game physics (using J key on your keyboard) and enter the editor mode (using the F11 key). What you should have on your screen should be the same as the picture below.
 Editor_mode_startscreen
{width=“6.66667in”}
Editor_mode_startscreen
{width=“6.66667in”}
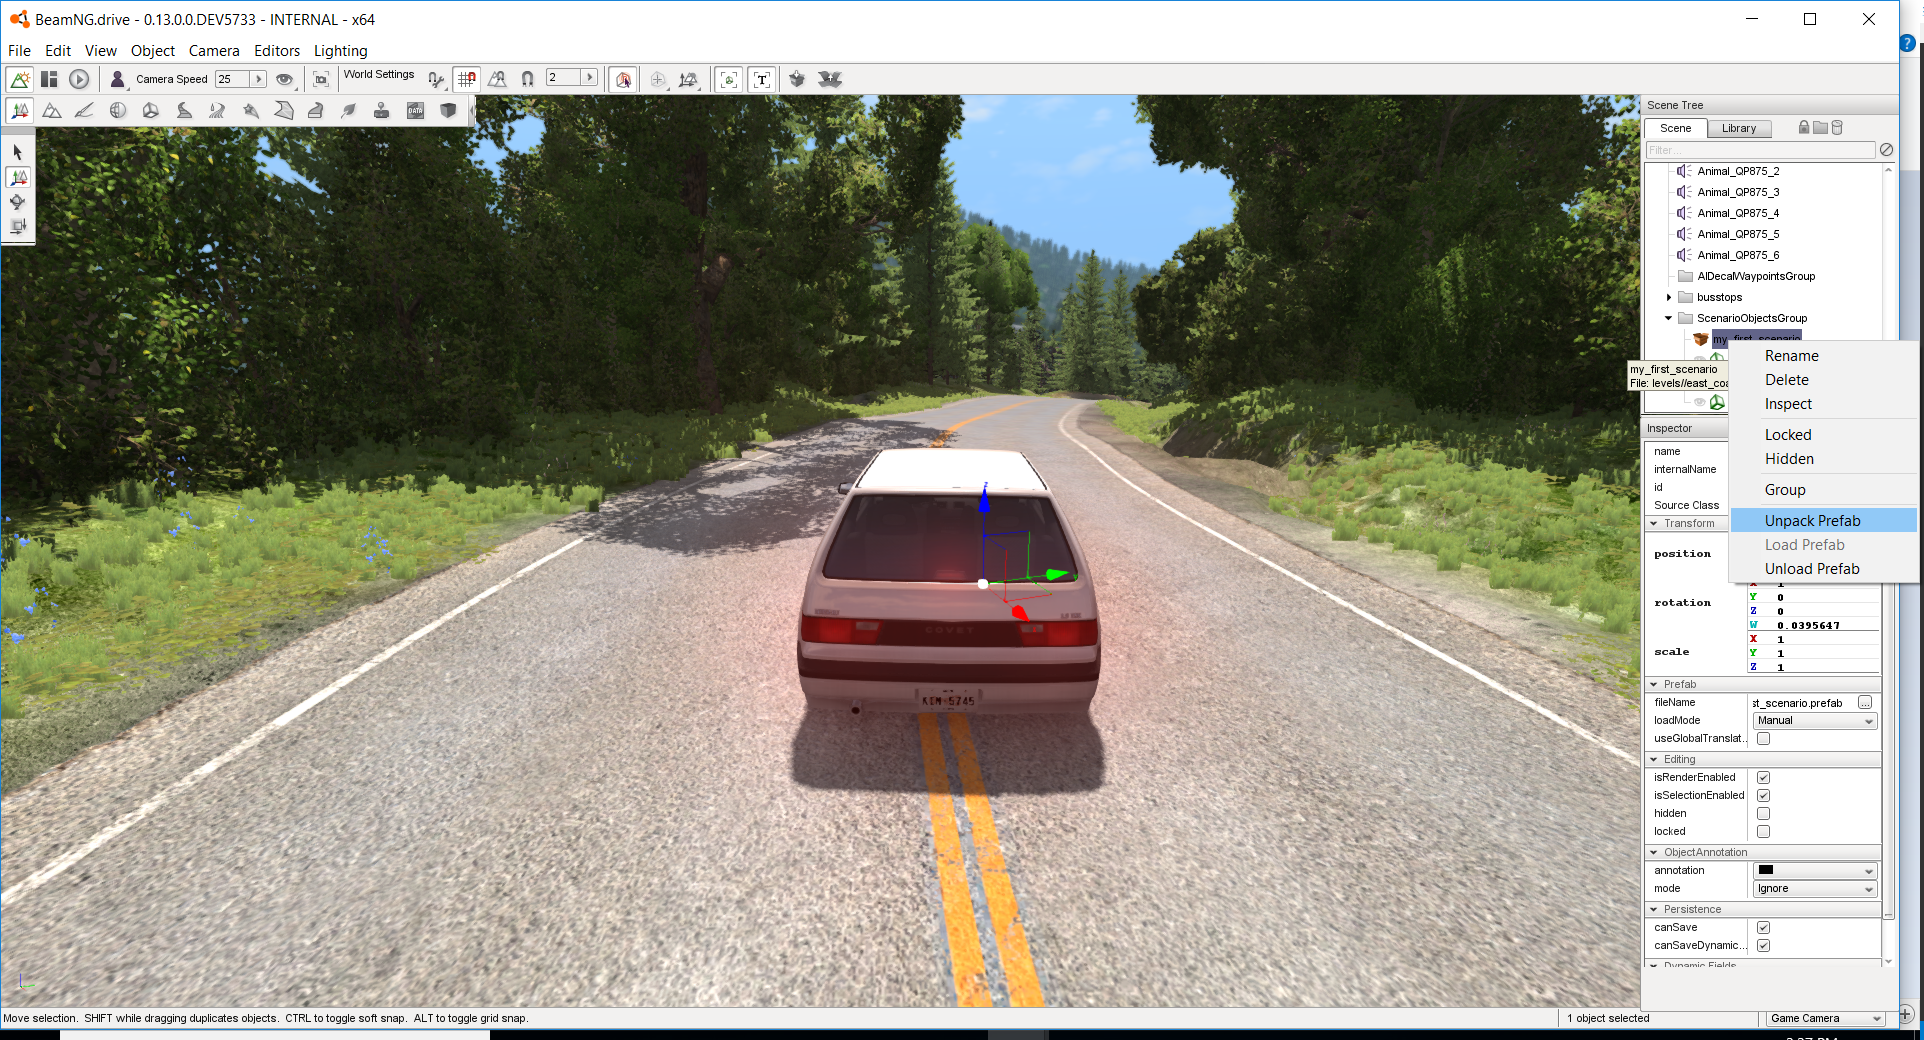
Now, you will have a scene tree at the top right side of your screen. On the scene tab is a folder with the name "MissionGroup". Open this folder and scroll down until you find a "ScenarioObjectsGroup" folder. Open the folder, right click on "my_first_scenario" and select unpack Prefab as shown in the picture below:
 Unpack Prefab
{width=“6.66667in”}
Unpack Prefab
{width=“6.66667in”}
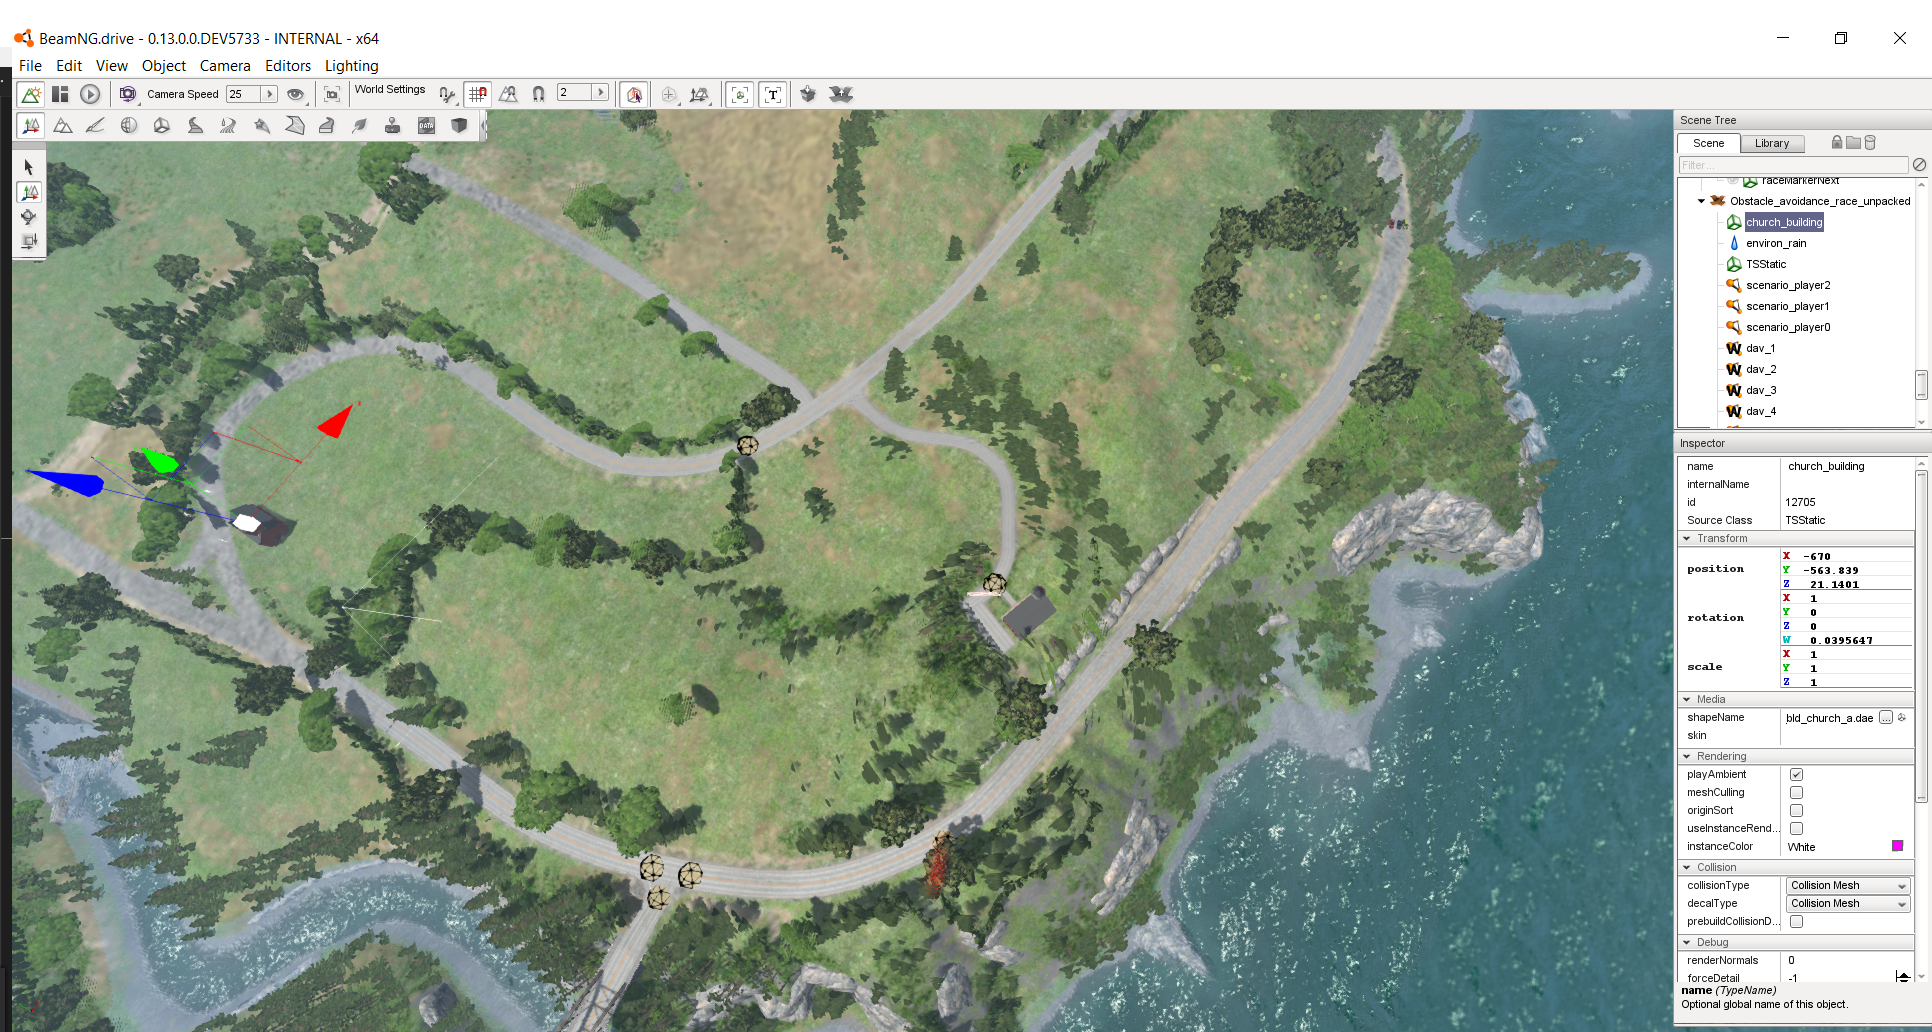
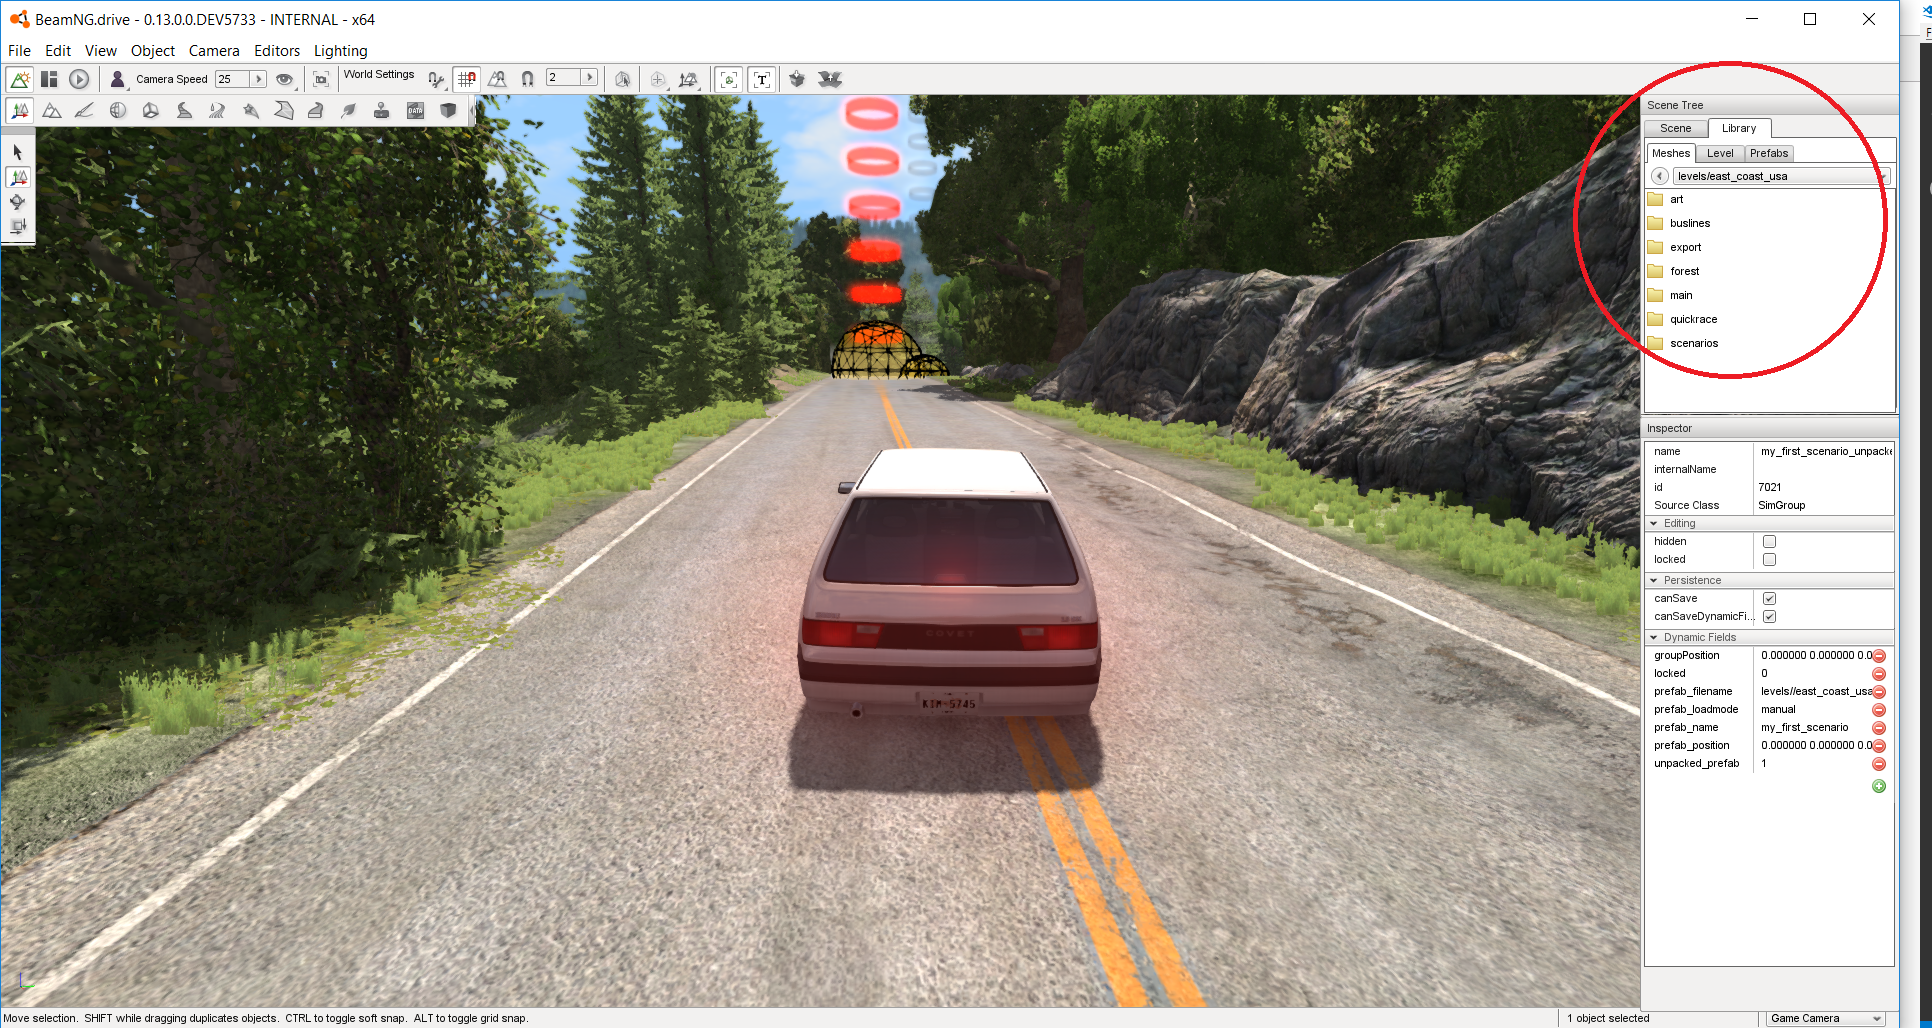
Unpacking the prefab allows you to customize it to your satisfaction by adding the available special features to your prefab. Open the unpacked prefab (my_first_scenario_unpacked) and left click on the 'scenario_player0' to pin-point the position navigator on it. Your screen should be as below:
 Selecting Scenario Player0
{width=“6.66667in”}
Selecting Scenario Player0
{width=“6.66667in”}
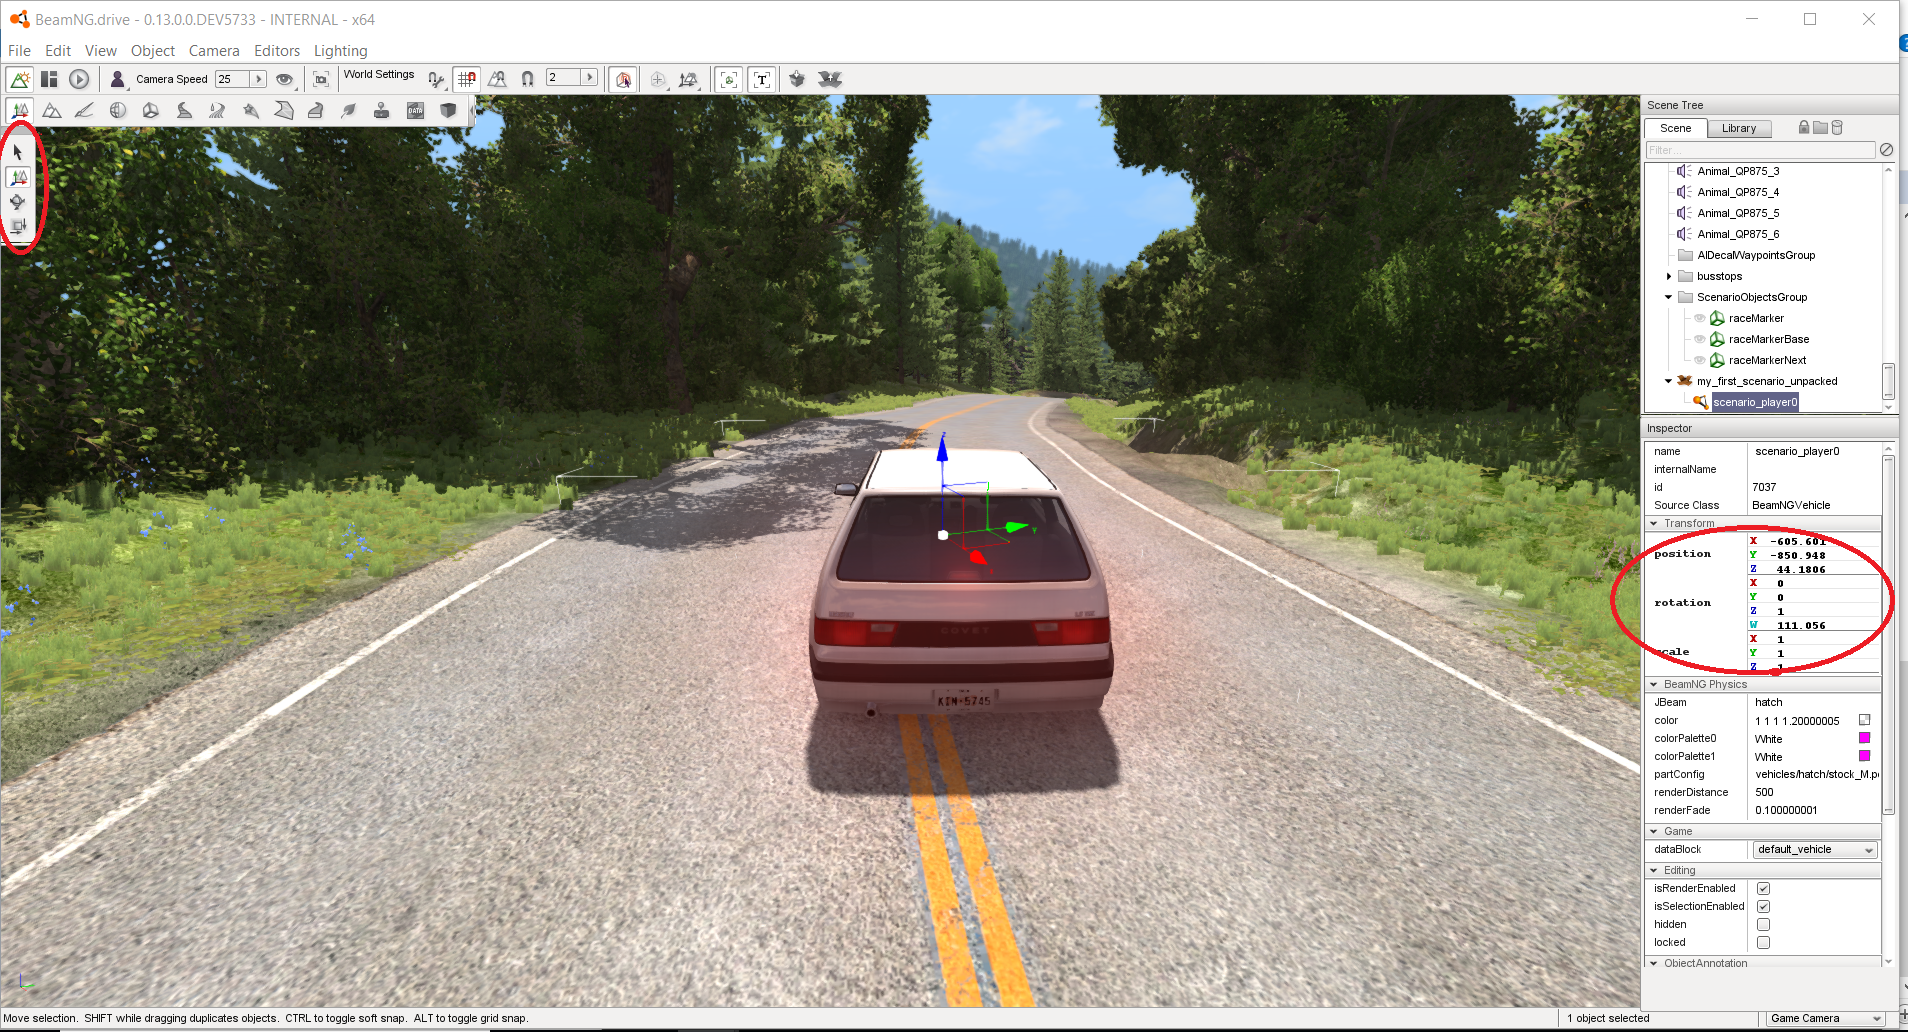
With the aid of the position navigator, the 'scenario_player0' (i.e. the car) can be moved to where you want the scenario to start. The car can also be rotated and scaled by selecting the "rotate selection" and the 'scale selection' respectively on the top left side of the screen. On the right side of your screen under the Transform column are the car's position coordinates,rotation coordinates and and scale. The afore-mentioned areas are marked 'red' in the picture below:
 Navigators and position Coordinates
{width=“6.66667in”}
Navigators and position Coordinates
{width=“6.66667in”}
Having moved to car (i.e. 'scenario_player0) to your desired scenario starting point, you can save changes made by packing the prefab as shown in the pictiure below.
 Pack Prefab
{width=“6.66667in”}
Pack Prefab
{width=“6.66667in”}
Your prefab is saved (as you pack the prefab) in this folder:Documents>BeamNG.Drive>level>east_coast_usa. Now go to this folder and copy the prefab file into Documents>BeamNG.Drive>mods>upacked>yourmodName>levels>east_coast_usa to overwrite the existing prefab file there. Always do this whenever you make changes to your prefab.
Start the scenario again, pause the game physics (using J key) and enter into the editor mode (using F11 key). Then unpack the prefab as explained earlier.
Positioning the waypoint
Under the Scene Tree section, go to Library>Level>BeamNG and select the waypoint by double clicking 'Waypoint' Using the position Navigator, you can move the waypoint to any position ( i.e. the route you want the car to take) of your choice. Multiple waypoints at different strategic points are used to define the path direction for the car.
::: {.note} ::: {.title} Note :::
The waypoint does not necessarrily need to be at the car's position. You can also scale and rename it to whatsoever name you want. Ensure that about one-third the area of the waypoint is beneath the ground while positioning it. With this, you can be certain the car touches the waypoint as it passes across it. :::
The pictures below show the waypoint at the point of selection and after positioning it.
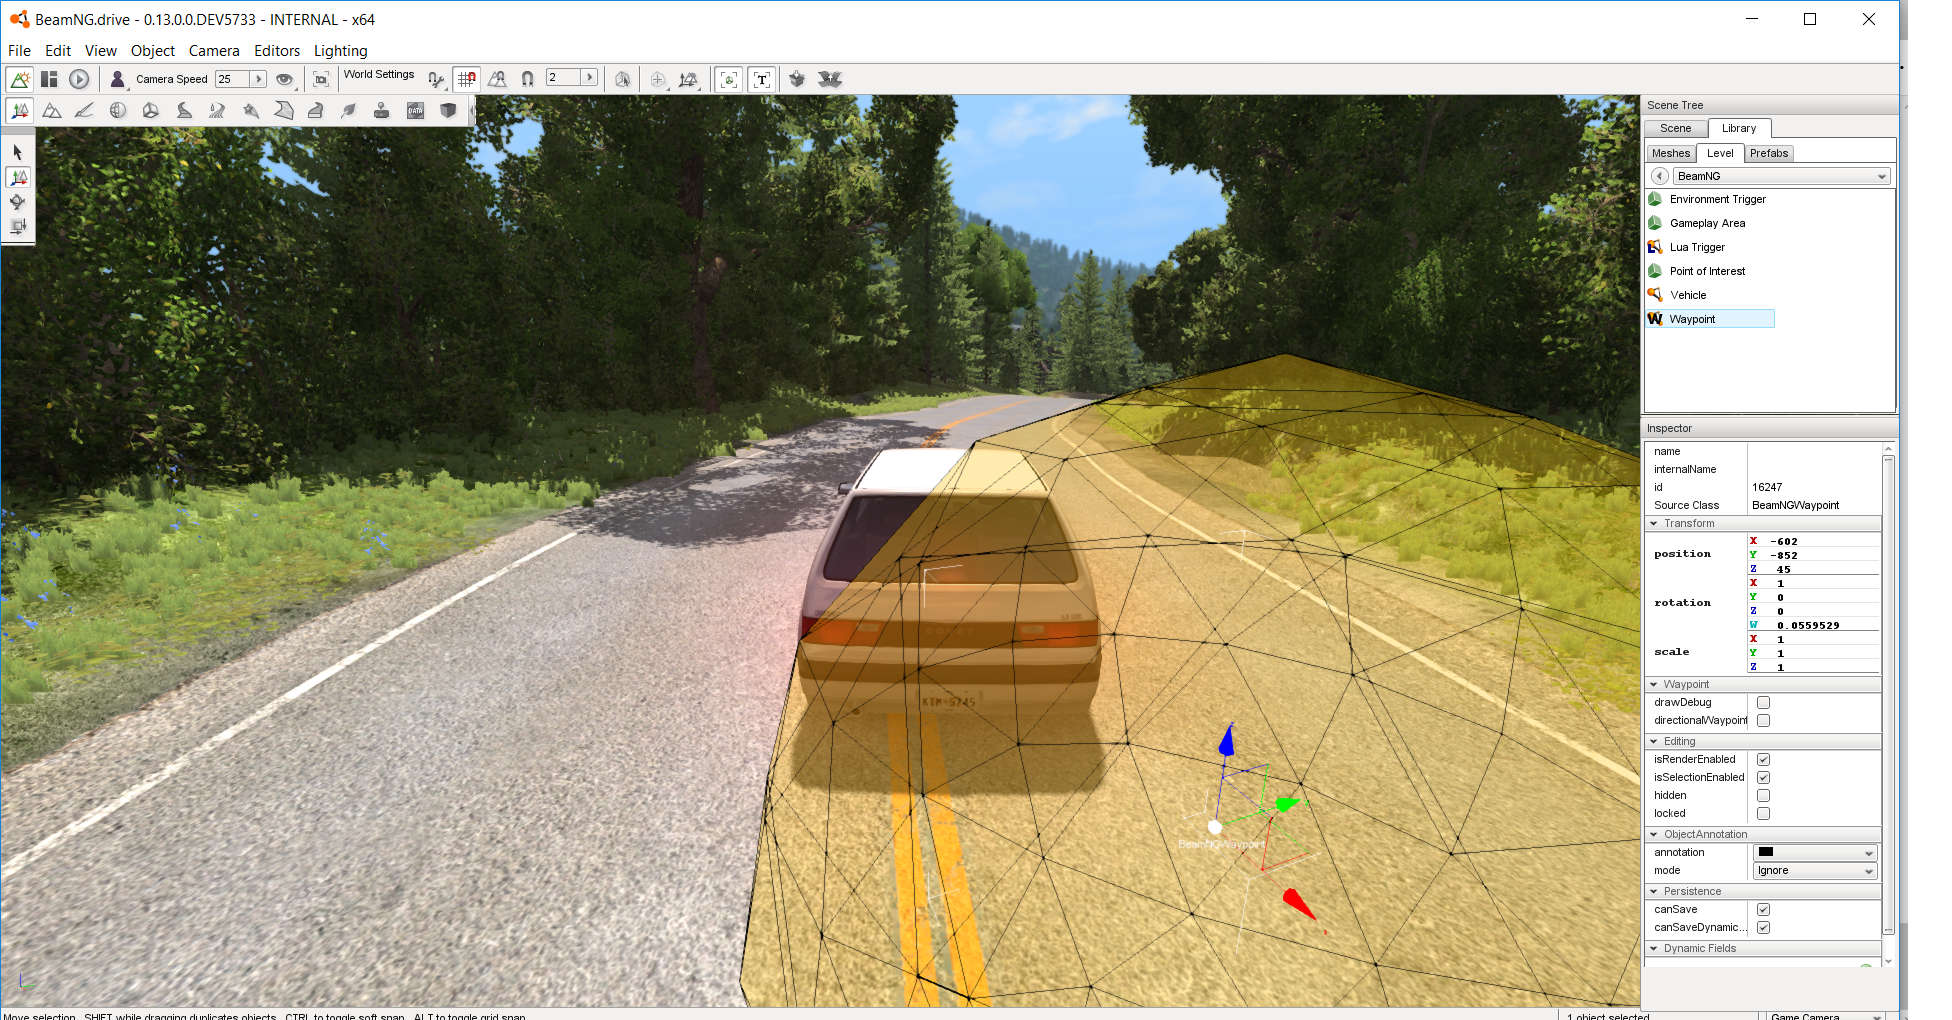 Waypoint at point of selection
{width=“5.55556in”}
Waypoint at point of selection
{width=“5.55556in”}
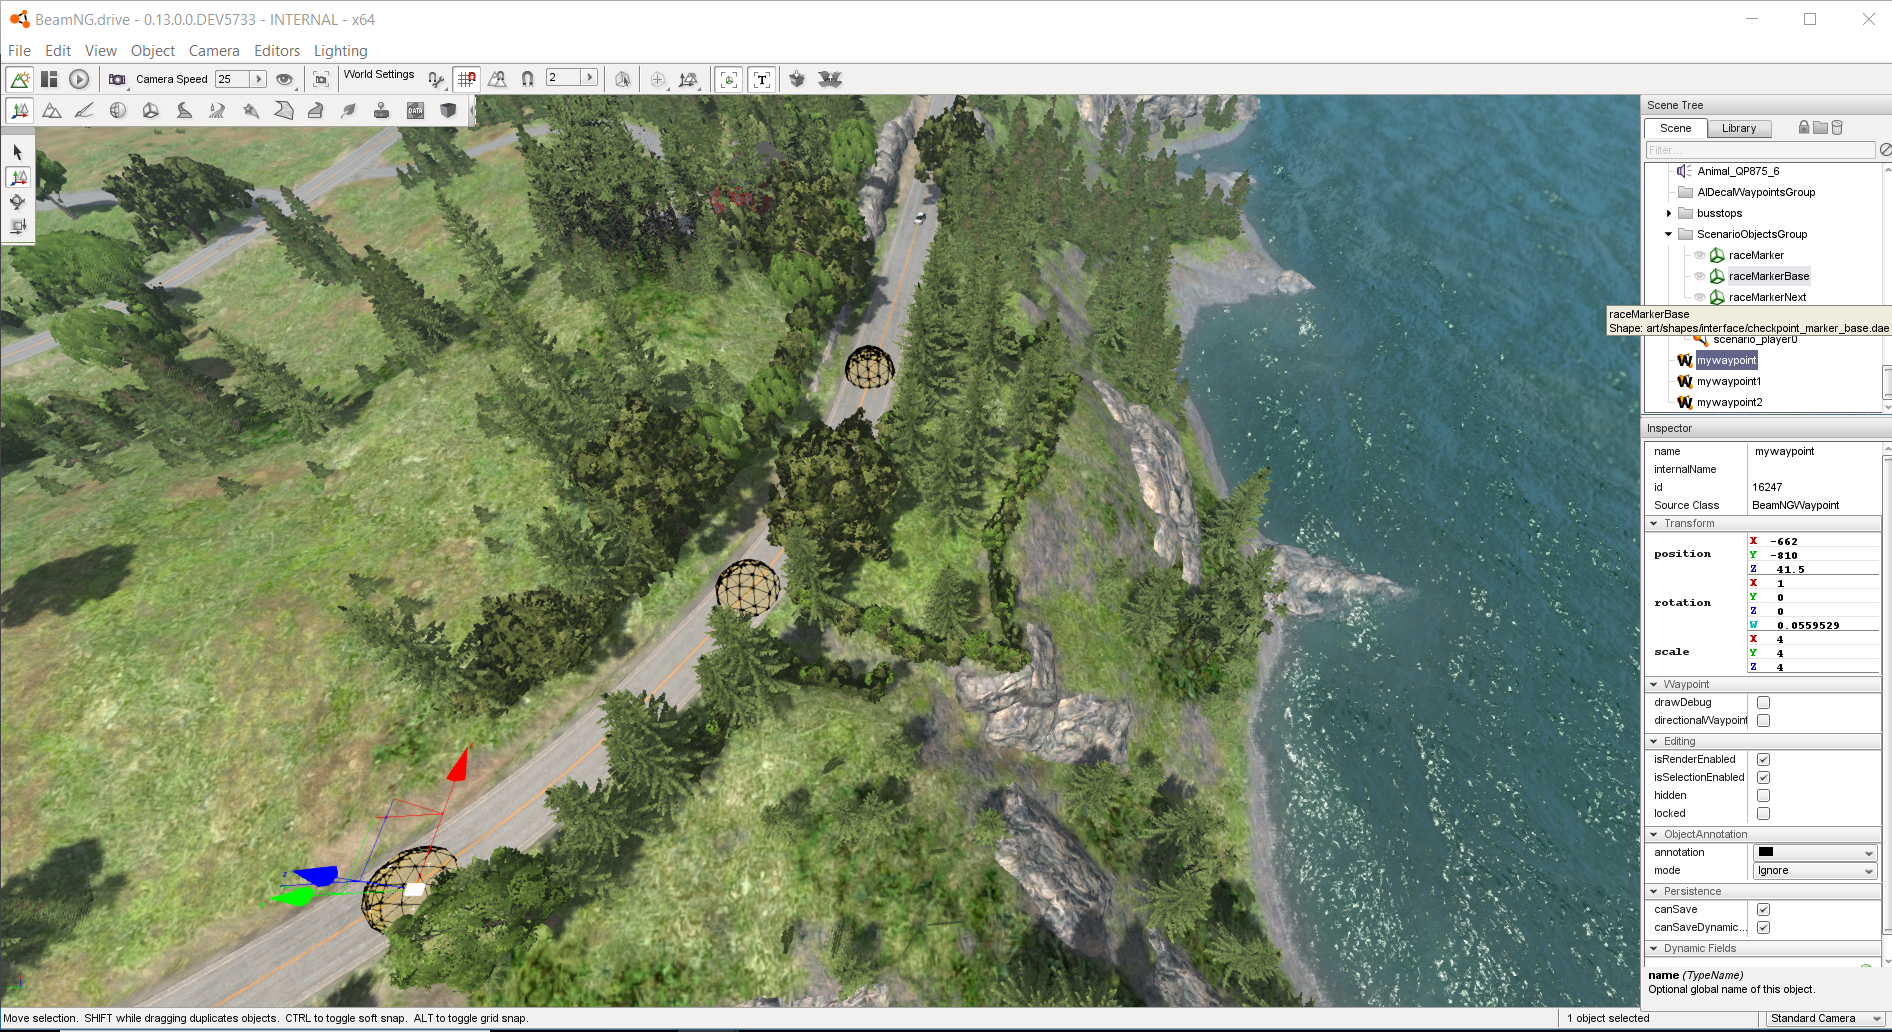
 Waypoint after positioning
{width=“5.55556in”}
Waypoint after positioning
{width=“5.55556in”}
::: {.hint} ::: {.title} Hint :::
Object are duplicated in the prefab by simply Shift + Click (on any axis of the object) and move. Thus, the waypoint is duplicated as shown below :::
 Duplicating waypoint
{width=“6.66667in”}
Duplicating waypoint
{width=“6.66667in”}
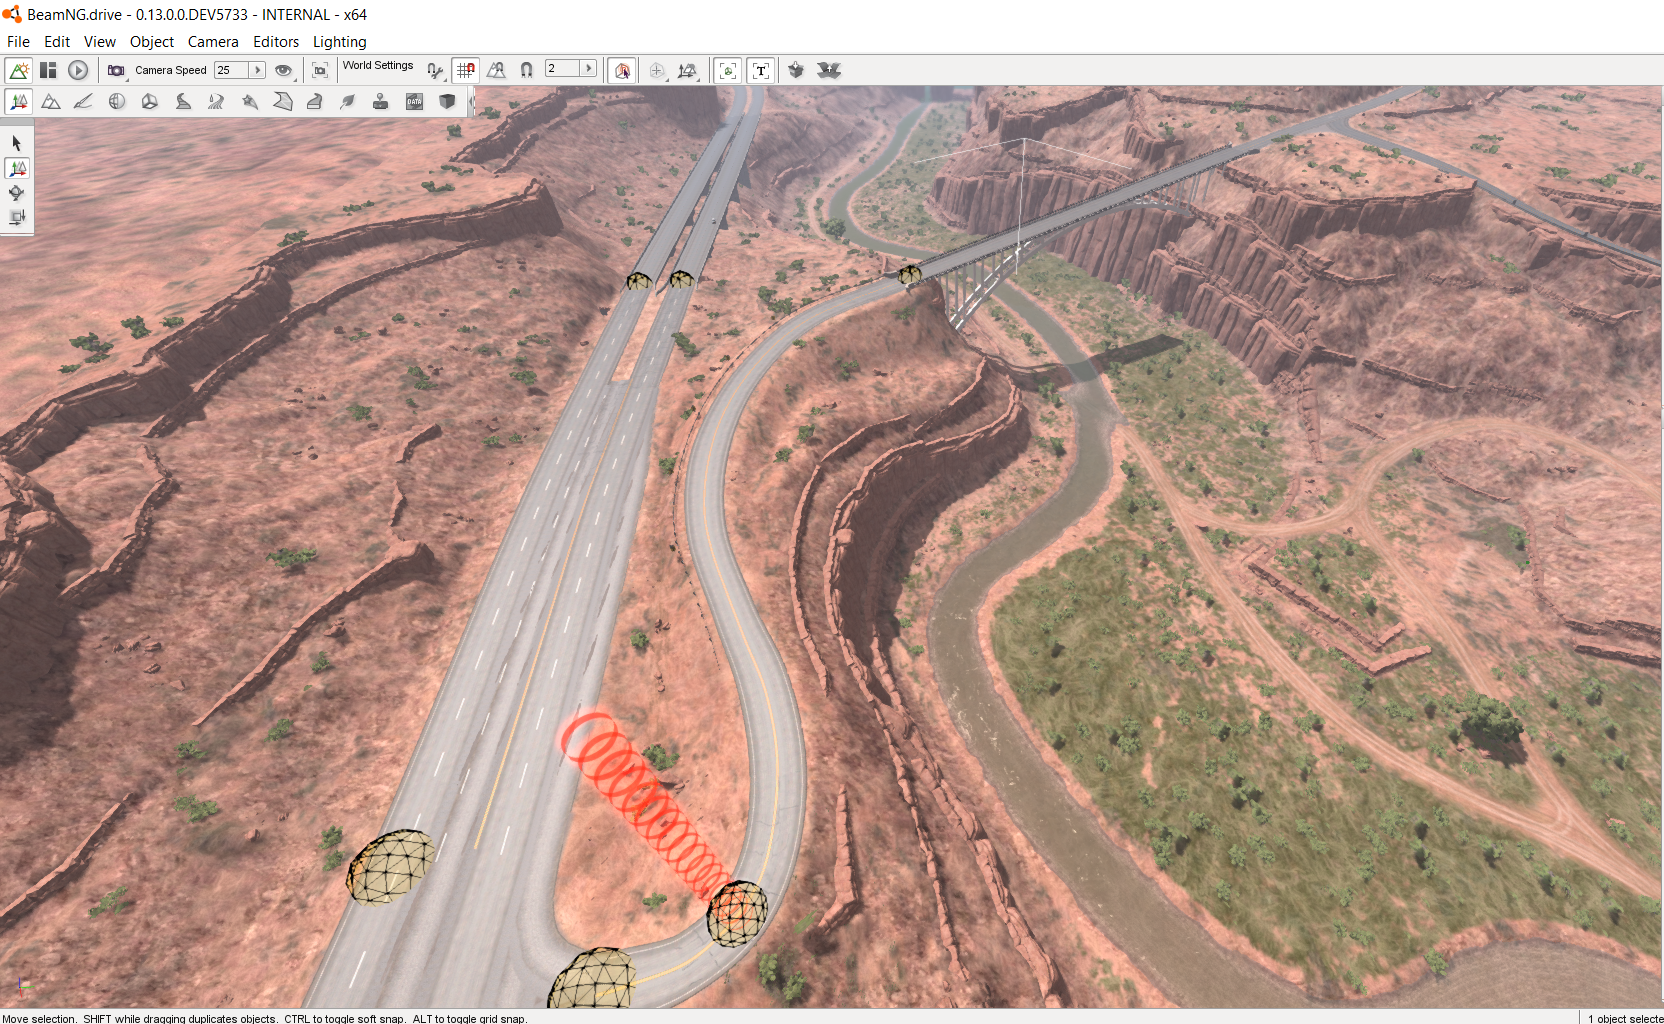
I have successfully created a short path with three waypoints as shown in the picture below.
 A short path with three waypoints
{width=“6.66667in”}
A short path with three waypoints
{width=“6.66667in”}
It is very important that the waypoints are moved into the prefab group. This can be achieved by simply moving (i.e. drag with mouse) it to the prefab group as shown in the pictures below.
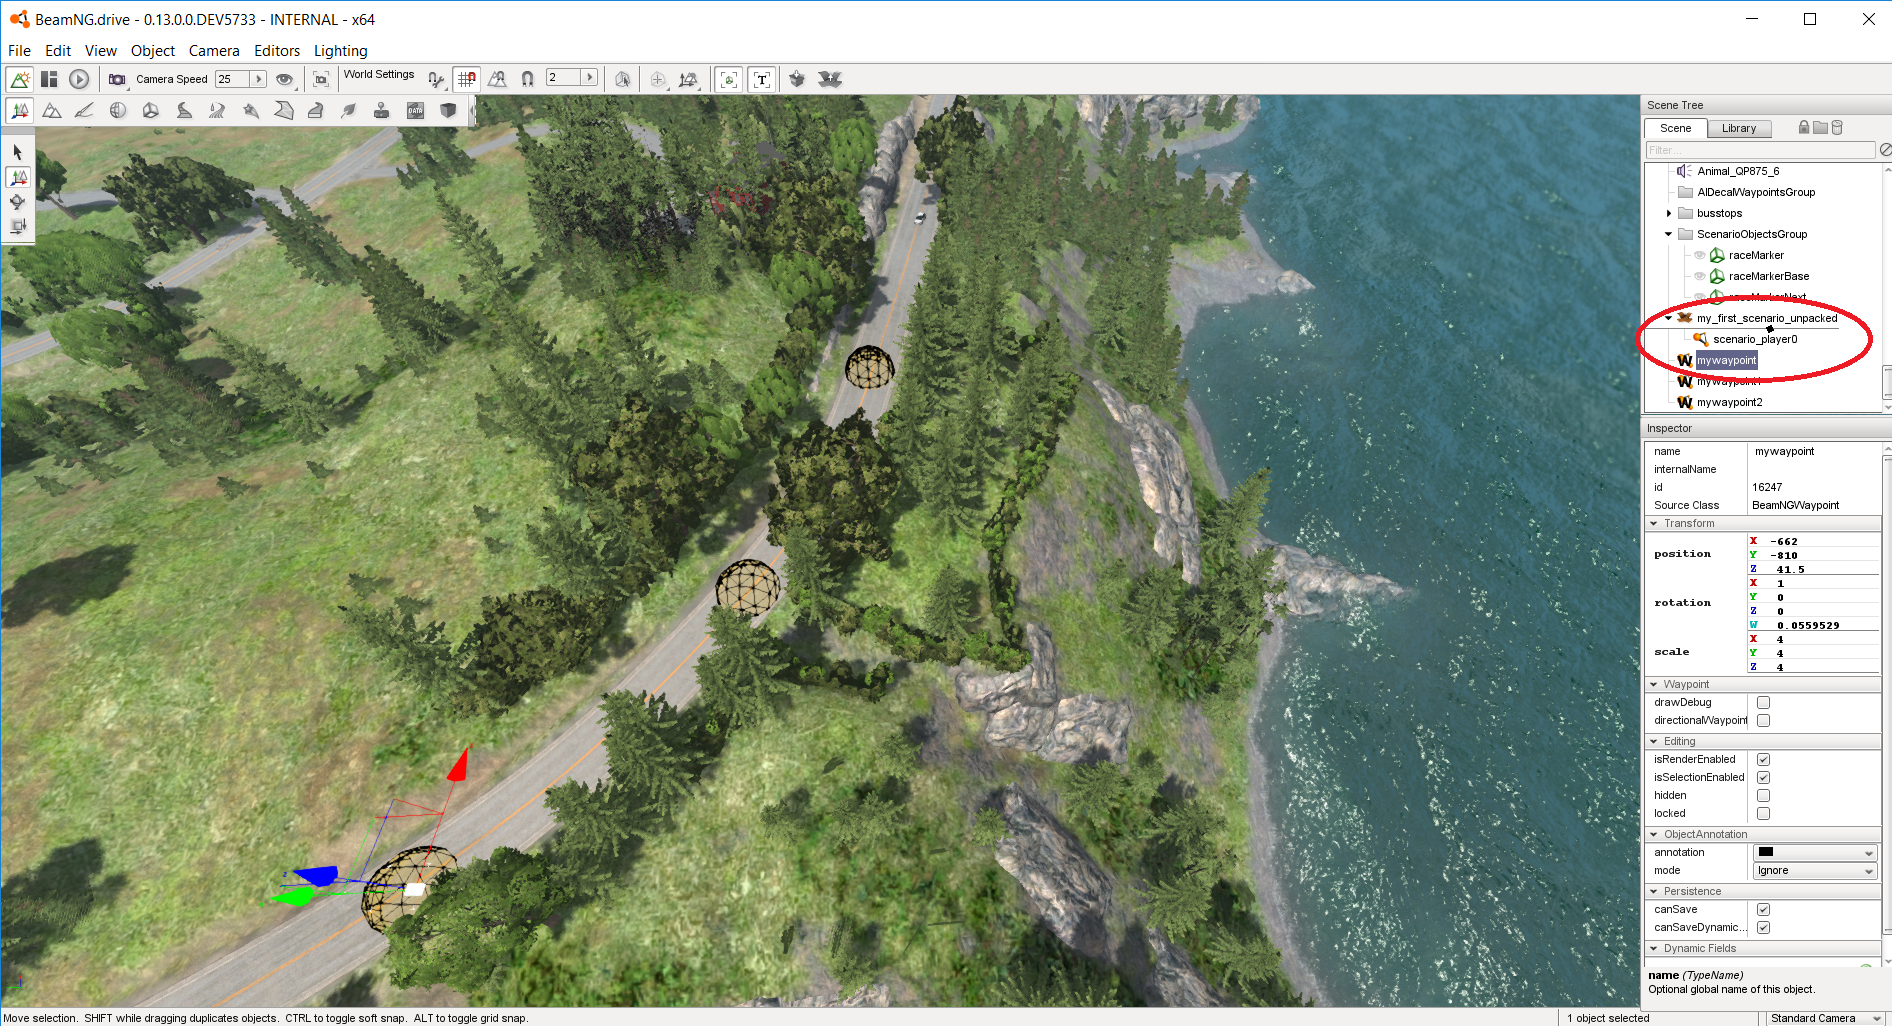 Moving the waypoint
{width=“5.55556in”}
Moving the waypoint
{width=“5.55556in”}
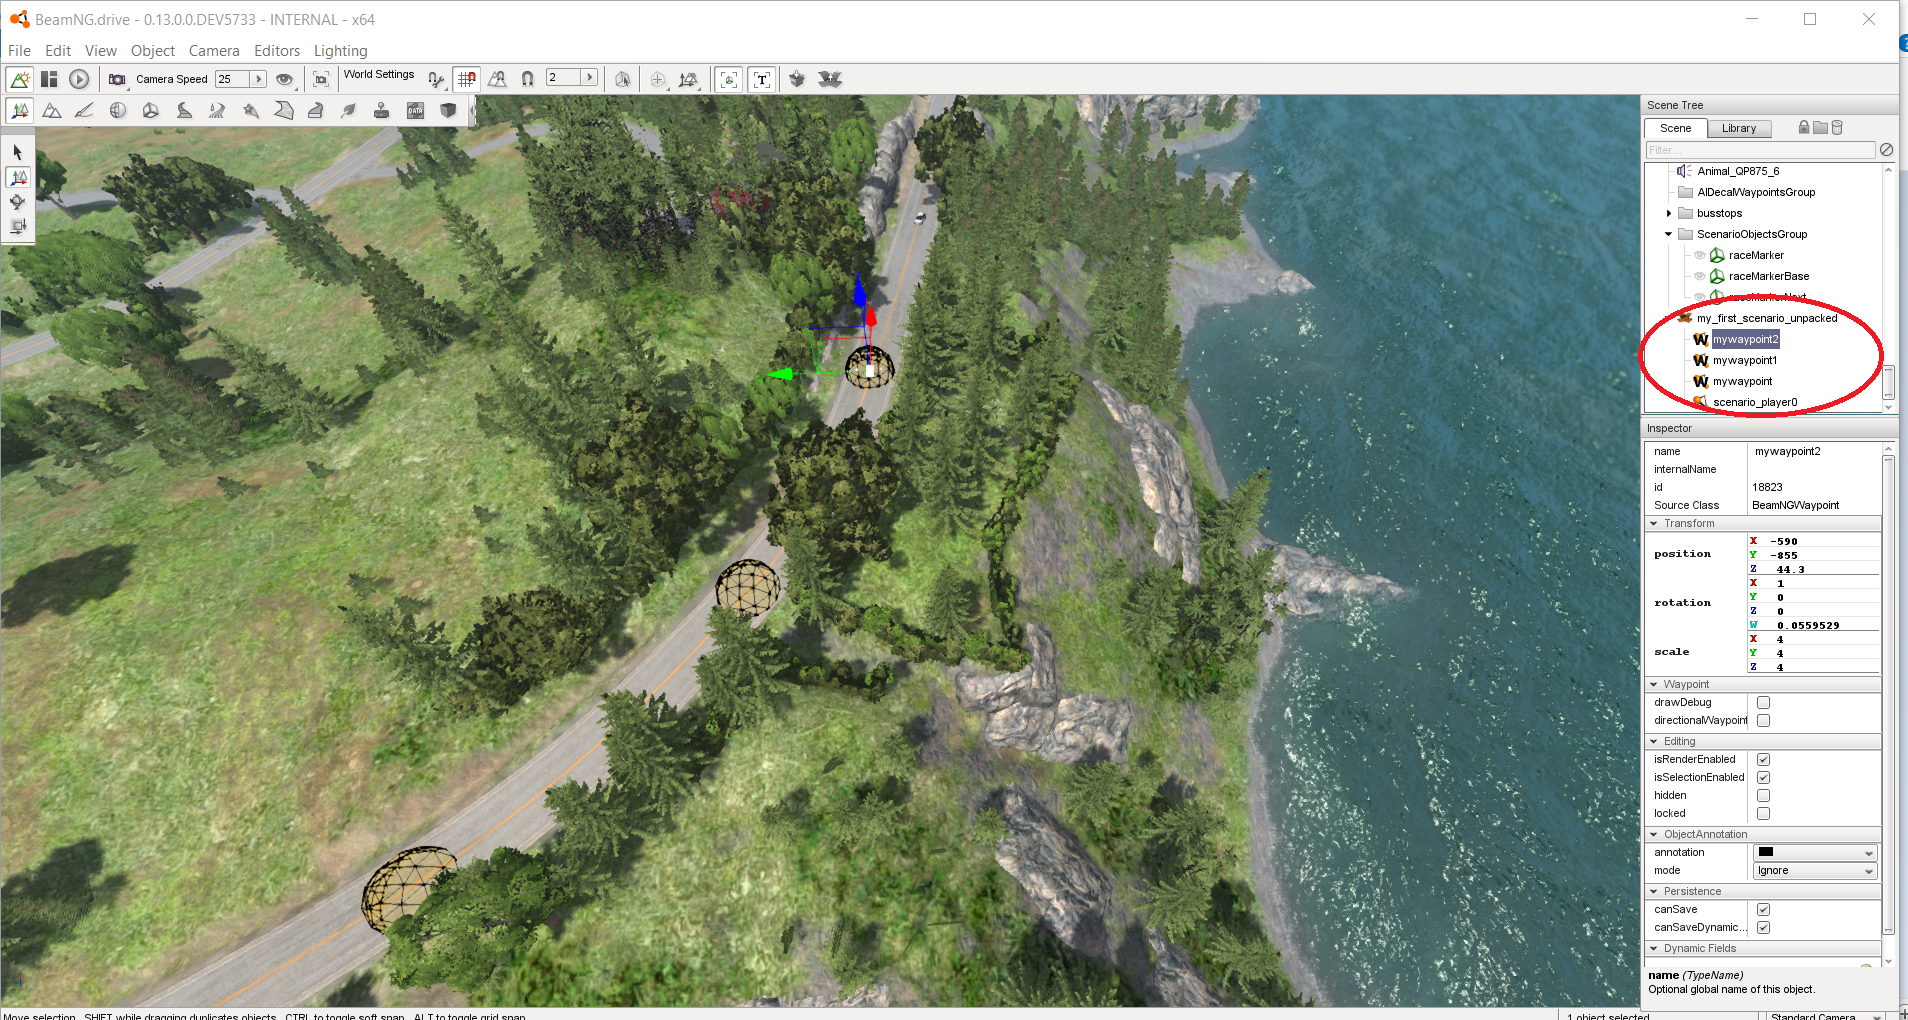 Waypoints after being moved
{width=“5.55556in”}
Waypoints after being moved
{width=“5.55556in”}
Now, I will repack my prefab as previously explained to save the additional changes.
Open the scenario json file and edit the 'LapConfig' section with the names of your waypoints as shown in the picture below. In case you changed the default file names, you should effect the changes by editing the names on the 'preview' and 'prefab' sections as marked in the picture
 Scenario's json file
{width=“6.66667in”}
Scenario's json file
{width=“6.66667in”}
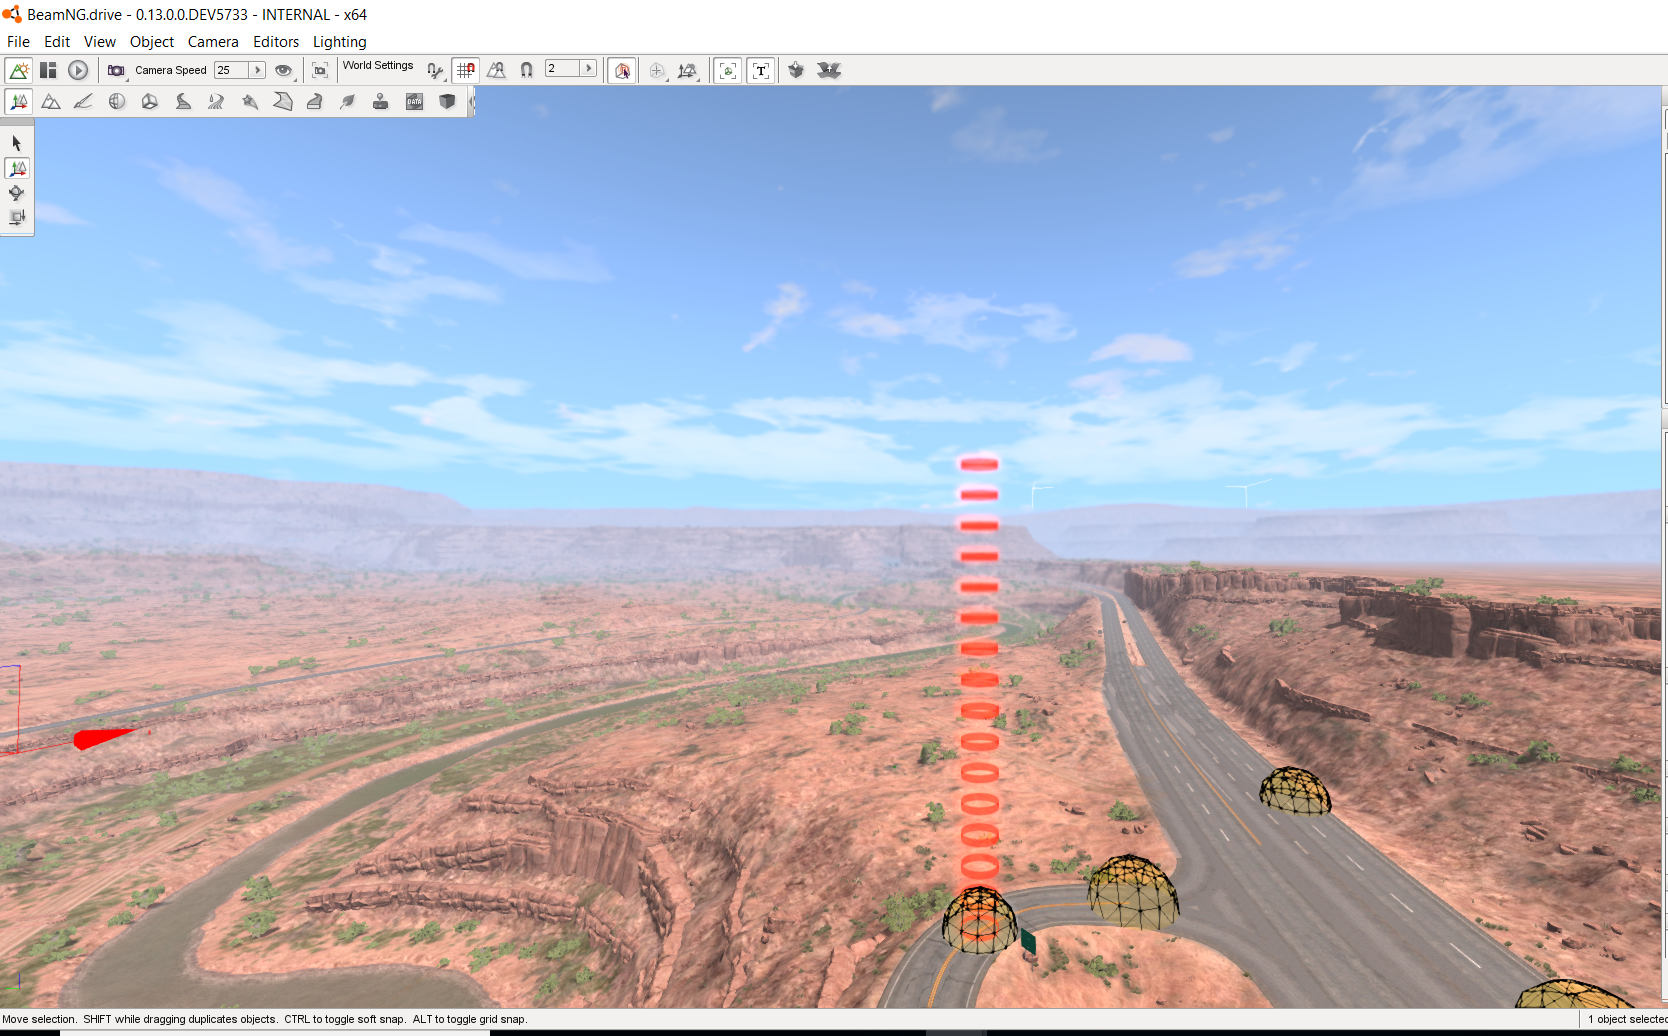
After I save and reload the scenario, you should see the waypoints as below:
 Scenario with positioned waypoint
{width=“6.66667in”}
Scenario with positioned waypoint
{width=“6.66667in”}
Placing objects
Start the scenario, pause the game physics (using J key) and enter into the editor mode (using F11 key). Then unpack the prefab as explained earlier. You can take the objects available to your game level ('east_coast_usa') from 'Scene tree>library>meshes>art>shape'. There, you see some folders containing different objects that you can add to your scene.
 Location of gameobject
{width=“5.55556in”}
Location of gameobject
{width=“5.55556in”}
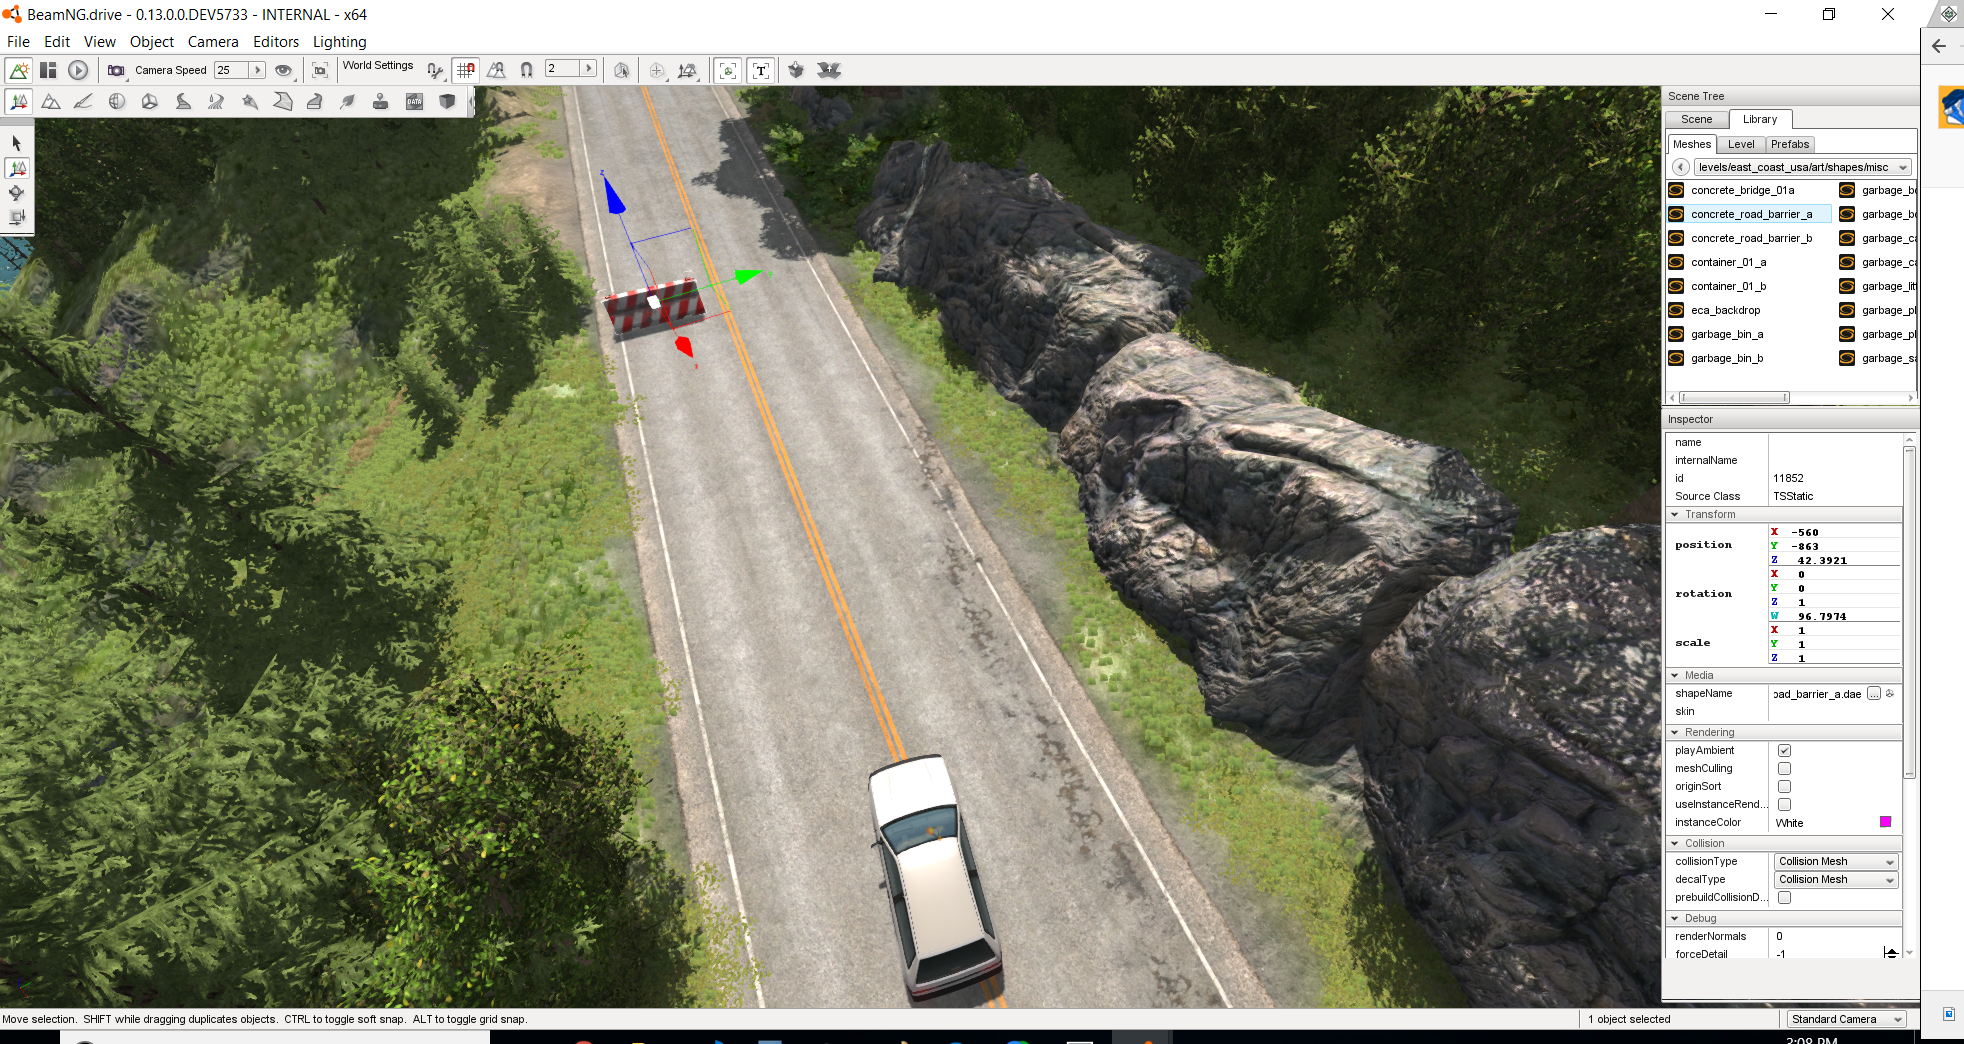 Placing a gameobject into the scenario
{width=“5.55556in”}
Placing a gameobject into the scenario
{width=“5.55556in”}
The procedure for placing and duplicating objects in a prefab is the same as that of waypoints. Do not forget to move the objects into the prefab group as previously explained.
You can now repack the prefab and reload your scenario, you will see your saved objects.
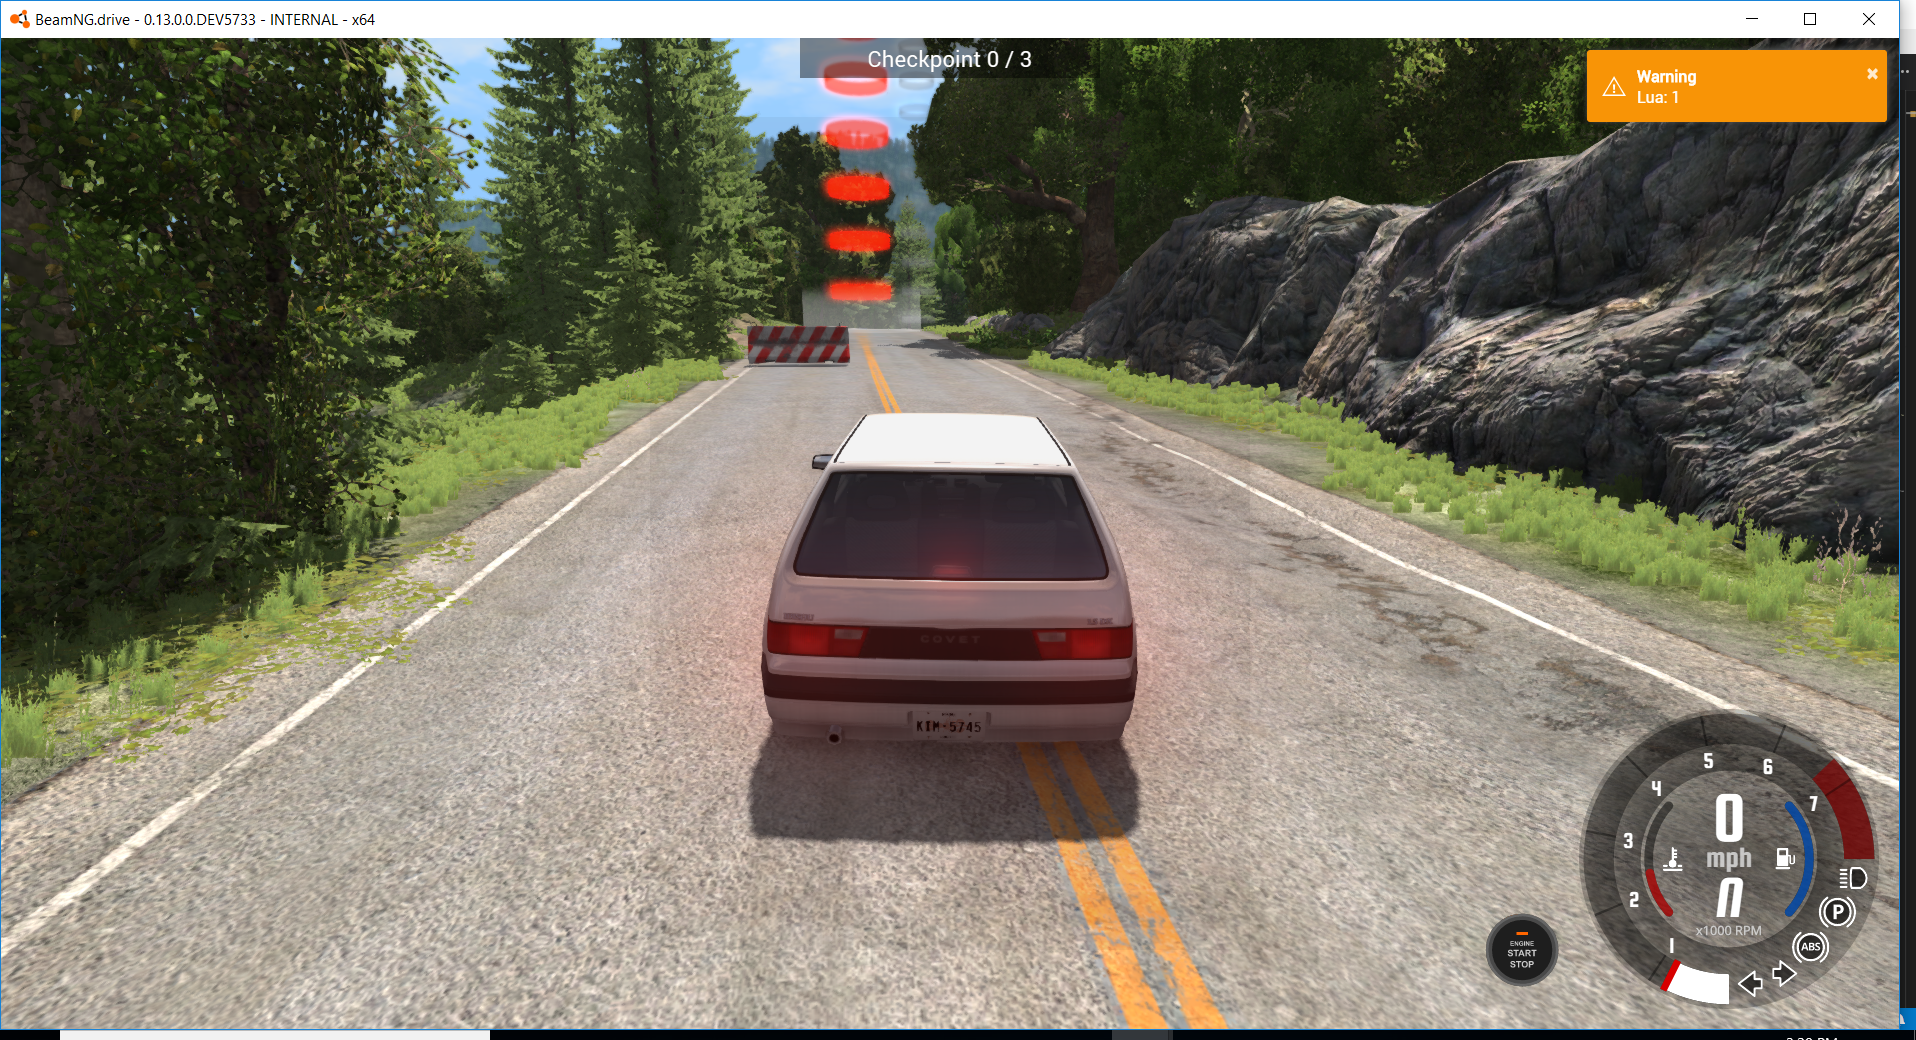 Created Scenario
{width=“6.66667in”}
Created Scenario
{width=“6.66667in”}