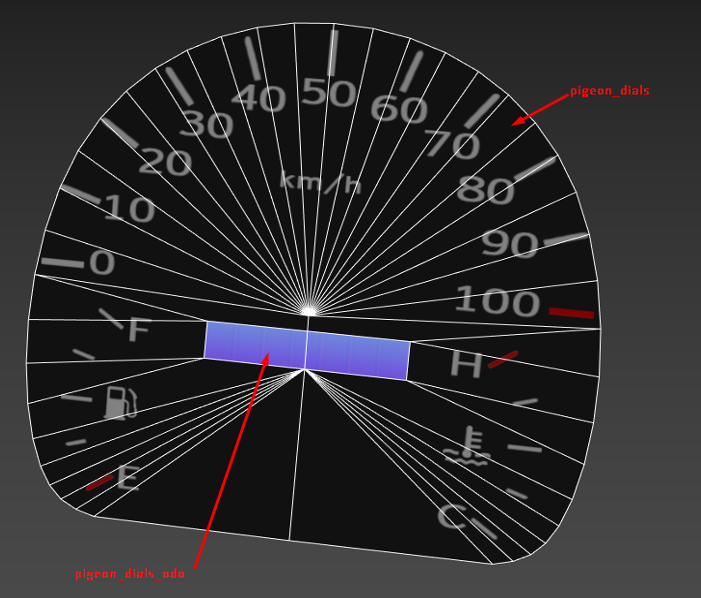
Odometer Setup
In order to crate the new odometer texture, we need to cut the geometry where the odometers are (in this case, the pigeon only has a total odometer).
Then assign a new material to each odometer section with the _odo postfix.
The 1st UV map channel should be the same as the gauges, but the 2nd should be mapped to the 512x32 odometer texture:
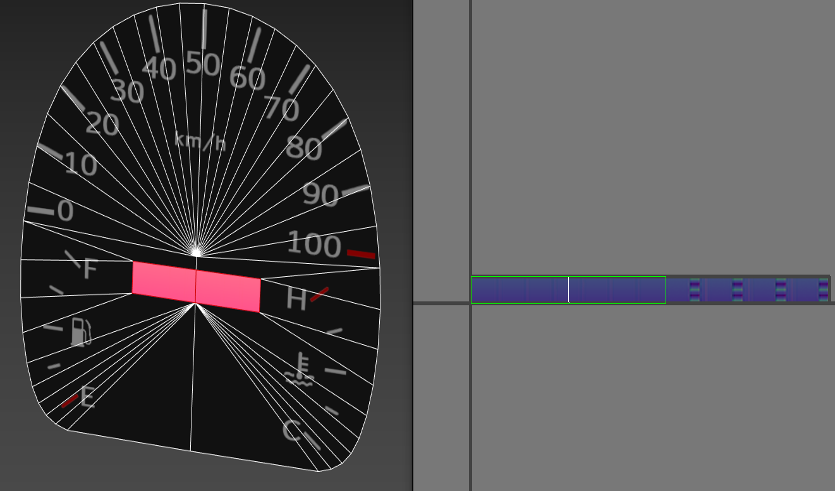
It can be found in \vehicles\common\odometer_analog_xx.png
The material should be configured in the material editor like this:
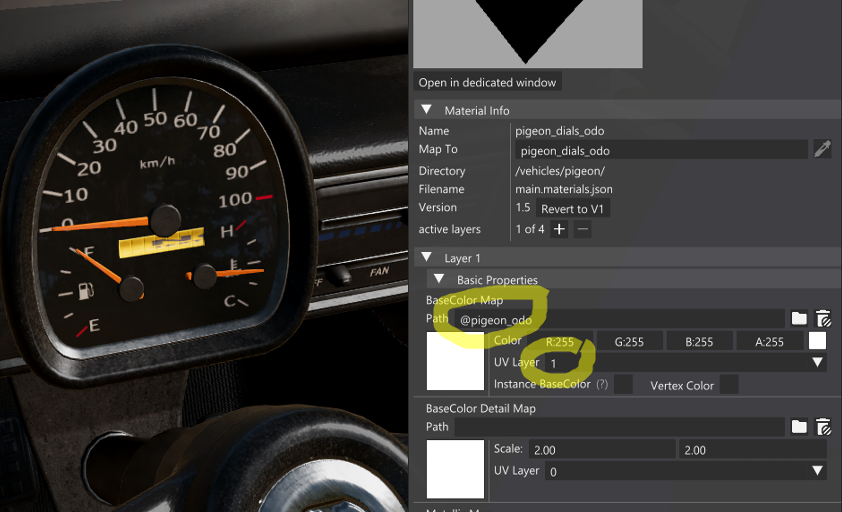
Make sure the path is @vehiclename_odo and the UV Layer is set to 1.
Alternatively, change it manually in the JSON file:
 1{
 2  "pigeon_dials_odo": {
 3    "name": "pigeon_dials_odo",
 4    "mapTo": "pigeon_dials_odo",
 5    "class": "Material",
 6    "Stages": [
 7      {
 8        "baseColorMap": "@pigeon_odo",
 9        "diffuseMapUseUV": 1,
10        "normalMap": "/vehicles/pigeon/pigeon_dials_nm.normal.png",
11        "roughnessMap": "/vehicles/pigeon/pigeon_dials_r.data.png"
12      }
13    ]
14  }
15}
Last modified:
April 15, 2026
Was this article helpful?
