Biome Tool
Introduction
Biome is a powerful tool that allows the user to generate anything from vast forested areas to the smallest backyard garden in an incredibly fast and automated way, while maintaining a natural distribution of vegetation elements.
This tool comes with a lot of different functions that lets users play with forest item distribution using terrain materials as masks, exclusion zones to hide/delete specific forest areas and add randomness. All with a non-destructive approach.
Getting Started
The tool can be found in the main toolbar of World Editor.

After clicking on the icon, the user can choose between 2 tabs controlling the 2 main methods to procedurally populate the map with forest items.
- Level biome tab
This section uses terrain material layers to determine areas for foliage placement to populate the map. - Biome areas tab
This section gives the user more freedom to create distribution areas using the lasso function and exclusion zones and to organize them in layers to create subtractions or additions of elements looking at their position.
Biome generation workflow
The tool uses a specific workflow to generate foliage in the map that implies the use of one of the 2 methods or both.
Once chosen, user is prompted to create at least one layer and a forest brush to use to populate it.
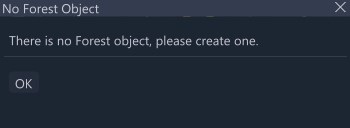
Be sure to first create a Forest Object. If the user tries to open Biome tool, and a Forest Object is not present in the level, a warning message will appear.
Every layer has its own properties with which the user can check layer names, paths, mask used, setup the brush for placing an area border and control the falloff and the slope influence. The user will use the properties section to generate or re-generate the selected layer.
All the changes made to forest object with Biome will act independently from Forest editor.
Explicitly selecting or rectangle selecting biome forest items from Forest Editor and transforming/deleting them still works.
In that case, biome items will be converted to forest editor items.
Level biome toolbar
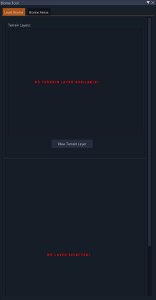
This panel is subdivided in 2 main sections:
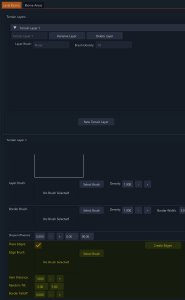
Layers Panel
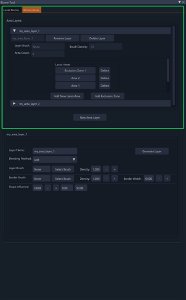
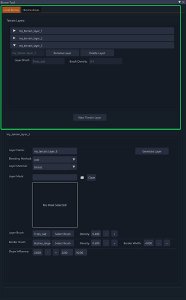
The layers panel contains the layers stack and shows all the main info about the layers that the user has created.
The user can create a New Terrain Layer from here, select the layers in the stack, rename, or delete them.
 click to zoom
- Layer Name
Shows the active layer name.
- Rename Layer
When pressed lets user change the actual active layer name. The new name will be updated both in the drop down layer bar and in the Layer Properties section. - Delete Layer
Delete the active layer from the stack. User will be prompted with a message to request the effective deletion. - Layer Brush
Shows the name of the selected brush used in the active layer - Brush Density
Shows the actual density of the layer brush on the active layer - New Terrain Layer Button
Pressing the button creates a new layer at the bottom of the stack and makes it the active layer
Layer Properties
This panel shares the same functions with the Biome Areas Layer properties.
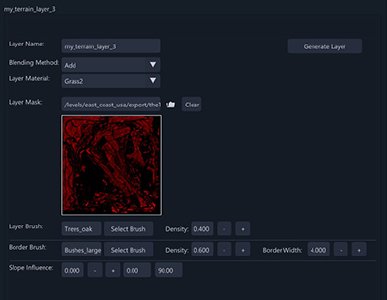
The layer properties panel allows user to change the generation parameters of the active layer and Generate the active layer biome.
Here can be setup brush type, density, falloff and can be selected an existing terrain mask or a custom mask and the blending method
-
Generate Layer Button
When pressed it will generate the biome inside the active layer based on the setup parameters. -
Layer Name
Shows the active layer name -
Blending Method
There are 3 methods the user can select to spawn the foliage inside the selected area.- Add
With this method, when pressing Generate Layer button, the selected layer brush will be added inside the area in a random distribution. Note that pressing Generate Layer multiple times the area will be populated with more forest items randomly scattered and that Density changes affect distribution. - Replace
With this method, when pressing Generate Layer button, the selected layer brush will be replaced inside the area in a random distribution. Note that user can select another layer brush or even use the same brush that will generate a different distribution seed and that Density changes affect the distribution. - Delete
With this method, when pressing Generate Layer button, the forest item present in the area will be deleted. Density changes will affect the amount of elements that will be deleted.
- Add
-
Layer Material
Layer material drop down contains all the terrain material of the actual map that are used as masks to control the distribution of the forest items.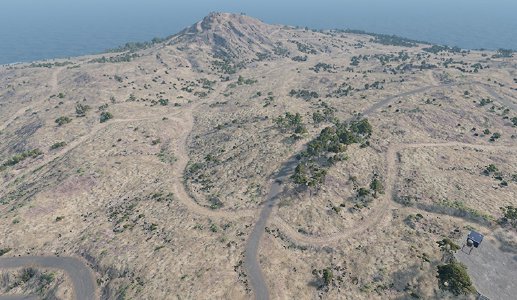 Base map
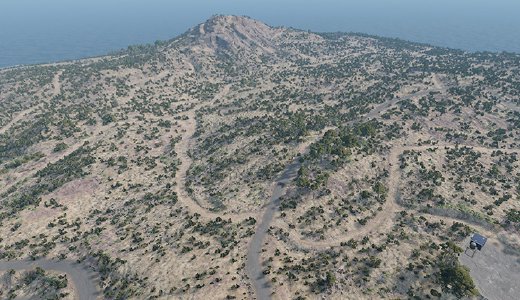 Generation using grass terrain mask
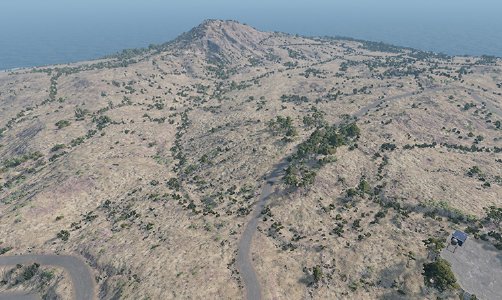 Generation using dirt_dusty terrain mask
 -
Layer Mask
Shows the selected mask path. Pressing the folder icon lets user select a custom mask to be used to scatter, replace or delete forest items.
Note that the Layer Mask selected acts on the whole map area, no matter the resolution of the mask image. It can be used to customize the forest items placement.Exported terrain masks can be exploited to polish the map.
For example, the user can select the asphalt terrain material mask with delete blending method to clean possible forest items on all the map roads with a single click.
-
Mask Preview
Shows the active selected mask image preview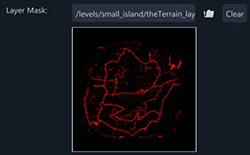 dirt_dusty exported terrain material used as layer mask
 -
Layer Brush
Shows the active selected forest brush used to populate the active layer.
Forest brushes used in Biome tool share the brush settings setup by the user in the Forest Editor. Look into the documentation section to know how to create and setup a forest brush.- Select brush
The button allows the user to open the file browser and select the forest brush to be used in the generation - Brush density
A numeric value to define the amount of forest elements spawned in the active layer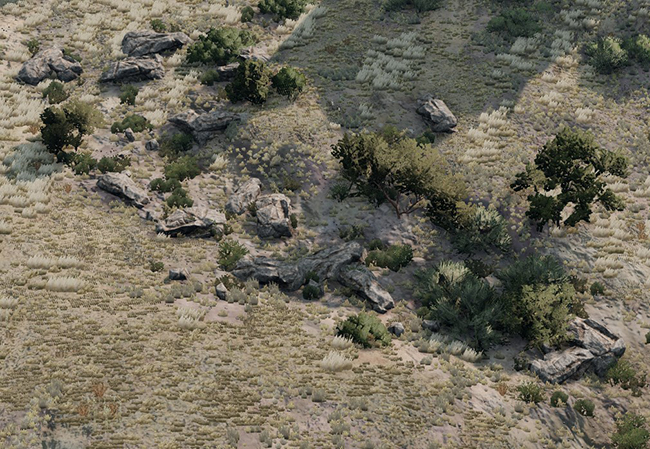 Scattered rocks on dirt_grass terrain mask - Density value 1.0
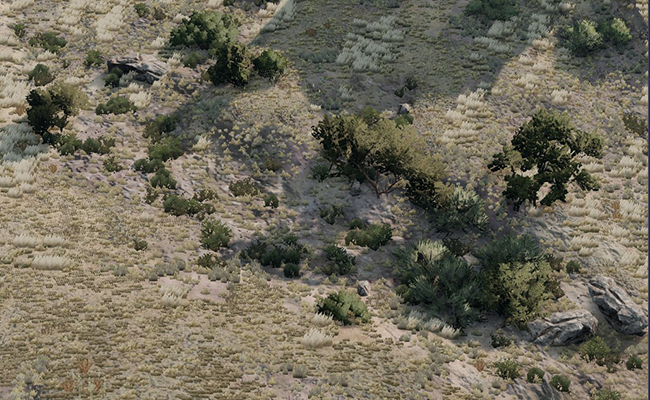 Scattered rocks on dirt_grass terrain mask - Density value 0.3
- Select brush
-
Border Brush
Shows the selected forest brush that will be used for the borders of the selected mask of the active layer- Border Brush
The button allows the user to open the file browser and select the forest brush to be used in the border generation - Border Brush Density
A numeric value to define the amount of forest elements spawned in the mask borders of the active layer - Border Width/Falloff
A numeric value in meters going from -10 to 10 that defines the falloff of the forest brush spawned in the mask borders of the active layer. A positive value will add foliage outside the area, while a negative value will shrink the falloff area inside.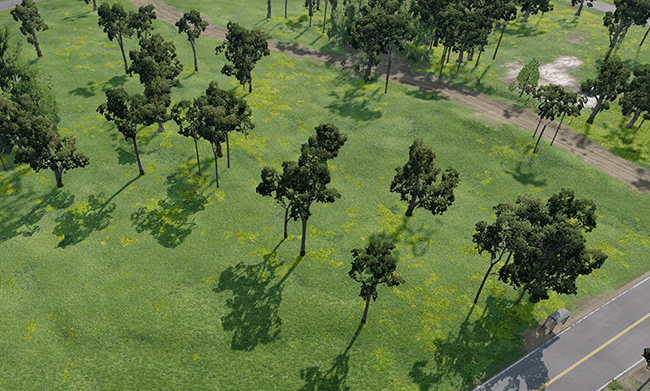 Trees_oak placed on Grass2 mask terrain mask - Brush Density 0.4
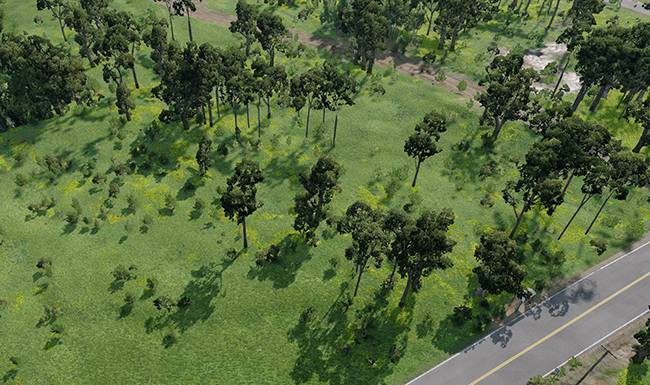 Trees_oak placed on Grass2 mask terrain mask - Brush Density 0.4, Border Density 0.6, Falloff 4
- Border Brush
-
Slope Influence
Slope influence is a value that needs to be setup to -1, 0 or 1 that defines the forest elements spawn probability zone inside the active layer- a value of -1 means that the density of spawned vegetation will be more toward min slope
- a value of 0 deactivates the slope range action
- a value of 1 means that the density of spawned vegetation will be more toward max slope
-
Slope Range
Slope range is defined by a min and max value degree number and works together with the setup Slope influence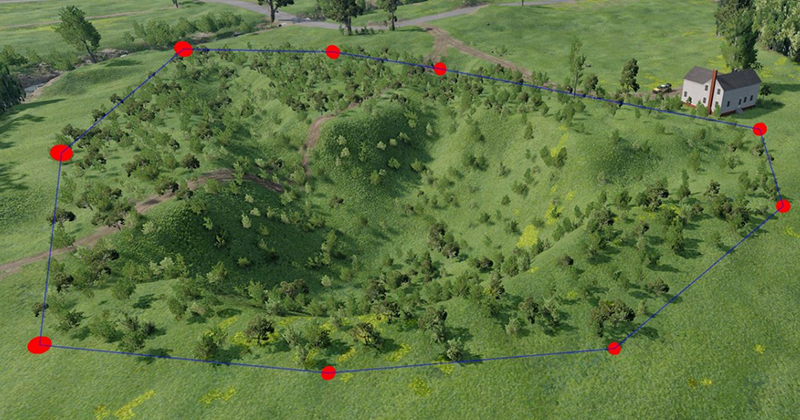 Slope influence -1, Slope range 0° to 90°
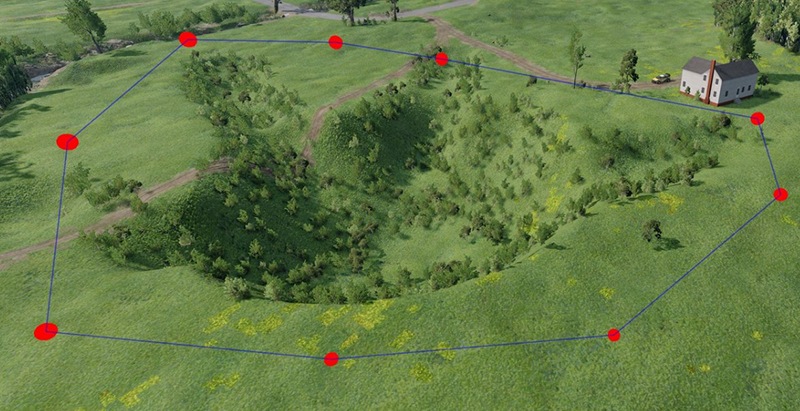 Slope influence 1, Slope range 10° to 45°
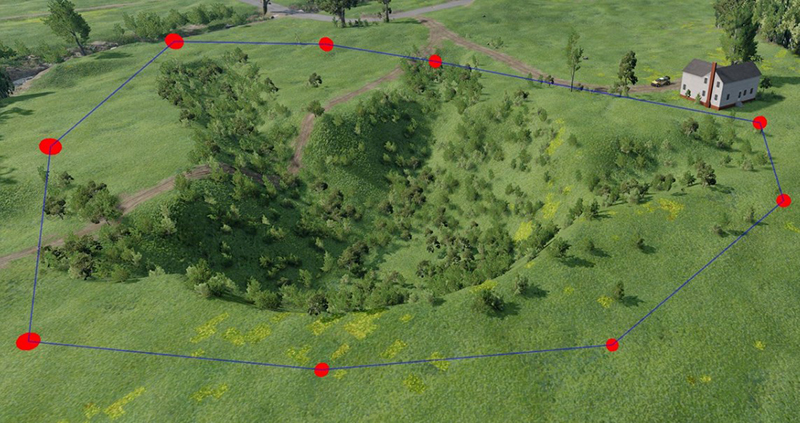 Slope influence -1, Slope range 10° to 45°
 Slope influence -1, Slope range 0° to 20°
Biome areas toolbar
The panel is subdivided in 2 main areas:
Layers Panel
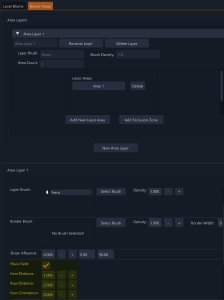
The layers panel shows all the info about the active layer. The user can create a new area layer from here, select the layers in the stack, rename or delete them.
- Layer name
Shows the active layer name. - Rename layer
Lets you change the actual active layer name. - Delete layer
Delete the active layer from the stack. - Layer Brush
Shows the name of the brush used in the active layer. - Brush Density
Shows the actual density of the brush on the active layer. - New Area Layer
The button will create a new Area Layer. It is treated as a container of specific set of Lasso Areas and Exclusion Zones that works independently from other Area Layers. - Lasso Areas
In this section are organized all the lasso areas and exclusion zones included in the area layer. This section will be visible after adding at least one New Lasso Area to the stack.
The lasso areas work together to generate the biome inside the user created areas on the map. They are read from top to bottom when generate button is pressed. - Add New Lasso Area
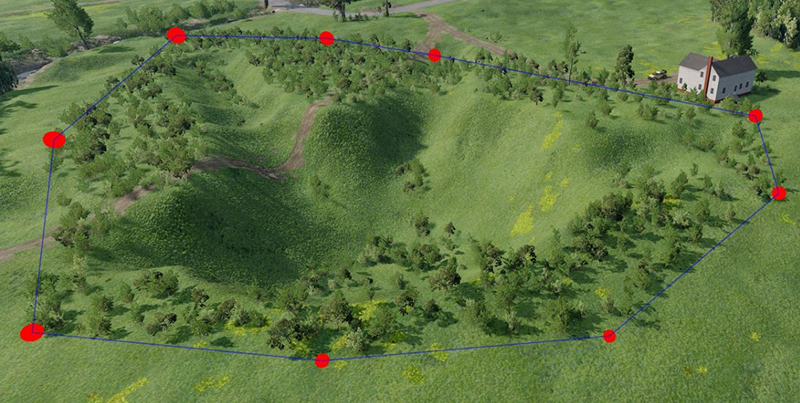
The button is visible only when New Area Layer button is pressed. It adds a new area on top of the stack.When pressing Add New Lasso Area button user is prompted to draw a lasso area on the map.
The lasso area is considered created when the first and last node are connected.
The color code of the added lasso area is blue.
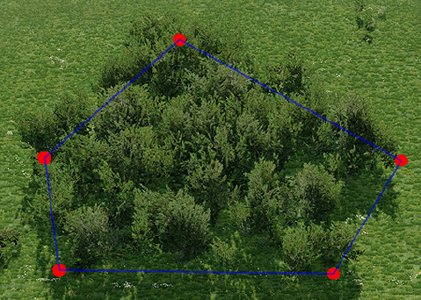 Lasso area can’t be left open. User needs to close it or press Esc to cancel the action
 - Add Exclusion Zone
The button is visible only when New Area Layer button is pressed. It adds an exclusion zone on top of the Lasso Areas stack. It acts on all the layers, no matter the position in the stack, by keep the added exclusion area free from any forest item placement.Like the Add New Lasso Area, the Add Exclusion Zone button asks the user to draw a lasso area when pressed.
The color code of the added exclusion zone is red.
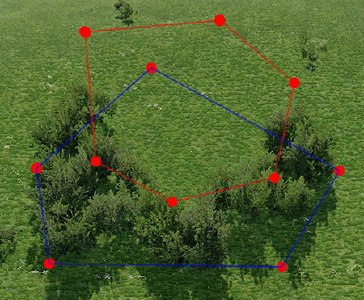 Left click on one of the Lasso Area in the stack makes the viewport area blinking so user is aware about which area is which.
Layer Properties
See the layer properties section of the Level Biome.
It doesn’t differ from the Level Biome toolbar apart from the simplest approach to layers setup. Mask controls are not available here.
Place Field
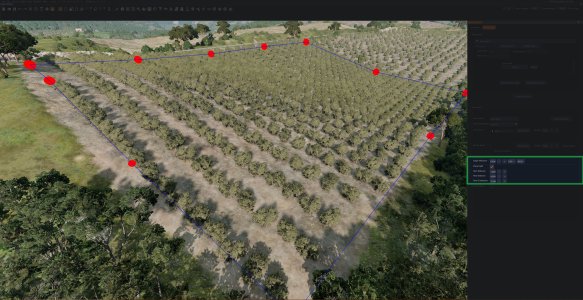
Place field is a toggle, available only for Biome Areas, that allows user to organize forest objects in a field-like disposition (rows) using the new values unlocked with the active toggle.
- Create a Lasso area
- Select a Layer brush to use
- Density is not influencing the placement using the Place Field toggle
- Setup the values
- Press Generate Layer button to spawn the field
- Item Distance
Defines the distance between a forest object and the next in a row - Row Distance
Defines the distance between rows - Row Orientation
Defines the orientation of the placed field in degrees based on world position
Place Edges
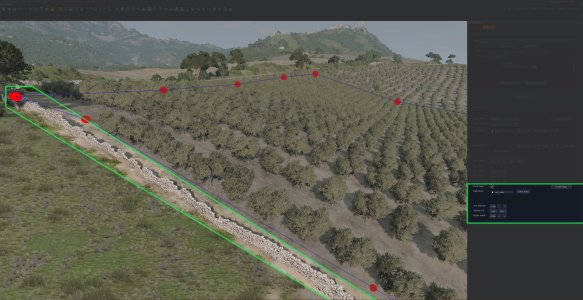
Place Edges is a toggle that allows user to organize forest objects on edges, controlled by a mask for Level Biome tab and Lasso area limits for Biome Areas tab and setup with the new values unlocked with the active toggle.
Place Edges Workflow
The workflow is the same for both the Level Biome and Biome Areas with some specifications for the Level Biome
- Toggle Place Edges
- Select an Edge Brush
- Level Biome specific
- Selecting a Layer Material will act on the whole mask used for that terrain material
- Selecting a Layer Mask takes priority over Layer Material
This can be a time and memory intensive action for lower spec systems
- Biome Areas specific
- The border is directly defined by the Lasso area created by the user
- Setup the parameters
- Press Create Edges button
- Item Distance
Defines the distance between a forest object and the next - Random Tilt
Random tilting of the forest objects placed expressed in a range. Can be negative or positive - Border Falloff
This determine the position of the elements along a border side. Can be positive or negative
Save option
Current version of Biome tool saves the section along with the map.
When working on a map using the Biome tool features user can press CTRL + S or go to File > Save Level to save the actual state of work. A folder named /biomeTool will be created inside the actual user level.
Biome section will be saved along with all the other changes on the map.
If the user returns to the map the work done with Biome will be resumed from the last changes. All the layers created will still be there.
Troubleshooting
- The actual Biome tool version has already all the main functions. Still, the tool is not complete and more features will be added in the next versions
- The tool was tested and proved to be stable, but there can still be bugs, so we can’t assure the total functionality
- Once lasso areas are created, nodes drag is not available to reshape the area but it’s a feature that will be implemented as soon as possible
- Mid-spec pcs may suffer from slowdowns when a lot of layers are created
The following features are in our to do list:
- Procedural layer noise mask generation
- Regenerate all layers button
- Open and Save project buttons
- Hide and Duplicate layers button
- Multiple layer brush selection
- Layers reordering
- and more…
Was this article helpful?
