Decal Road Editor
Basics
The Decal Road Editor allows to create and edit Decal Road.
A Decal Road (also previously known as decalsroad) is a strip-shaped decal defined by a 2D spline. This strip is projected onto the terrain, similarly to how decals are projected on collision meshes. These are used widely in BeamNG.drive to visually represent roads, off-road paths, etc. and therefore do not provide any sort of collision geometry (like decals).
The Inspector window is required to adjust various properties of a decal road.
Adding and Editing Decal Roads
When selecting this edit mode, two options will appear below the main toolbar:
- Default Width: The width of the decal road
- Only AI Roads: If enabled, only decal roads used for AI route mapping (with drivability value set) can be selected
These values will be the initial values for any new decal road that will be created.

Creating a Decal Road
Add a new decal road with these steps:
- Press ALT and then hover the cursor on the viewport to display a preview of the first node.
- While holding ALT click the Left Mouse Button to create the node.
- Repeat step #2 until to create the other nodes.
- When done, release ALT to finalize the decal road.
- New decal roads may appear invisible until a Material is assigned to it through the Inspector
Editing a Decal Road
To edit an existing decal road:
- Select the decal road by clicking on it. Selected decal road will display a white outline/wireframe and its nodes will be shown as red spheres.
- Click on a sphere to select a node, then use the gizmo to translate or scale the node as needed. Press Delete to remove the node.
- Hold ALT to create new nodes. Use this to either add new nodes inbetween existing ones, or to extend the decal road.
- Decal roads will be extended from their last node. To extend a decal road from the first node, make sure to select that node first.
- Press Delete when the entire decal road is selected to remove it entirely.
- It is possible to copy & paste properties from one decal road to another by simply selecting each and respectively pressing CTRL+C and CTRL+V
Inspector Window
When a Decal Road is selected, several of its options are displayed in the Inspector window
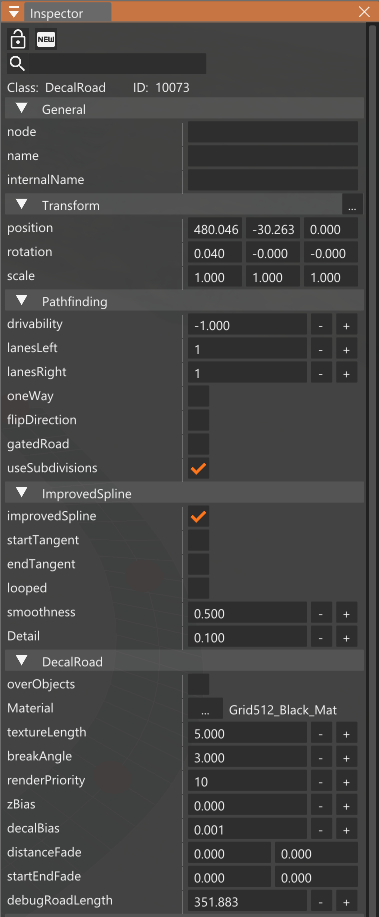 Inspector when a decal road is selected
The Pathfinding panel contains settings related to AI route mapping:
Other relevant properties are:
Distance/Range from the camera at which the decal road will fade out.
e.g. 100-50 means the decal road will start to fade when the camera is 100m away from it, with a 50m range for the fading effect
Was this article helpful?
