Forest Editor
Basics
The Forest Editor is a tool that allows you to quickly create massive amounts of vegetation for your level, including patches of trees, forests, and plants’ fields, but can virtually be applied to type of mesh that needs to be duplicated several time onto the level. Entire forests can be laid down using simple techniques similar to painting on a canvas, where your brushes place down 3D models on the terrain.
The Inspector window is required to adjust various properties of the forest items.
When entering this edit mode, some options will appear below the main toolbar:
- Select Item: If enabled, forest items can be selected individually. You can manipulate them like a standard object.
- Paint: Place forest items by painting them on the terrain
- Erase: Paint over forest items to erase them
- Erase Selected: Erase only selected items. Useful to isolate only certain items
- Snap to Terrain: Paint over already placed forest items to snap them down to the terrain. Useful if placed forest items are floating
- Size: Diameter of the brush
- Density: How many items are placed when painting
These values will be the initial values for any new decal road that will be created.
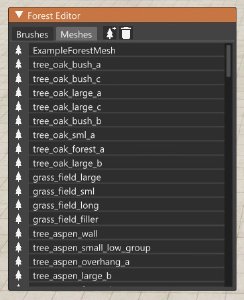
Additionally you will see a Forest Editor window. From here you can manage everything about Brushes and Meshes.
Meshes
These are the main element of the Forest system. A forest mesh defines the single element (e.g. a single tree, bush, etc). To create a new forest mesh, simply click the Add New Mesh button in the Forest Editor window.
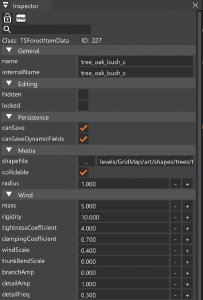
All the properties of a forest mesh are shown in the Inspector window when one is selected.
 Inspector window when a forest mesh is selected
The relevant options are:
.dae mesh fileBrushes
A Brush is what you use to paint your forest items onto the terrain. It can contain one or more meshes. A brush made of a single mesh is called a Brush Entity. A brush composed by multiple meshes is called Brush Group.
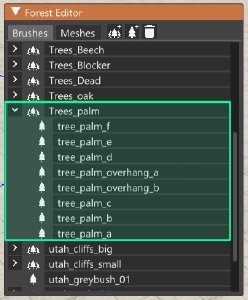
In the sample below, Tress_palm is a Brush Group that contains 8 bBrush entities.
 Example of a brush group
When painting, it is both possible to select the brush group (e.g. select Trees_palm), or just a brush element (e.g. select one of the meshes that the brush group is made of).
To create a new brush group, click the relative button in the Forest Editor window.
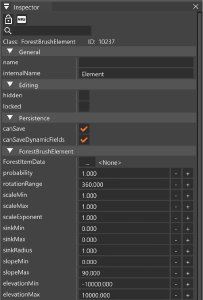
The new group will appear at the bottom of the list by default. The group will be empty, until a brush entity is added to it (by clicking the relative button). The Inspector will display all the properties of the selected brush entity.
 Inspector when a brush entity is selected
The main properties are:
Both Meshes and Brushes are tied to the level they are being edited on.
- Meshes are usually defined in the
<currentLevel>/art/forest/managedItemData.csfile. - Brushes are stored in
main.forestbrushes.jsonfiles.
Manual editing of these files is not recommended.
Was this article helpful?


