Tool Window
The main tool window of Road Architect (shown below) serves as the gateway to all editing features and sub-windows within the tool. We recommend docking the tool window to either the left or right side of the world editor. This page provides a high-level overview of the main tool window and its features.
Main Control Panel
The main control panel is found at the top of the window and contains a row of buttons.
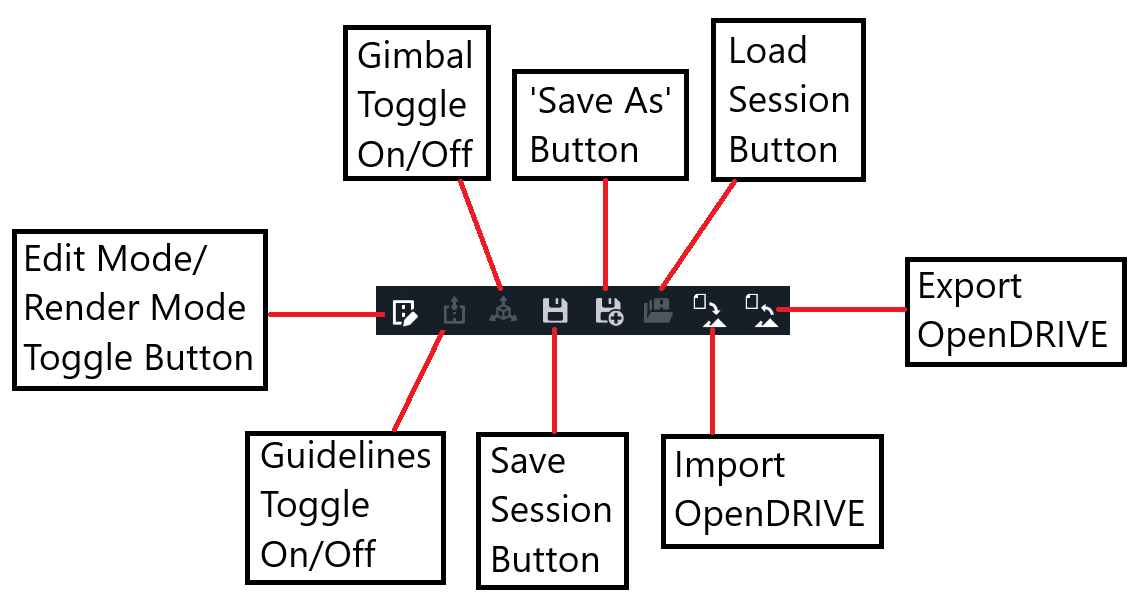
State Toggle: Switches the tool between Edit Mode and Render Mode. In Edit Mode, users can modify roads without seeing them in their finalized state. In Render Mode, all roads are shown in their finalized state, but editing is disabled, effectively locking the tool.
Guidelines Toggle: Turns measurement guidelines on or off. In Edit Mode, these guidelines appear as straight lines extending from the start and end of roads. Where they intersect with the selected road, spheres appear at the intersection points, along with measurements (in meters and degrees) for distance and angle. This feature is useful for aligning roads and junctions with precise spacing.
Gimbal Toggle: Toggles the translation gimbal on or off. The ALT key can also be used as a shortcut for this feature.
Save Session: Opens a file dialog to save the current session, including all roads, junctions, groups, and terrain.
Load Session: Opens a file dialog to load a previously saved session file into BeamNG.
Import (BeamNG.tech only): Opens a file dialog to import an OpenDRIVE (.xodr) file into BeamNG, where the roads are available as Road Architect primitives.
Export (BeamNG.tech only): Opens a file dialog to export the current session’s road network to an OpenDRIVE (.xodr) file, which can be used with OpenDRIVE-supporting third-party software.
Tab Bar
Directly below the main control panel, there are three tabs: Roads, Junctions, and Groups. The selected tab determines what appears in the rest of the tool window below it.

Roads Tab:
This tab is used for creating and editing roads, bridges, and overlays. It contains the Roads List and its associated button bar. Below this, if a road is selected, you’ll find the Nodes List and its button bar. Following these are collapsible headers with various road-specific controls, which apply to the selected road. Detailed information on road editing can be found here .
Junctions Tab:
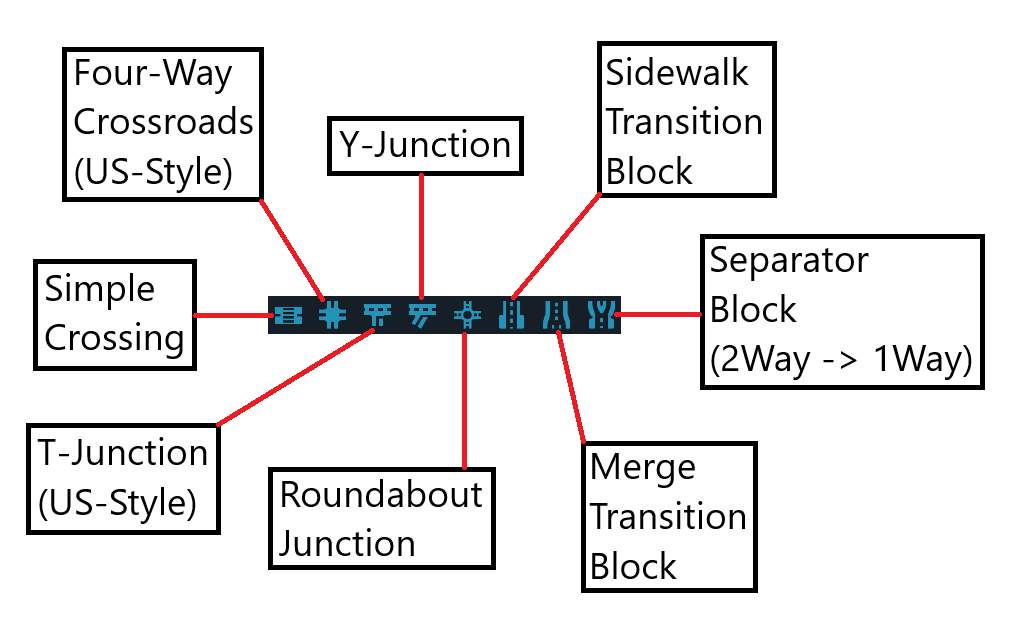
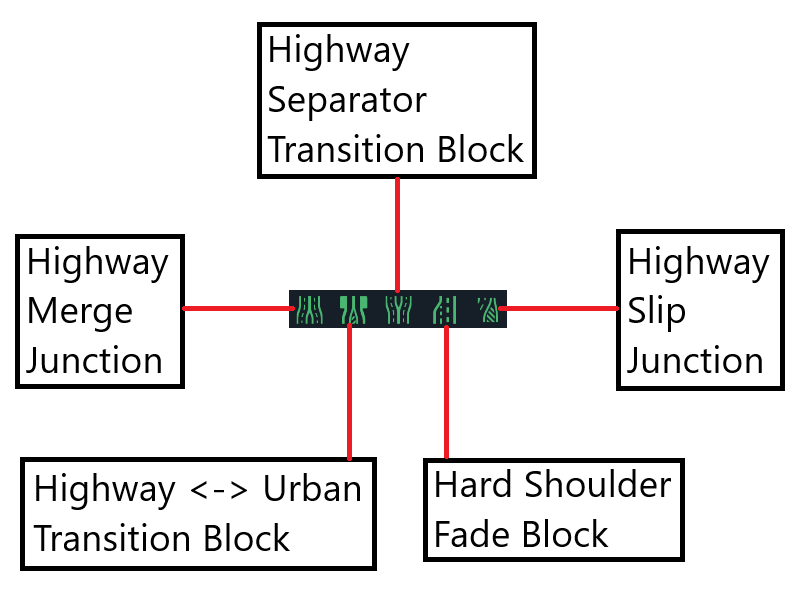
This tab is for designing new junctions. It contains the Junctions List, showing all junctions currently in edit mode (not finalized). Below this, if a junction is selected, are two rows of buttons with different junction types: urban-type junctions on the top row and highway-type junctions on the bottom row. Further down are sections to control the properties of the selected junction, which vary depending on the junction type. More details on junction editing are available here .
Groups Tab:
This tab is for switching between and creating groups. It contains the Groups List, showing all groups currently in the session, either created by the user or placed from a template. Below this are two buttons:
Group Templates Window: Opens a window where you can select and place a preset group or a previously saved group onto the map.
Create Group Mode: Allows you to draw a polygon around a region to collect roads inside it and create a new group.
If a group is selected, an additional collapsible header appears, providing controls for terraforming the terrain to the selected group. More information on group editing can be found here .
Junctions List [And Junction Button Bars]
In the Junctions tab, the Junctions List is located at the top, as shown in the image below.
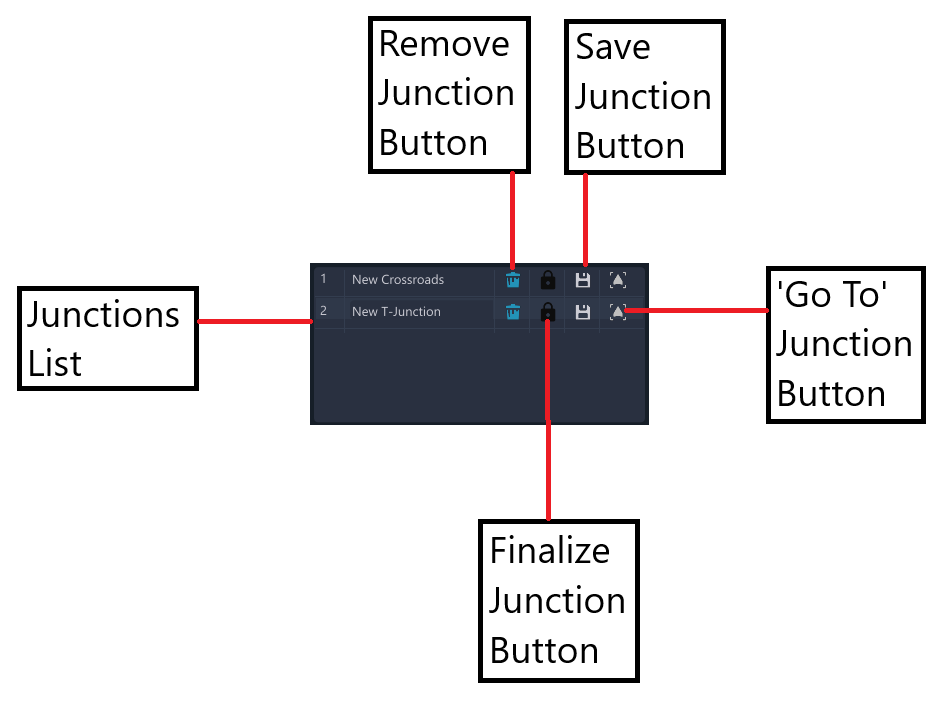
Below the Junctions List, there are two rows of buttons: the first row contains junctions for urban and rural roads, while the second row contains junctions for highways. Pressing any of these buttons will create a junction that can be placed and edited using the mouse. These buttons are detailed in the images below.
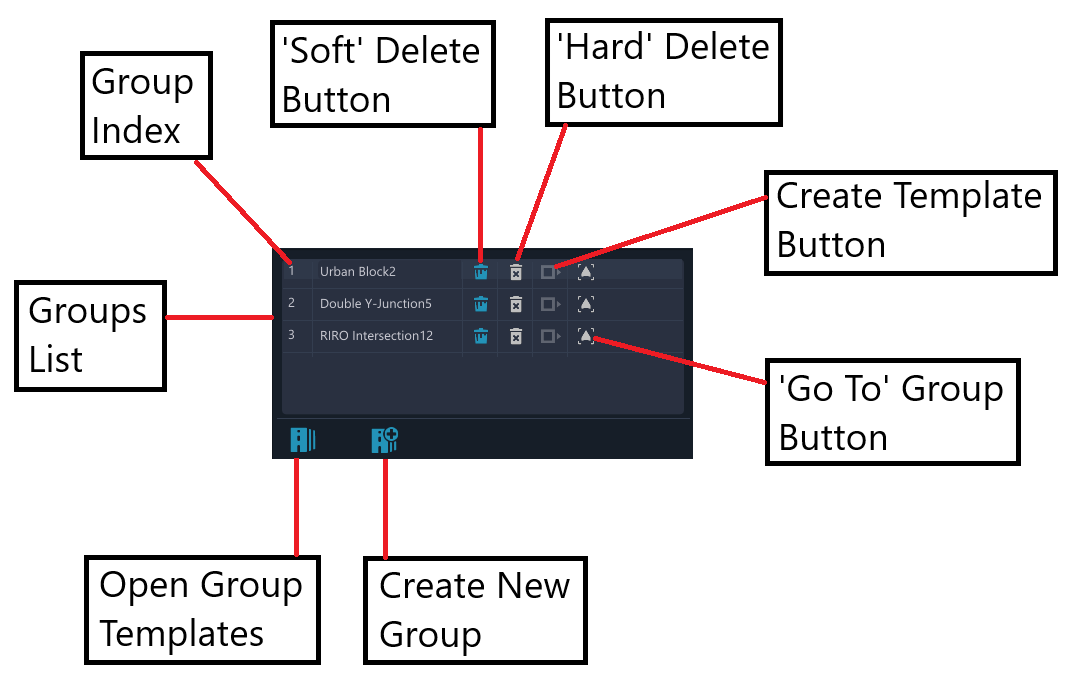
Groups List [And Group Button Bar]
In the Groups tab, the Groups List is located at the top, as shown in the image below.
Was this article helpful?
