Vehicle Groups Manager
The Vehicle Groups Manager can be used to create, spawn, and save custom vehicle groups. It can be found under Windows > Gameplay in the World Editor. Vehicle groups can be used for traffic, races, missions, and anything else you can think of. This editor uses the Multispawn system for spawning the vehicles all at once, which you can learn about later in this guide.
Here is what the editor looks like when you open it:
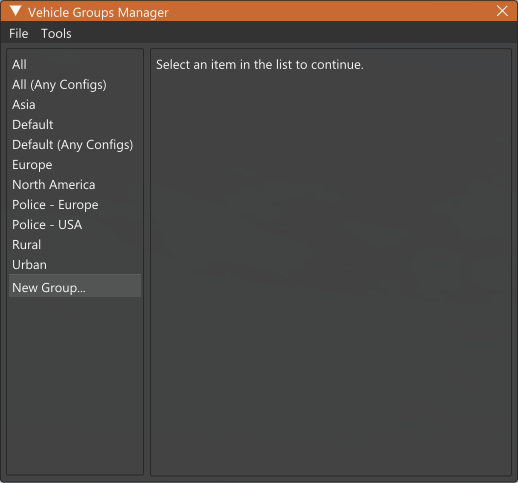
Overview
In the left panel, you can see the named vehicle groups, sorted alphabetically. Click on a name to select and load the vehicle group.
In the right panel, the currently selected vehicle group is displayed. There are two sections: Edit Group, and Spawn Group. When you create or edit a vehicle group, you can change the group name, type, vehicle models, vehicle configs, and vehicle paints. If you want to spawn the vehicle group in the world, you can change the spawn mode, spacing, order, and amount.
In the menu bar, under File, you can save all of the vehicle groups at once by selecting Save All Groups. The combined data gets saved in <user folder>/settings/editor/vehicleGroups.json . Additionally, you can Import or Export individual vehicle group files. The Export option is useful if you want to use a vehicle group for a race, mission, flowgraph, and other cases.
Also in the menu bar, under Tools, you can duplicate the current group by doing Duplicate Group, and you can overwrite the current group with existing vehicles from the map by doing Set Scene Vehicles to Group.
Group Editing
The next part instructs how to create, edit, and save a new vehicle group.
-
Click on New Group… in the left panel. You may need to scroll down.
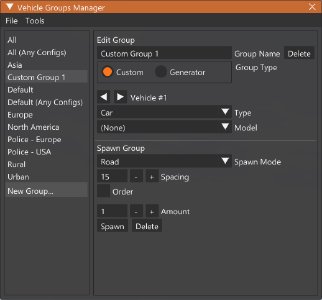
-
New vehicle group data will show up in the right panel. You can give the group a new name, and change the group type. For this part, the type Custom will be used; Generator is advanced and will be explained later.
-
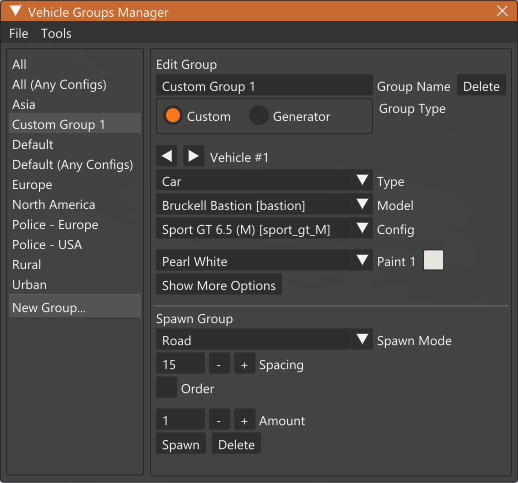
The left and right triangle arrows can be used to select the vehicle slot. A vehicle group can contain any amount of vehicle slots; in other words, this is the group size or amount of entries. At this moment, you can set the first vehicle’s model, config, and paint to whatever you want.

-
Set more vehicles by clicking on the right arrow and filling in the next slot. When you are done, you can review each vehicle by clicking the left and right arrows.

-
When you are fully done, go to the top menu bar of this editor, and click on File > Save All Groups. Your custom vehicle group is now saved! You can also export it as a single file if you need to by selecting File > Export….
Group Spawning
This part is easy; you can spawn any currently selected vehicle group, if a level is loaded.
-
Set the spawn options. The spawn mode is the spawning algorithm that the Multispawn system will use to place the vehicles. Some modes require a valid road to exist at the current camera position. The spacing is the distance between each vehicle spawn point, in metres. The order can be turned on if you want to spawn the vehicles in the same order as the editor, or it can be turned off for randomization.
-
Set the spawn amount. Keep in mind that high values (for example, above 20) will cause a long loading time and a heavy performance impact.
-
Click the Spawn button. You can also Delete spawned vehicles.
Advanced
This section is advanced, and not used commonly. Here is some info about the group type, Generator:
The generator group type saves some parameters to the vehicle group instead of predefined models and configs. When this group is spawned, it processes the parameters and outputs vehicle models and configs that fit the specifications. This is generally used to give out different traffic vehicles every time the spawning is called.
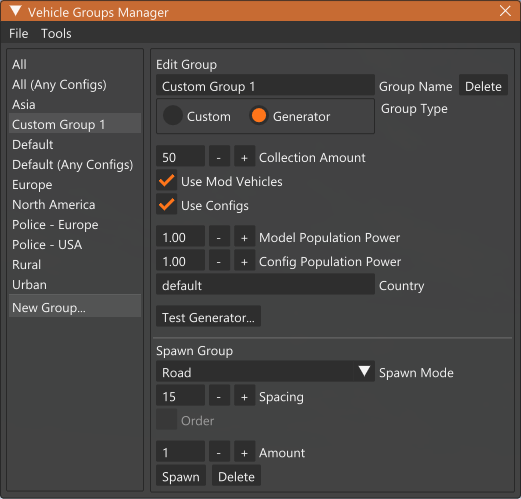
The collection amount is the total number of slots that will get filled with vehicle data. It’s not like the spawn amount, so you can set this to a high number if you want a diverse output of vehicles.
The Use Mod Vehicles and Use Configs options do as they say. Selecting the configs option will enable all of the configs of any vehicle model; otherwise, only the default config will be used when spawning the group.
The Model Population Power and Config Population Power values are exponents that get applied to the vehicle population values (which can be found in the vehicle info files). Set these values above 1 to increase the probability bias of vehicles with a higher population value, or set these values below 1 to normalize the probability, which means that vehicles will get selected more equally. Set it to 0 to ignore population values.
The country field can be used to apply a probability bias for vehicle models from the given country.
Click the Test Generator… button to generate some random results! In the pop-up window, you can click on Generate Group again and again to see what vehicles would be generated.
Was this article helpful?
