Blender and Substance Painter Workflow
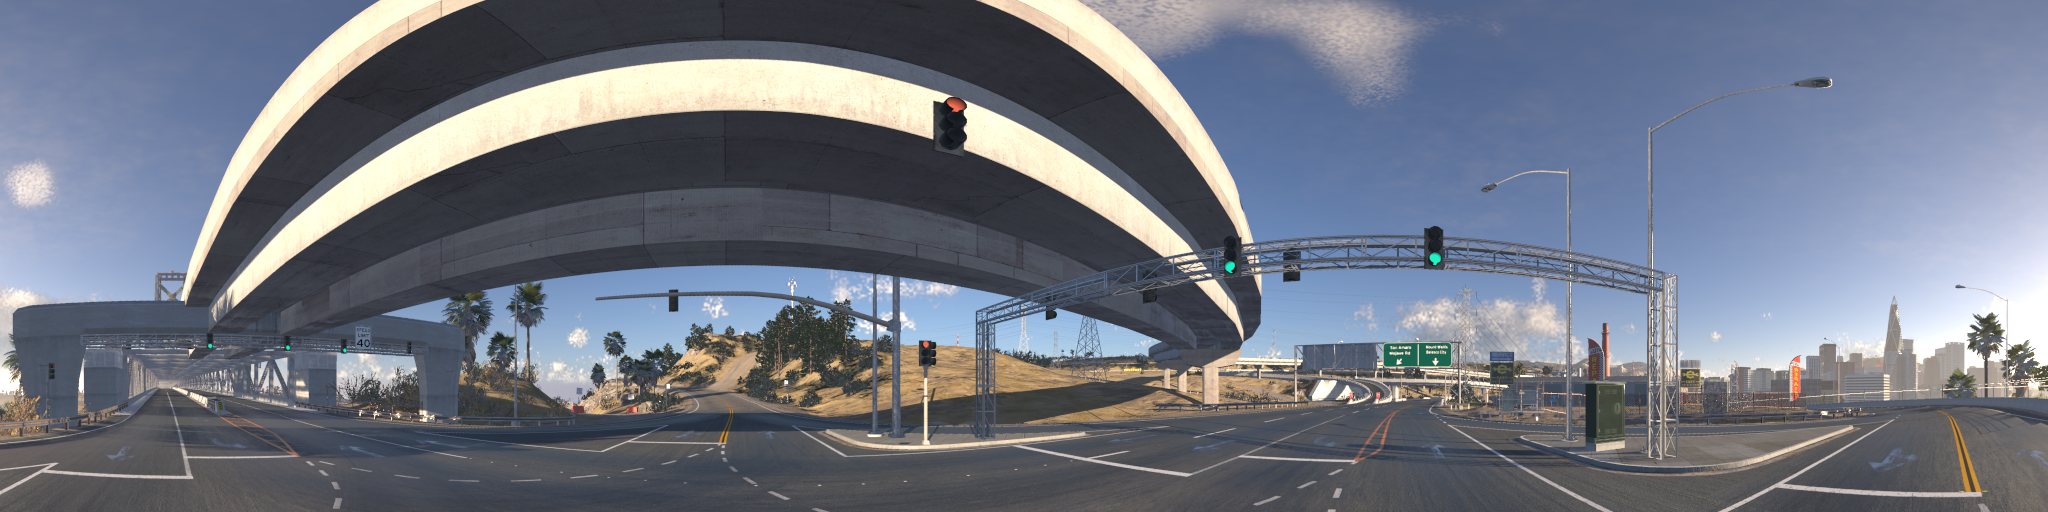
This page collects plugins and addons for creating BeamNG content and materials in Blender, Substance 3D Painter, and Substance 3D Designer. The goal is to make external tools match the game lighting pipeline as close as possible, so materials, emissives, and light values are not tuned against a different renderer by accident.
The files attached to this page are intended for art validation. They do not replace checking the final result in BeamNG.drive, but they make the first pass much closer to the game.
Downloads
The workflow uses these support files:
- BeamNG Light Validation Blender add-on
- GT7 tone mapping add-on for Blender
- GT7 tone mapping OpenColorIO configuration for Substance Painter and Designer
- BeamNG environment map (HDRI) pack for Blender and Substance Painter
The environment map pack contains 360 degree HDR captures from BeamNG.drive. These maps let Blender and Substance Painter use lighting captured directly from the game instead of a generic studio HDRI.
Why use this workflow
BeamNG uses physically based lighting, auto exposure, HDR rendering, and GT7 tone mapping. If materials are authored only under a default Blender or Substance Painter studio light, they can look correct in the authoring tool but too bright, too dark, too saturated, or too reflective in game.
Using BeamNG support files helps with:
- Previewing materials under lighting captured from BeamNG levels at various lighting conditions
- Checking roughness, metallic, clear coat, glass, and paint response with game reflections
- Validating emissive materials with nits instead of arbitrary color values
- Previewing point and spot light values with BeamNG units
- Reducing last minute retuning after importing assets into the game
This is especially useful for vehicles, buildings, road props, light fixtures, interiors, and any asset that depends on reflective or emissive materials.
Environment maps
The BeamNG environment maps are HDR captures of in-game lighting. They are meant to be used as the world/environment lighting source in Blender or as the environment in Substance Painter.
Use them when you want to:
- Match the brightness and color of BeamNG lighting
- Check material response against real game sky, sun, clouds, and ambient lighting
- Preview reflections using scenery that resembles the final game environment
- Compare assets across several time-of-day or weather captures
Do not use these maps as final game cubemaps for a level. They are authoring references for external tools. Final in-game reflections should still be configured with BeamNG cubemaps, environment maps, dynamic reflections, and the level lighting setup.
Reference EXR exposure values
| Environment map | Exposure |
|---|---|
west_coast_dusk_world.exr |
5 EV |
west_coast_afternoon_world.exr |
2.7 EV |
west_coast_default_world.exr |
1.3 EV |
west_coast_night_world.exr |
5 EV |
west_coast_overcast_world.exr |
1.5 EV |
Blender environment setup
In Blender:
- Open Material Preview mode.
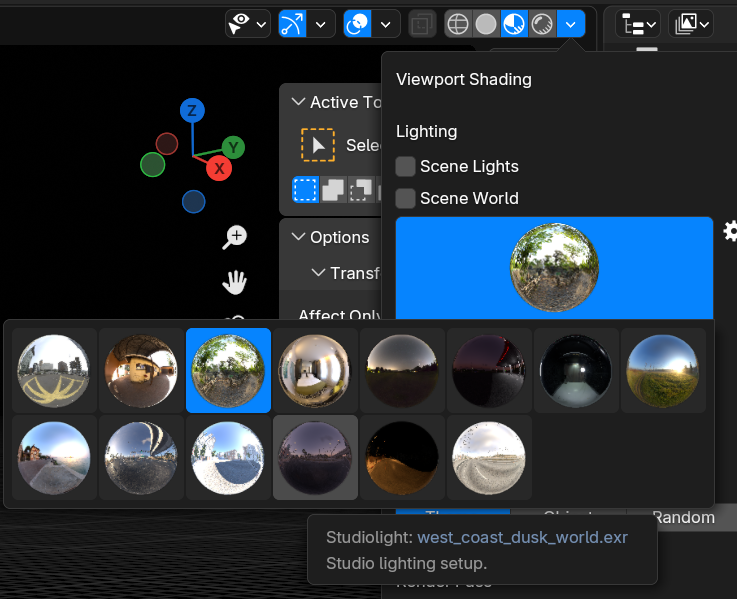
- Open the viewport shading settings from the arrow next to the material preview icon.
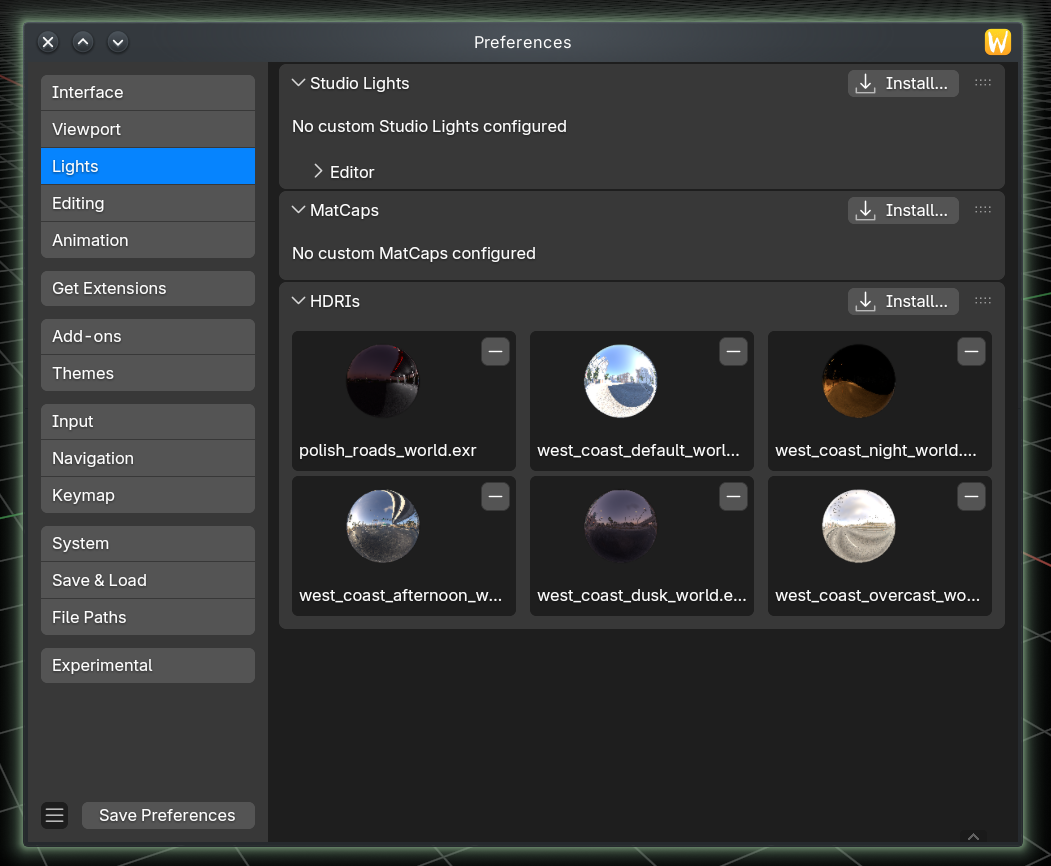
- In the HDRI selector, choose Open Preferences….
- In next menu press Install.

- Select the BeamNG HDR environment maps.
- Select the installed BeamNG HDRI in the previous selector.

- Use scene-referred lighting and avoid adding extra studio lights unless the asset needs a specific inspection setup.
- Check the material from several angles, especially for roughness, metallic, clear coat, and glass.
As an optional setup for rendered scenes:
- Open the World properties.
- Set Color to Environment Texture.
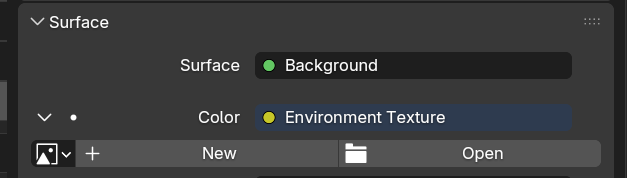
- Load one of the BeamNG HDR environment maps.
- Use rendered view to check the asset with that environment map.
The environment map gives a better preview of how the asset reacts to BeamNG-like lighting, but it is still a static capture. Dynamic changes such as auto exposure, local exposure, weather, time of day, and nearby geometry must still be checked in game.
Substance Painter environment setup
In Substance Painter:
- Open File > Import Resources.
- Choose Add Resources and select the BeamNG
.exrenvironment maps. - Set the resource type of each map to Environment.
- Choose whether to import the resources into the current project or your library, then select Import.

- Open Display Settings and select a BeamNG map under Environment Settings > Environment Map.
- Adjust the environment rotation as needed, but keep its exposure unchanged when comparing materials.

- Use the environment while authoring base color, roughness, metallic, normal, and emissive textures.
- Test the same material under more than one BeamNG environment map before final export.
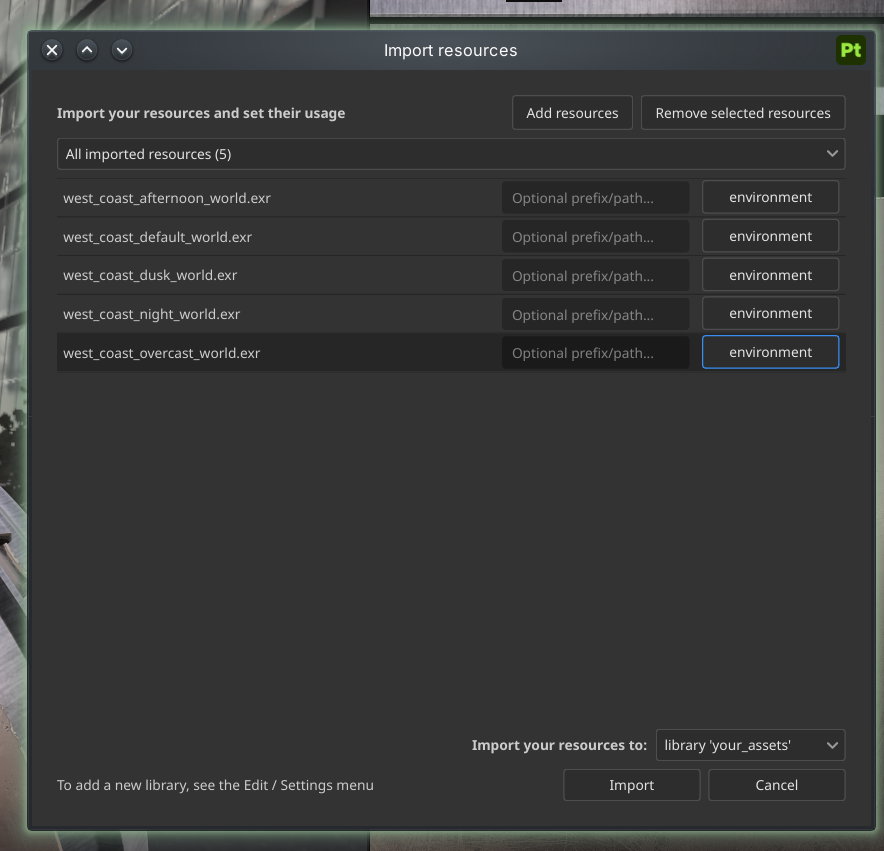
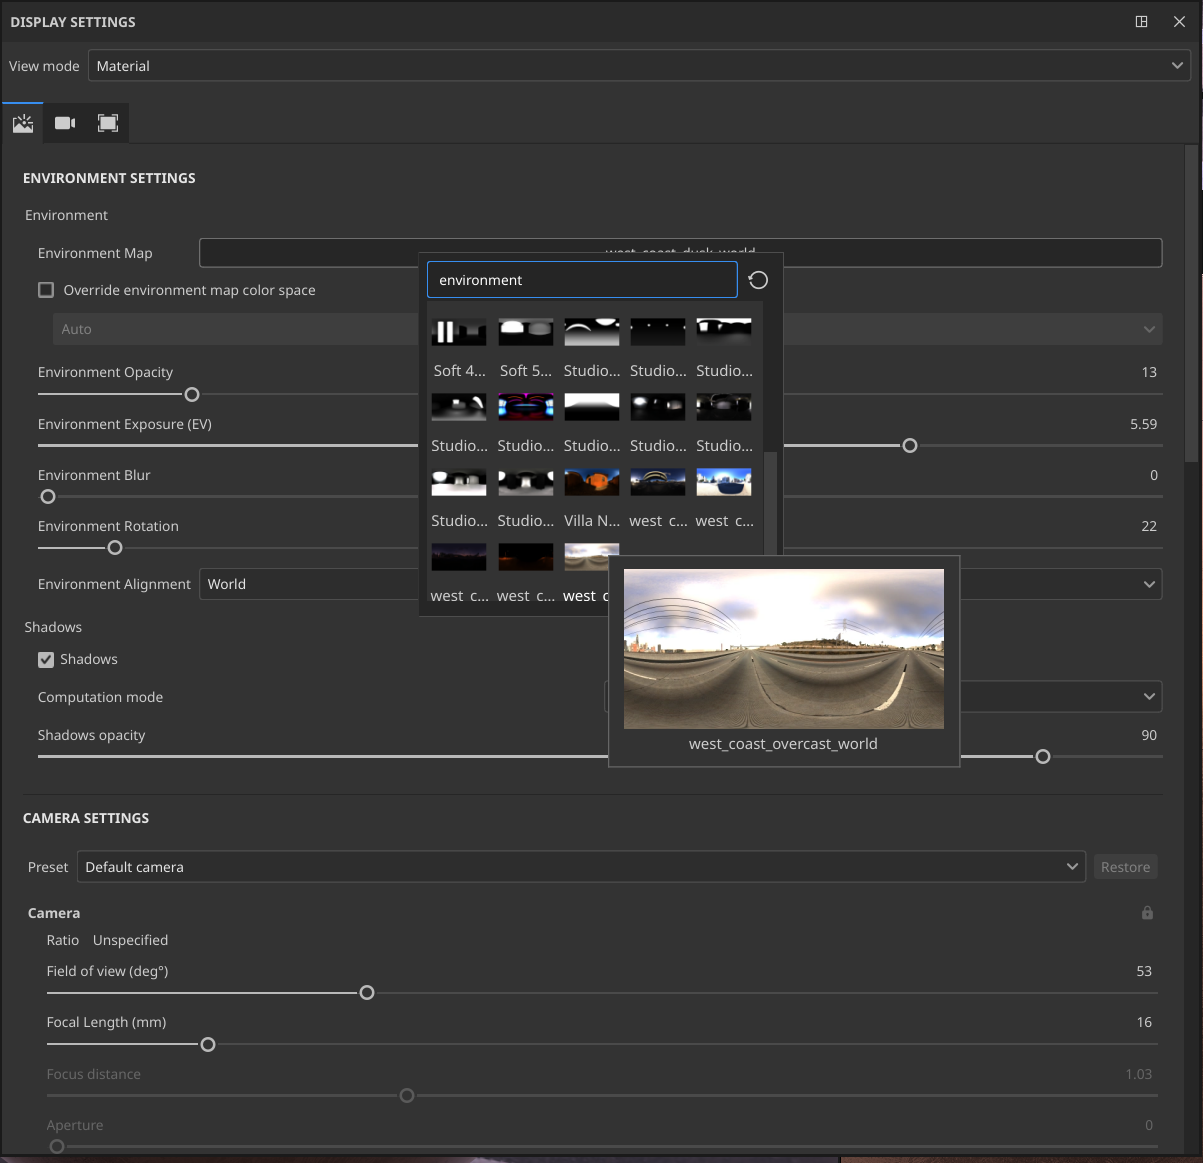
Avoid tuning the base color or roughness to look good under only one HDR map. The material should remain believable under daylight, overcast, dusk, night, and interior conditions.
Substance Designer environment setup
In Substance 3D Designer:
- Drag a BeamNG
.exrenvironment map into a package in the Explorer window. - Select Link when prompted.
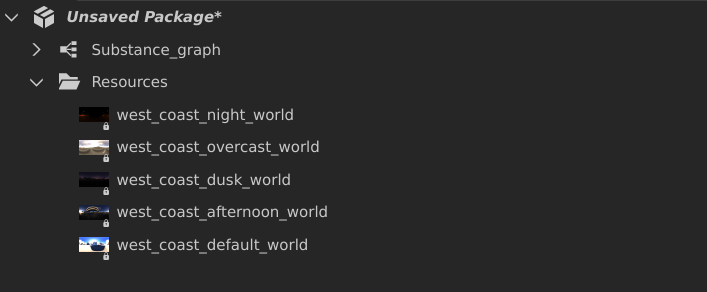
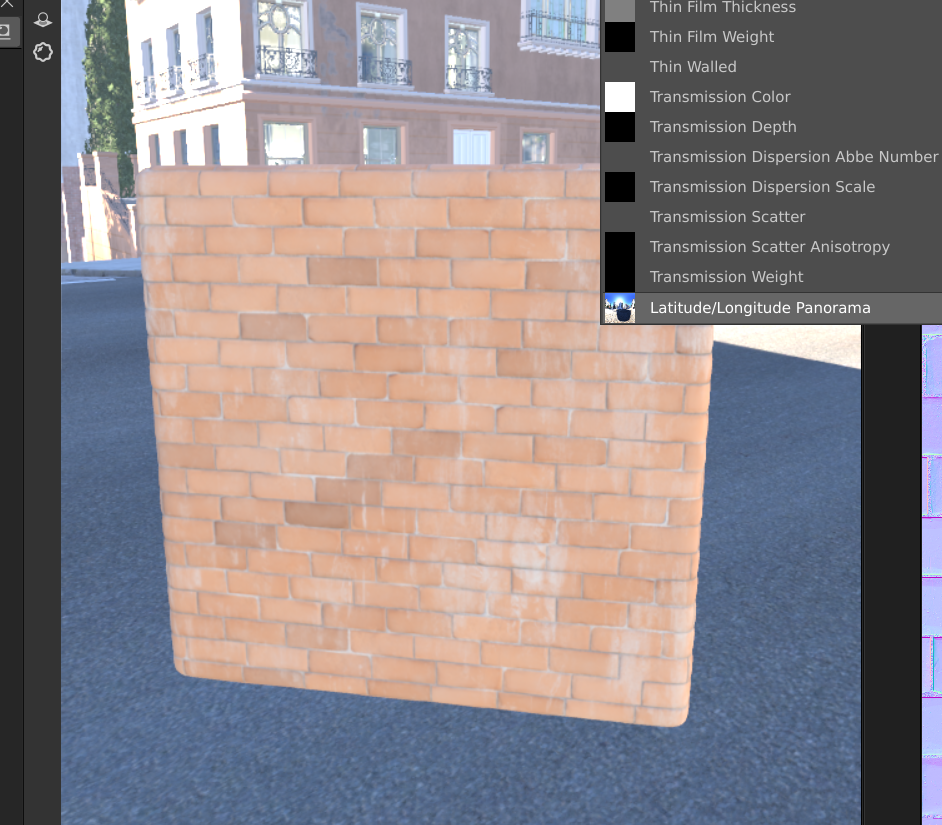
- Drag the linked resource from the Explorer into the 3D view.
- Select Latitude/Longitude Panorama as the target.

- Open the 3D view’s Environment menu and select Edit properties to adjust its rotation.
- Keep the environment exposure unchanged when comparing materials.
Blender light validation add-on
The BeamNG Light Validation add-on adds BeamNG lighting controls to Blender. It is useful when you want a Blender preview that uses the same values you will enter in BeamNG.
The add-on supports Blender 4.5 LTS to 5.2 LTS.
It supports:
- BeamNG
PointLightvalues in lumens - BeamNG
SpotLightvalues in candela - Radius and range controls in meters
- Kelvin color temperature conversion
- Light cookies
- Emissive material values with
emissiveFactorandemissiveIntensityNits - Copying light and emissive values as JSON for easier transfer
Installing the add-on
To install:
- Download
beamng_light_validation.py. - In Blender, open Edit > Preferences > Add-ons.
- Choose Install… and select the Python file.
- Enable BeamNG Light Validation.
- Open the BeamNG tab in the 3D View sidebar, or use BeamNG tab directly in light objects.
The add-on also adds BeamNG panels to supported Blender light and material data properties.
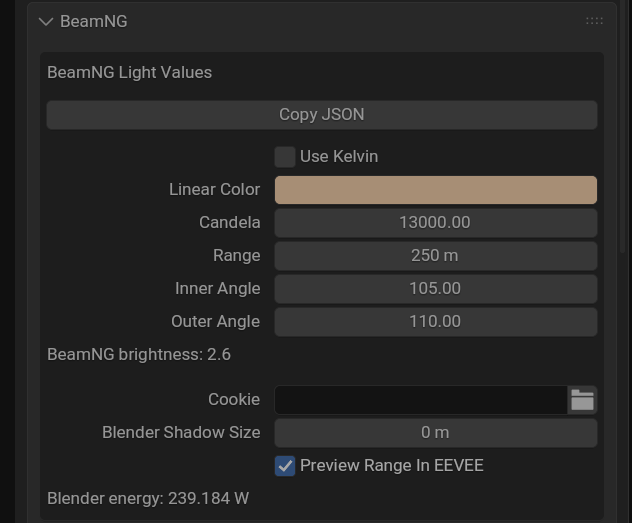
Using light values
Create or select a point or spot light, then enter values using the BeamNG panel:
- Use Lumens for point lights.
- Use Candela for spot lights.
- Use Radius or Range as attenuation distance.
- Use Kelvin when matching real light temperature.
- Use the cookie field when checking a spot light texture.
The add-on converts these values for Blender preview. The final light should still be checked in BeamNG with the target exposure, tone mapping, shadow quality, and surrounding scene.
Using emissive values
For emissive materials, use the BeamNG emissive panel:
- Set
emissiveFactoras the color multiplier. - Enable nits when the material should use
emissiveIntensityNits. - Keep texture values in a normal SDR range and use nits for brightness.
- Use real lights for illumination; emissive materials should mainly describe visible glowing surfaces.
This matches the BeamNG material workflow more closely than pushing overbright texture colors in Blender or Substance Painter.
GT7 tone mapping in Blender
BeamNG uses a GT7 tone mapper in the current lighting pipeline. The Blender GT7 tone mapping add-on adds matching color management views so highlights, emissives, and saturated bright colors behave closer to the game preview.
The add-on supports Blender 4.5 LTS to 5.2 LTS. For versions 5.x HDR output is supported.
Use it when:
- Checking high brightness emissives
- Validating vehicle paint and glossy materials
- Comparing SDR and HDR preview behavior
- Reviewing assets under strong sunlight or night lighting
Installing the add-on
To install:
- Download
gt7_tonemapping_manager.zip. - In Blender, open Edit > Preferences > Get Extensions.
- Open the menu and select Install from Disk….
- Select the zip file.
- Enable GT7 Tonemapping plugin.
- Restart Blender.
After Blender restarts, select the GT7 view transform from Blender’s color management settings.
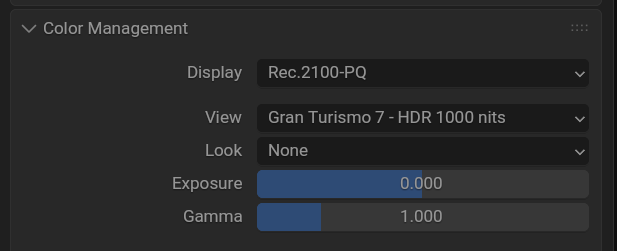 Gran Turismo 7 HDR Tonemapper enabled in Blender
GT7 tone mapping in Substance Painter
OpenColorIO configuration for previewing the GT7 SDR tone mapper in Substance 3D Painter. It applies the tone mapping to the complete viewport, including the model and HDRI background, without changing exported material textures.
To enable it for a Painter project:
- Download and extract
gt7_tonemapping_substance.zip. Keep theociodirectory and itslutssubdirectory together. - Open the project in Substance 3D Painter.
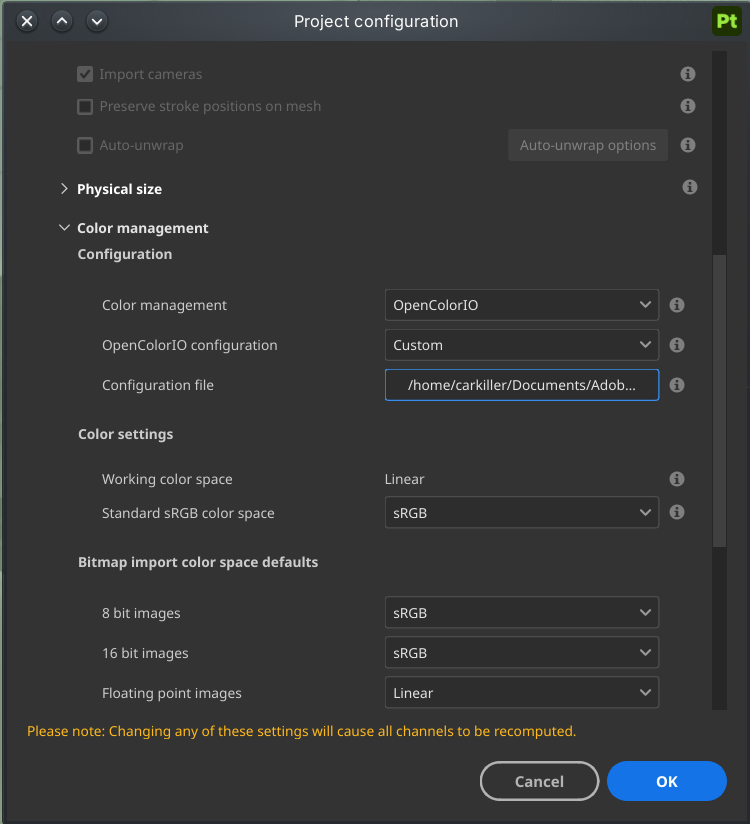
- Open Edit > Project Configuration.
- Set Color Management to OpenColorIO.
- Set the OpenColorIO configuration to Custom.
- Select the extracted
ocio/config.ocio.
- Confirm the project configuration changes.
- Select GT7 SDR from the display-transform dropdown in the 3D viewport.

- Open Display Settings > Post Effects and disable Tone Mapping.

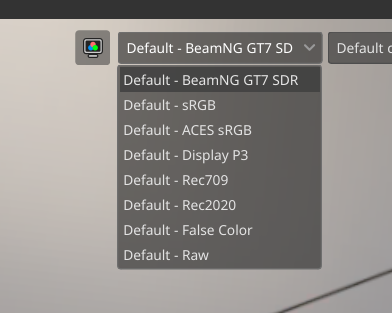
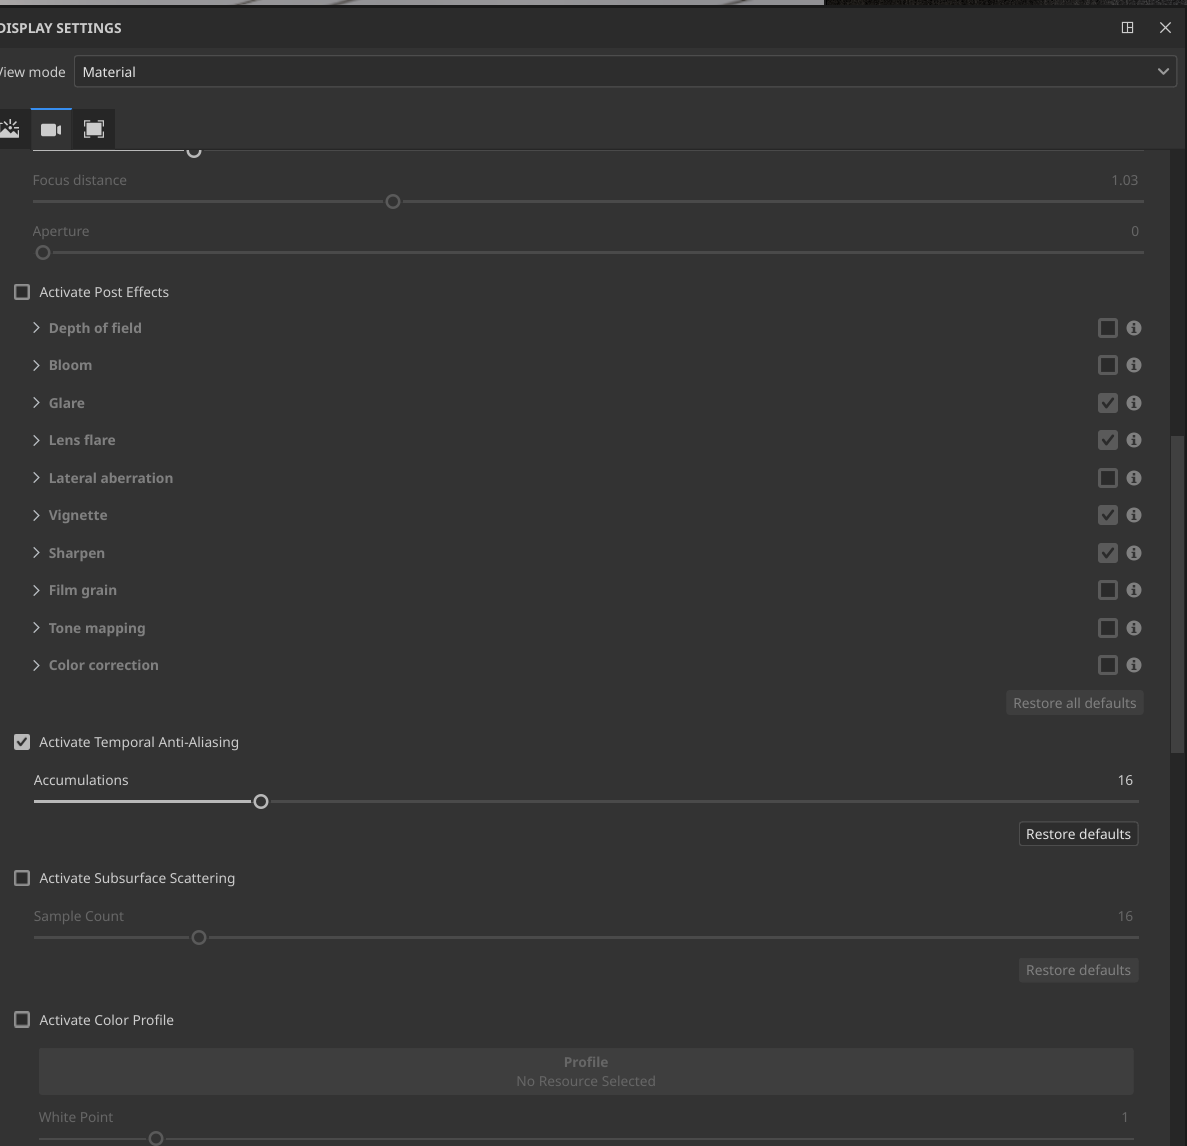
Use Painter’s normal material shader, such as ASM Metal Rough. Keep Substance Painter’s post-effect tone mapping disabled and disable any additional Color Profile LUT to avoid applying tone mapping twice.
GT7 tone mapping in Substance Designer
The same OpenColorIO configuration can be used for the 2D and 3D views in Substance 3D Designer.
To enable it:
- Download and extract
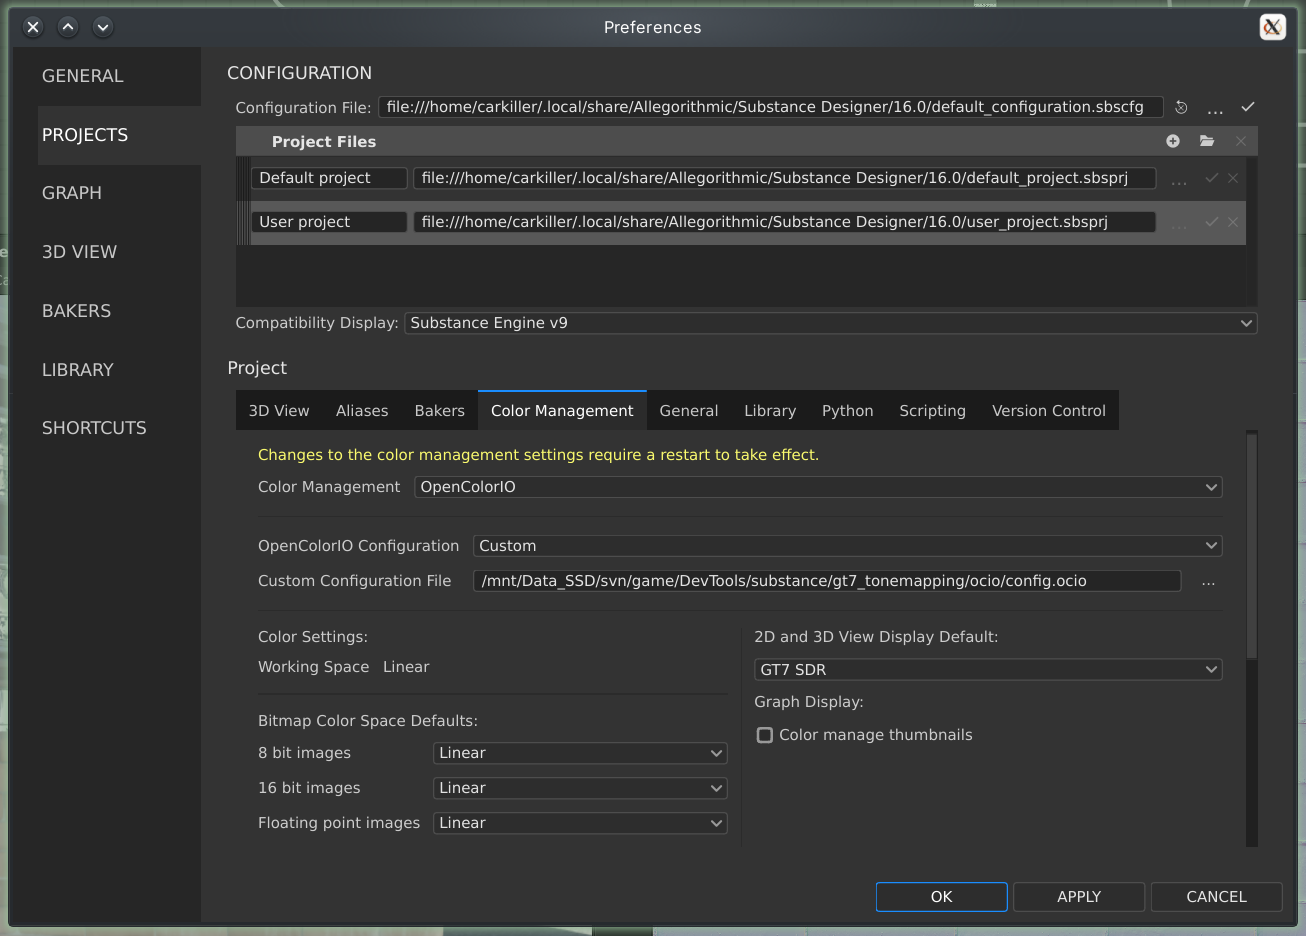
gt7_tonemapping_substance.zip. Keep theociodirectory and itslutssubdirectory together. - Open Edit > Preferences > Projects.
- Set Color Management to OpenColorIO.
- Set OpenColorIO Configuration to Custom.
- Set Custom Configuration File to the extracted
ocio/config.ocio. - Set 2D and 3D View Display Default to GT7 SDR.

- Confirm the preferences.
- In the display toolbar of the 2D or 3D view, enable color management and select GT7 SDR as the display transform.

- In the 3D view camera properties, open Post Effects and disable Tone Mapping.

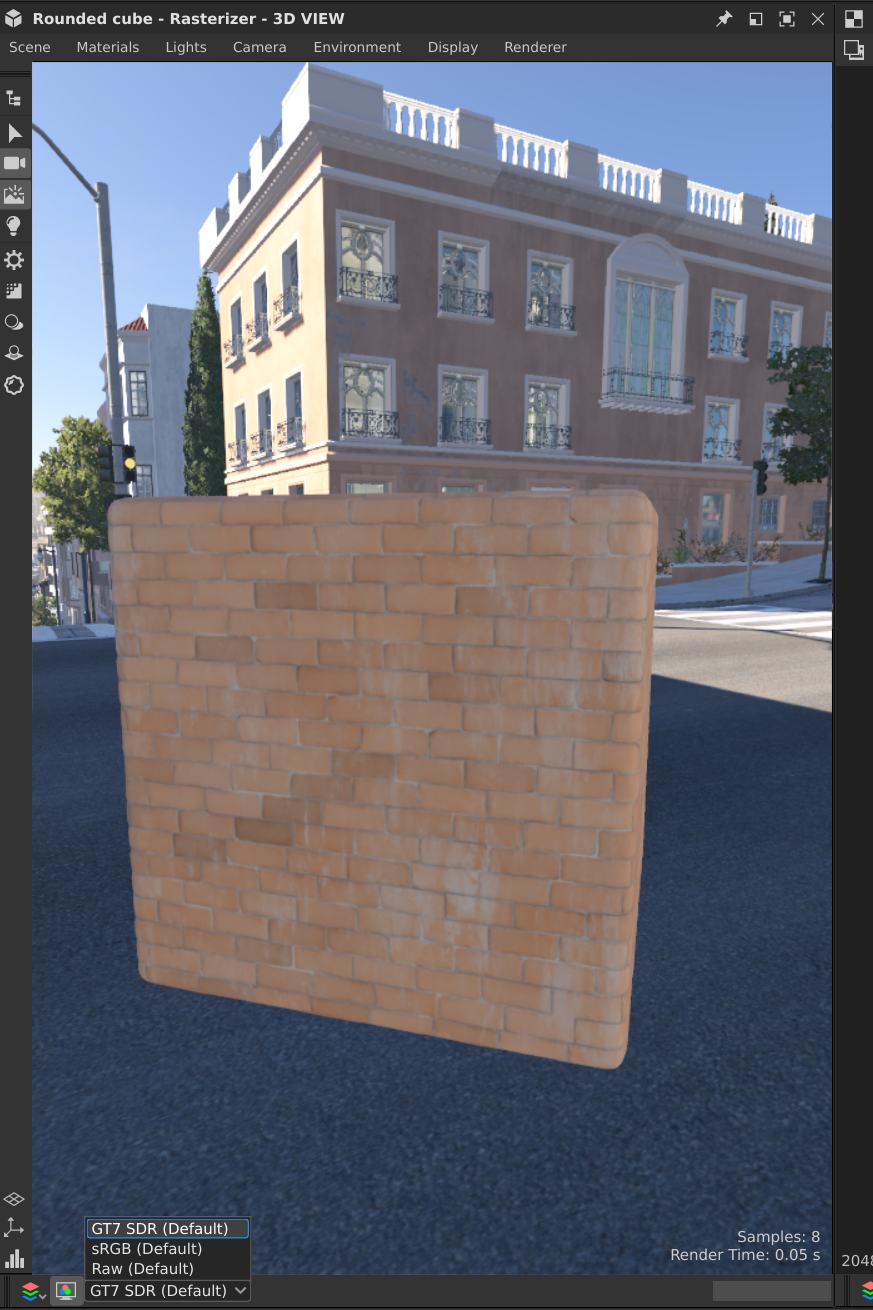
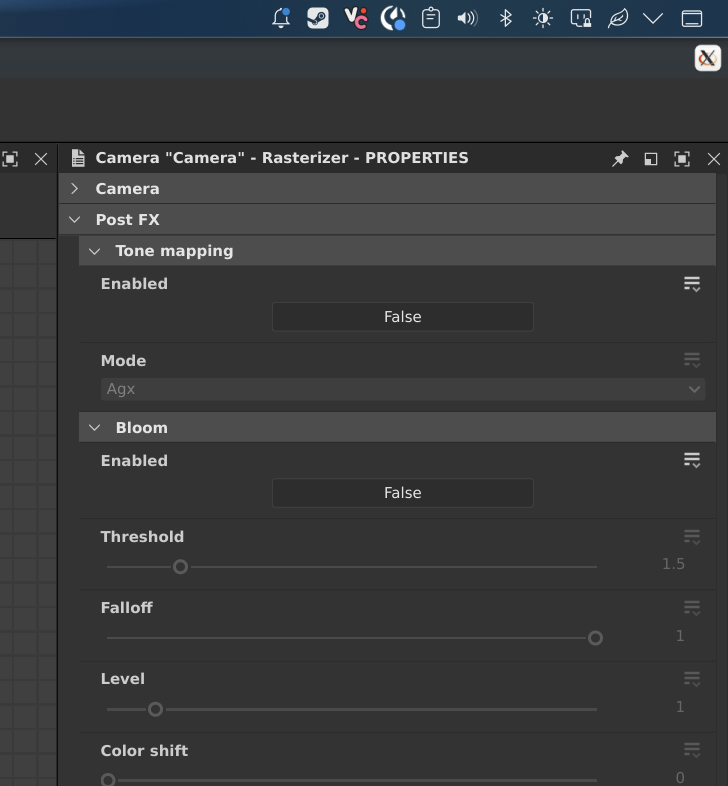
The GT7 display transform changes the viewport preview, not the graph’s material values. Keep any additional tone-mapping post effect disabled to avoid applying tone mapping twice.
License notes
The GT7 tone mapping files for Blender, Substance Painter, and Substance Designer include LUT files generated from the MIT-licensed Polyphony Digital GT7 tone mapping sample.
Because of the MIT license, the download package should include the copyright and permission notice for the GT7 source used to generate those LUTs. Keep THIRD_PARTY_LICENSES.md in the add-on archive, and do not distribute the LUTs separately without the same license notice.
Recommended workflow
When creating BeamNG materials or lights in external tools:
- Start with physically correct material values and real-world light references.
- Use a BeamNG environment map instead of a generic studio HDRI.
- Use the GT7 tone mapping add-on in Blender or the OpenColorIO configuration in Substance Painter or Designer.
- Use the BeamNG Light Validation add-on for point lights, spot lights, and emissives.
- Test the asset under more than one BeamNG environment map.
- Import the asset into BeamNG and check it with Auto Exposure, tone mapping, lighting quality, reflections, and the final level setup.
External previews should shorten iteration time, not become the final authority. The final lighting and material check is always the asset running in BeamNG.drive.
Was this article helpful?