Lights and shadows
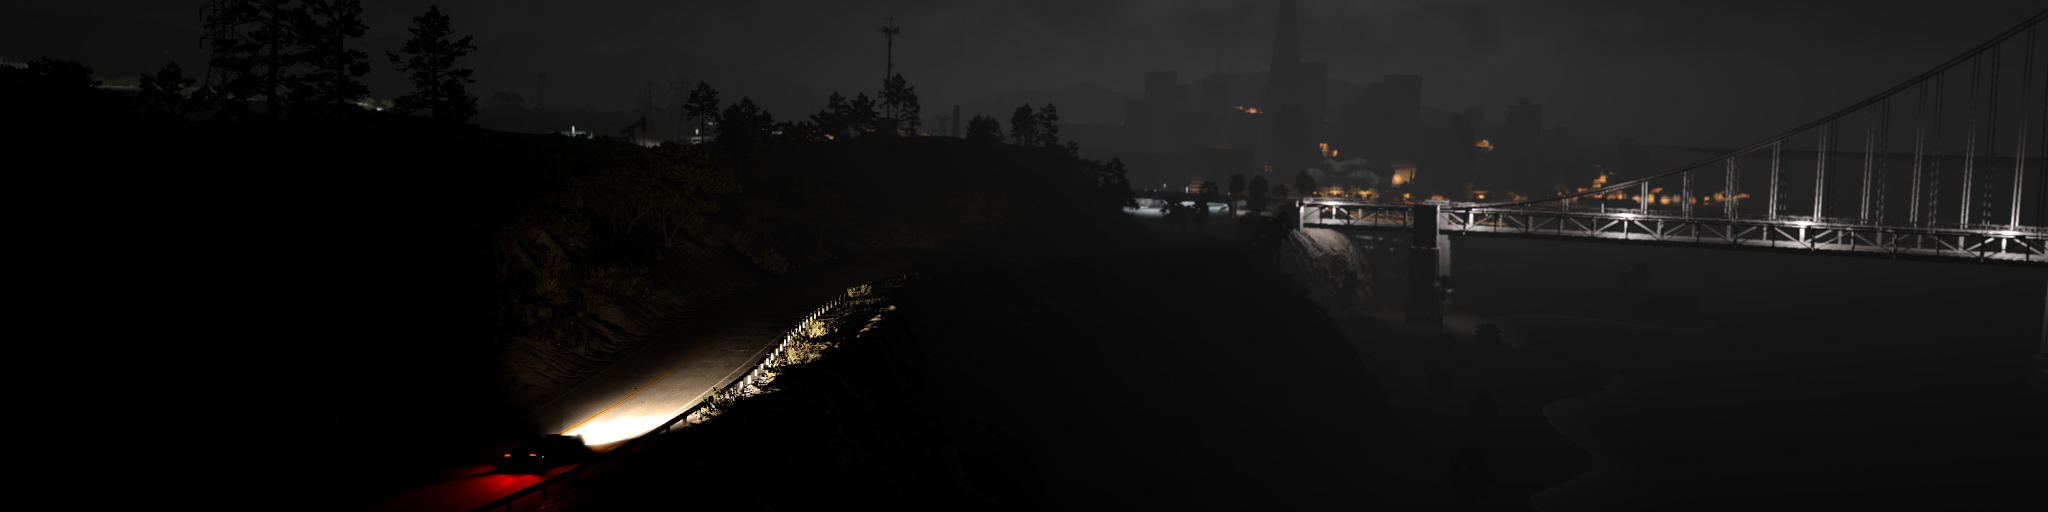
Local lights are used for fixtures, street lamps, tunnels, interiors, vehicle-adjacent props, signs, industrial areas, and any other scene element that needs direct illumination beyond the sun, sky, and ambient lighting.
BeamNG supports two main local light objects:
| Light type | Use for | Main controls | Default unit |
|---|---|---|---|
PointLight |
Omnidirectional sources such as bulbs, small lamps, interior lights, and local fill | radius |
Lumens (lm) |
SpotLight |
Directional sources such as street lamps, headlights, floodlights, tunnel lights, and projected beams | range, innerAngle, outerAngle |
Candelas (cd) |
Both light types use physically based intensity values and inverse squared falloff. The light radius or range limits how far the light is allowed to contribute, but it does not create a custom linear falloff.
Basic setup
Create local lights from the World Editor object creation tools under the environment/object categories, then tune them in the Inspector.
A typical setup order:
- Choose the correct light type.
- Place the light at the real fixture position.
- Set color using color temperature or a realistic RGB value.
- Set physical intensity using
lmfor point lights orcdfor spot lights. - Set
radiusorrangeonly as large as needed. - Enable
castShadowsonly where shadows add visible value. - Test the result at day, dusk, night, and from normal driving camera distances.
For night-only level lights, mark the light as a night light instead of leaving it active all day. See Night Lighting for the automatic day/night workflow.
Quick starting points
These values are only starting points. Final values depend on fixture size, mounting height, cone angle, exposure, fog, material brightness, and nearby lights.
| Use case | Light type | Suggested setup |
|---|---|---|
| Small warm bulb | PointLight |
400-1000 lm, radius 5-12 m, no shadows |
| Interior lamp | PointLight |
500-2000 lm, tight radius, shadows only if close and important |
| Street lamp | SpotLight |
10000-50000 cd, range 25-60 m, wide cone, optional IES cookie |
| Tunnel fixture | SpotLight |
Repeated moderate cd lights, limited range, cookies for fixture shape |
| Floodlight | SpotLight |
High cd, long range, aimed at a specific area, shadows only on key lights |
| Decorative distant lamp | PointLight or SpotLight |
Small range, usually no shadows, visible emissive/flare for readability |
For first-time users, start with one representative light, make it correct, then duplicate it. For experienced users, build lighting families: one setup for each fixture type, with consistent intensity, color temperature, range, shadow use, naming, and night-light fields.
Official levels
Official levels usually keep the visible fixture mesh and the actual light emitter as separate objects. For example, a pole, tunnel lamp, or gas station canopy mesh is a TSStatic, while the illumination comes from one or more nearby SpotLight or PointLight objects.
For night lighting, the mesh and light are linked with dynamic fields:
childon the fixture mesh points to one or more light object names.- Linked lights are automatically registered for night control.
nightEmissivemakes the fixture mesh glow at night.nightEmissiveColorsets an explicit glow color when the mesh is not inheriting color from a linked light.nightLightcan also mark a light directly for automatic night control.isEnabled:falseis preferred on night-only lights so they are not active during the day.
This split workflow makes it easier to group meshes separately from emitters, copy tuned light families, and keep visible glow matched to real illumination. Double-headed poles and larger fixtures can link multiple lights with child, child1, child2, and similar indexed fields. When a mesh links to lights, the first linked light provides the mesh’s night emissive color.
Common official patterns:
| Fixture family | Typical setup |
|---|---|
| Street poles | Wide SpotLight, range around 45-60 m, warm or cool color, often shadowed near roads |
| Tunnel lights | Repeated short-range SpotLight objects, usually around 15 m range, often with dayIntensity and nightIntensity |
| Port / industrial floodlights | Aimed high-intensity SpotLight objects, longer range, shadows only on key fixtures |
| Gas station canopy lights | Wide downward SpotLight objects with moderate intensity and matched emissive canopy meshes |
| Interior bulbs | Small PointLight or short-range SpotLight, tight range, shadows only if close and visible |
| Visual-only helpers | Tiny or zero-range light with flareType, used for a visible sparkle, not real illumination |
Shared light fields
Both PointLight and SpotLight inherit common fields from LightBase.
| Field | Description |
|---|---|
isEnabled |
Enables or disables the light. |
color |
Linear RGBA light color. Prefer realistic color temperature where possible. |
useColorTemperature |
Editor metadata that enables Kelvin-based color authoring for the light. |
colorTemperatureKelvin |
Saved Kelvin value used by the color temperature editor. |
colorTemperatureFilamentId |
Saved filament or lamp type used to tint the Kelvin color, such as blackbody, tungsten, halogen, sodium, or xenonHid. |
colorTemperatureDegradation |
Saved aging/degradation amount from 0 to 1 for filament types that support degradation tinting. |
intensity |
Preferred physical light intensity value. |
intensityUnit |
Editor/runtime unit such as lm, cd, or ev. |
brightness |
Legacy intensity field. Prefer intensity for new content. |
castShadows |
Enables shadows from this light. |
priority |
Increases importance for light/shadow selection when budgets are limited. |
cookie |
Optional projected texture used to shape the light output. |
texSize |
Requested shadow texture size for the light. |
sourceRadius |
Emitting radius in metres used to soften clustered shadows away from contact (since version 0.40). -1 keeps the legacy filtering, 0 gives hard shadows. See Light source radius
. |
flareType, flareScale |
Visual flare effect. Flares do not illuminate the scene. |
animate, animationType |
Optional light animation, such as flicker, fire, or rotating beacons. |
animationPeriod, animationPhase |
Animation timing and offset. Use phase to avoid rows of lights flickering in sync. |
brightness. New content should use intensity with the correct unit so values remain predictable with physically based lighting.Editor units and color temperature
The Inspector can show intensity in lumens, candelas, or EV, but the engine stores the canonical value on the light:
PointLightstores intensity as lumens.SpotLightstores intensity as candelas.intensityUnitis saved as editor metadata so the value can be shown in the chosen unit.- When a
SpotLightis edited in lumens, conversion uses the currentouterAngle.
The color temperature option is saved as editor metadata. When enabled, the Kelvin control drives the saved linear color, while these dynamic fields preserve the authoring setup:
useColorTemperature: enables Kelvin-based authoring.colorTemperatureKelvin: stores the selected Kelvin value.colorTemperatureFilamentId: stores the selected filament or lamp type.colorTemperatureDegradation: stores the aging/degradation tint amount from0to1.
Kelvin sets the base white point. The filament type adds a lamp-specific tint for technologies such as tungsten, halogen, sodium vapor, mercury vapor, metal halide, phosphor LED, and xenon HID. Degradation can be used to add subtle variation or worn-lamp color shifts on supported filament types.
If a light already has a color but no saved Kelvin metadata, the editor can initialize the color temperature control by matching the color to the nearest known preset. After that, changing Kelvin, preset, filament type, or degradation updates the light’s saved color.
Scale and attenuation
PointLight and SpotLight do not use normal object scale for their light size. Use radius for point lights and range / cone angles for spot lights.
attenuationRatio may still appear in some editor fields or older content, but all local lights use inverse squared falloff.
Point lights
PointLight emits in all directions from a position. It is best for sources that are roughly omnidirectional:
- Bare bulbs
- Interior dome lights
- Small lamps
- Decorative glow sources that need real illumination
- Small local fill lights
The main field is radius.
{
  "class": "PointLight",
  "name": "garage_bulb",
  "intensity": 800,
  "intensityUnit": "lm",
  "radius": 10,
  "color": [1, 0.86, 0.65, 1],
  "castShadows": false
}
radius is the maximum effective range of the light. Keep it close to the real area the fixture should affect. A point light with a very large radius touches many more pixels and clusters, and can become expensive even if the intensity is modest.
Avoid using point lights for beams, headlights, street lamps, or floodlights. Those should usually be SpotLight objects because they have a direction and a controlled cone.
Spot lights
SpotLight emits in a cone. It is best for sources that aim light in a specific direction:
- Street lamps
- Headlights and work lights
- Tunnel lights
- Flashlights
- Industrial lamps
- Stadium or area floodlights
- Fixtures using cookies or IES-derived beam patterns
The main fields are range, innerAngle, and outerAngle.
{
  "class": "SpotLight",
  "name": "street_lamp",
  "intensity": 25000,
  "intensityUnit": "cd",
  "range": 35,
  "innerAngle": 35,
  "outerAngle": 65,
  "color": [1, 0.78, 0.48, 1],
  "castShadows": true
}
range is the maximum cone length. innerAngle is the full intensity part of the cone, and outerAngle is where the light fades out to zero. The inner angle is clamped so it cannot be larger than the outer angle.
When using candelas, the intensity describes directional brightness. Changing the cone angle changes where the light goes, but not the center-beam candela value. When using lumens, the same total light is spread over the cone, so wider cones appear less concentrated.
For a spotlight aimed directly at a surface:
lux = candela / distance²
For example, 25000 cd at 25 m gives roughly 40 lux before losses from angle, cookies, fog, occlusion, and surface response.
Cookies and IES profiles
Cookies are textures that mask the light output by direction. White keeps the full configured light intensity, gray reduces it, and black blocks it.
Use cookies for:
- Street lamp beam patterns
- Headlight cutoffs
- Window or gobo projection
- Tunnel fixture patterns
- IES-derived real fixture distributions
A cookie does not make the light brighter than its intensity. It only shapes where the light goes. This is important for physically based lighting: the intensity remains a real value, while the cookie represents the fixture optics.
Cookies are most common on spot lights, but point lights can also use cookies for directional variation around the source. Reuse cookie textures where possible. The clustered lighting path has a limited number of unique cookie textures available per frame, so many unique IES textures in one view can compete with each other.
IES files can be converted into cookie textures with the IES Cookie Importer. The usual output is a *.color.png cookie texture and a matching *.cookie.json metadata file. When matching metadata is available, Apply IES if available can apply useful values such as intensity, cone angle, and color temperature to the selected light.
See Physically Based Lighting for the IES workflow.
Flares and visual glow
There are two separate visual glow systems:
flareType/flareScaleuses aLightFlareDataasset. This is an author-controlled screen-space flare and does not illuminate the scene.- Clustered distance coronas are automatic fake lights used by the renderer when real local lights become very small on screen.
These systems are independent. Setting flareType does not control the automatic clustered distance corona, and the automatic corona does not replace a manually authored flare.
Use flares for visible bright fixtures, warning lights, small bulbs, or far-away points of interest. Keep the flare color and scale consistent with the real light and emissive mesh.
Shadows
Local lights can cast dynamic shadows with castShadows.
Shadows are useful for:
- Important street lamps near the road
- Tunnel and parking garage lighting
- Large interior lights
- Gameplay-relevant fixtures
- Strong spot lights that would look wrong without occlusion
Avoid shadows on:
- Tiny decorative bulbs
- Distant fixtures
- Dense rows of small lights
- Lights that barely touch visible geometry
- Lights hidden behind other art where the shadow is not visible
Clustered shading
Since BeamNG version 0.39, the local lighting path uses clustered shading for point and spot lights. Instead of drawing every light over large screen areas one by one, the camera view is divided into a 3D grid of clusters. Local lights are assigned only to the clusters they can affect, and the shader evaluates the relevant lights for each pixel.
In practical terms, this means:
- The engine can handle many more local point and spot lights than the old style renderer.
- Small, limited-range lights are much cheaper than large lights covering the screen.
- Overlap still matters. Many lights affecting the same pixels are still more expensive.
- There is no reason to make every fixture shadowed just because more lights are supported.
- Content should still be authored with realistic range, intensity, and purpose.
The clustered grid has finite per-cluster limits. If too many large lights overlap the same view area, the renderer has to cull and prioritize. Keeping lights local and avoiding excessive overlap gives better quality and more stable performance.
Light source radius
Real light sources are not points. A bulb, a lamp housing, or a fluorescent tube has a physical size, and that size defines how quickly a shadow blurs with distance from the caster: sharp at contact, soft further away.
Since version 0.40, clustered point and spot lights expose this as sourceRadius, the emitting radius in metres:
sourceRadius is resource intensive. Values above 0 take extra shadow samples on every shadowed light that uses them. Use it on a few important fixtures and keep the radius close to the real source size.| Value | Behavior |
|---|---|
-1 (default) |
Legacy behavior. |
0 |
Hard shadows. Cheapest filtering, best for tiny sources or debugging. |
> 0 |
Physically based softening. The penumbra grows with the distance between caster and receiver, and shrinks as the source gets further away from the receiver. |
{
  "class": "SpotLight",
  "name": "garage_tube",
  "intensity": 3000,
  "intensityUnit": "cd",
  "range": 12,
  "innerAngle": 60,
  "outerAngle": 110,
  "castShadows": true,
  "sourceRadius": 0.3
}
Suggested starting values:
| Fixture | sourceRadius |
|---|---|
| Small bulb, LED, headlight | 0.02 - 0.05 m |
| Street lamp head, work light | 0.1 - 0.2 m |
| Fluorescent tube, diffuser panel | 0.3 - 0.6 m |
| Large floodlight bank, area light | 0.5 - 1.0 m |
sourceRadius only affects shadow filtering. It does not change the light range, intensity, specular highlight shape, or the visible flare. Larger values cost more shadow samples, so keep it near the real fixture size. The field is not used by shipped levels yet and is set as a dynamic field in the Inspector or in the level JSON.
Distance LOD and fake lights
Clustered shading also has a local light LOD system. The renderer estimates how large each light’s influence is on screen. When a light becomes very small on screen, the real clustered light can be faded out and replaced by a cheap additive billboard/corona.
This fake distant light keeps small far-away lamps readable without paying the full cost of shading the scene with every distant light. The transition is crossfaded: as the real light approaches the screen-size cutoff it fades down, while the cheap flare fades in. When the light is below the cutoff, only the flare remains.
For SpotLight, the fake flare is also direction aware. A spotlight only gets the corona when the camera is inside or near its beam, so a lamp facing away does not glow like an omnidirectional bulb.
For content creators, this means:
- Distant lights may still appear as small glowing points even when they no longer illuminate nearby geometry.
- This is expected and helps large night scenes stay readable.
- The fake light is visual only. It does not cast shadows or light the road, vehicles, buildings, or vegetation.
- Very large ranges make lights stay real for longer and can reduce the benefit of the LOD system.
- A visible emissive mesh or flare should match the real light color so the LOD transition feels natural.
Shadow atlas
Point and spot light shadows use a shared clustered shadow atlas. The atlas is a large texture budget used by local lights that need shadows. Spot lights usually need one shadow view. Point lights can need up to six views because they cast in all directions.
The renderer schedules atlas updates based on visibility, screen size, priority, distance, and timing budget. Important nearby lights may update more often or receive better atlas space, while distant or low-impact lights may update less often or be skipped.
For content creators, this means:
- A shadowed
SpotLightis usually cheaper than a shadowedPointLight. - Large shadowed point lights should be rare.
- Optimal shadow resolution is calculated by the system.
- Shadows can disappear or update less often when many shadowed lights compete for budget.
The clustered shadow system only gives full attention to a limited number of local shadow casters at once (16 to 96 depending on Local Lights Quality ). Spot lights are more efficient because they usually need one shadow view. Point lights can need up to six views, so they consume more atlas and update budget.
SpotLight. It gives better control, works well with cookies/IES profiles, and is usually cheaper to shadow than an omnidirectional point light.Editor tools
Use the World Editor Inspector for detailed light authoring, including color temperature, intensity units, cookies, cone angles, shadows, night lighting settings, and advanced fields.
Use the IES Cookie Importer to create cookie textures and sidecar metadata from IES profiles. These can then be assigned with Apply IES if available in the Inspector.
Performance impact
The cost of a local light depends mostly on how much of the scene it affects and whether it casts shadows.
Important cost factors:
- Number of active lights
- Radius/range
- Screen coverage
- Overlap with other lights
- Shadow casting
- Shadow resolution
- Point light shadow views
- Cookies and flares
- Distance light LOD and fake flare transitions
- Lighting, shadow, and local lights quality settings
sourceRadiussize on shadowed lights
Clustered shading improves the base cost of many local lights, but it does not make light setup free. A level with hundreds of small, limited, mostly unshadowed night lights can perform well. A level with many large overlapping shadowed lights can still become expensive in certain situations.
Optimization guidelines
- Use
SpotLightfor directional fixtures. - Use
PointLightonly when light really needs to emit in all directions. - Keep
radiusandrangeas small as the art allows. - Prefer several aimed spot lights over one huge all-covering light.
- Disable shadows on decorative or distant lights.
- Use shadows only where they are visible from normal gameplay cameras.
- Use cookies or IES profiles for beam shape instead of adding extra fake lights.
- Reuse cookie textures across similar fixtures.
- Avoid stacking multiple lights with similar color, range, and purpose in the same place.
- Test dense lighting areas on lower lighting, shadow, and local lights quality settings.
Advanced checklist
For larger or more polished scenes, check these before finalizing lighting:
- Are fixture meshes, emissive color, light color, and cookie shape visually consistent?
- Are repeated lights using shared values, or have they drifted from manual tuning?
- Are shadowed lights limited to areas where shadows are visible while driving?
- Are large point lights avoidable by using aimed spot lights?
- Do distant lamps still read from far away without needing real illumination everywhere?
- Are
dayIntensityandnightIntensityused for tunnels or always-present fixtures instead of duplicating lights? - Are dense areas tested with traffic, wet roads, night time, fog, and lower graphics settings?
- Are important lights grouped and named so they can be debugged or bulk edited later?
What to do
- Start from real world values: lumens for point lights, candelas for spot lights.
- Set exposure before increasing intensity.
- Match visible emissive materials with the actual light color and intensity.
- Use color temperature for realistic warm/cool fixtures.
- Use IES-derived cookies for real street, tunnel, industrial, and architectural fixtures.
- Group and name large lighting setups clearly in the scene tree.
- Tune one representative fixture, then copy it to similar fixtures.
- Keep light ranges local and minimize how many lights overlap the same area.
- Prefer targeted spot lights when shadows are needed.
- Check lighting while driving, not only from a close editor camera.
What not to do
- Do not use one huge light to illuminate a whole area.
- Do not use point lights for headlights, street lamps, or floodlights.
- Do not overlap many lights across the same area.
- Do not use large numbers of shadow-casting point lights.
- Avoid
outerAnglevalues above 160-170 degrees on shadow-casting spot lights. - Do not increase intensity to compensate for bad exposure.
- Do not leave every night fixture enabled during the day.
- Do not enable shadows on every lamp in a dense city or tunnel.
- Do not rely on flares or bloom to replace real illumination.
- Do not use overbright emissive colors as a lighting hack.
Common issues
Light is too dim
Check exposure, intensity unit, range/radius, distance to the surface, cone angle, and cookie brightness. For spot lights, estimate the expected surface lux from the candela value and distance.
Light is visible but does not illuminate enough
Flares and emissive materials do not light the scene by themselves. Make sure the actual PointLight or SpotLight has suitable physical intensity and range.
Spotlight points the wrong way
Check the object rotation. A SpotLight uses its transform direction to aim the cone.
Shadows are missing or unstable
Check castShadows, Shadows Quality, Local Lights Quality, distance, and whether too many shadowed lights are competing for the atlas. On the Lowest level only 16 local lights can be shadowed at once.
Shadows are too soft or too hard
Set sourceRadius to the real emitter size. 0 gives hard shadows, -1 restores the legacy filtering.
Performance drops in dense areas
Reduce active shadowed lights first, then reduce range/radius and overlap. Large shadowed point lights are especially expensive compared to targeted spot lights.
Related pages
- Physically Based Lighting - physical units, reference values, IES profiles, cookies, emissives, and exposure workflow.
- Auto Exposure - how exposure affects perceived brightness.
- Tone Mapping and HDR - how high dynamic range light values are displayed.
- Sky, Atmosphere, and Night Sky - sky, moon, stars, constellations, meteors, clouds, and sun shadow penumbra.
- Ambient Lighting - indirect sky and environment lighting.
- Lighting Quality - renderer quality levels and shadow quality settings.
- Vehicle Light Bulbs - vehicle-specific light intensity and emitter setup.
- Night Lighting - automatic day/night control for level lights and emissive fixtures.
- Lights (PointLight and SpotLight) - field-level reference for light objects.
- Atmosphere and lighting - level creation workflow for time of day, fog, PostFX, and local lights.
Was this article helpful?